The sheer variety of Android devices on the market is staggering—one report suggests there are well over 24,000 distinct phones and tablets floating around out there. When you consider that each manufacturer adds a few tweaks to the Android code base here and there, that makes for a lot of software variations, which in turn means there needs to be many different root methods to match this variety.
- Don't Miss: Android 'Root' Explained in Detail for Beginners
While there may never be a singular root method that works for all devices, developer Chainfire is at least making sure that the most common phones and tablets can be rooted using the same exploit. His CF Auto Root utility now works for over 300 devices on their latest firmware versions, which is about as ubiquitous as it can get. To top it off, the utility is incredibly easy to use, so I'll show you how to root most popular Android devices below.
Before You Begin
CF Auto Root works by unlocking your device's bootloader, which means that if your bootloader is not already unlocked, you will lose all of the data on your device. If you haven't done so already, make sure to back up all important data on a separate storage drive.
This is also where U.S. carriers come into play. In most cases, devices from Sprint and T-Mobile will allow for unlocked bootloaders, whereas devices from AT&T and Verizon Wireless are generally locked down. But devices that are universal for all carriers, like Nexus and Moto X devices, allow for easily unlocked bootloaders regardless of your carrier.
International devices will for the most part allow you to unlock your bootloader.
Also note that you will need a Windows PC to use this method on a Samsung device, but you can use either Windows, Mac, or Linux if you are rooting any other Android device.
It should also be noted that unlocking your bootloader and rooting your device will likely void your manufacturers warranty.
Step 1: Ensure That You Have the Proper Drivers Installed
First up, for your computer to be able to fully interact with your device, you'll have to make sure you have the proper drivers installed on your desktop or laptop.
Samsung Devices:
If you are rooting a Samsung phone or tablet, the drivers you'll need are only available for Windows, but they can be downloaded at this link. Once you've downloaded the file, simply extract the ZIP, then launch the EXE file and follow the prompts to get the drivers installed on your system.
All Other Android Devices:
If you are rooting any non-Samsung Android device, you'll need a different set of drivers. These drivers are available for all major desktop operating systems, and can be downloaded at the links below.
- Windows Drivers: If you own a Windows PC, you can download the drivers at this link. Just run the file, then follow the prompts, and you'll be good to go.
- Linux Drivers: If you're a Linux user, download and extract this ZIP file, then run the script with Terminal.
- Mac Drivers: For Mac users, the process of installing the proper drivers is a bit more involved. Please see our guide on the topic for more information.
Step 2: Download the Right CF Auto Root File for Your Device
Next, you'll need to download CF Auto Root, which is the tool you'll be using to actually root your device. There are different versions of CF Auto Root for each of the 300+ supported Android devices, so you'll need to be careful and make sure you download the right one.
To make sure you're downloading the right CF Auto Root package, you'll first need to find your Android device's model number. This can be done by heading to the "About Phone" menu in Settings, then looking for the series of letters and numbers listed under the "Model number" entry.
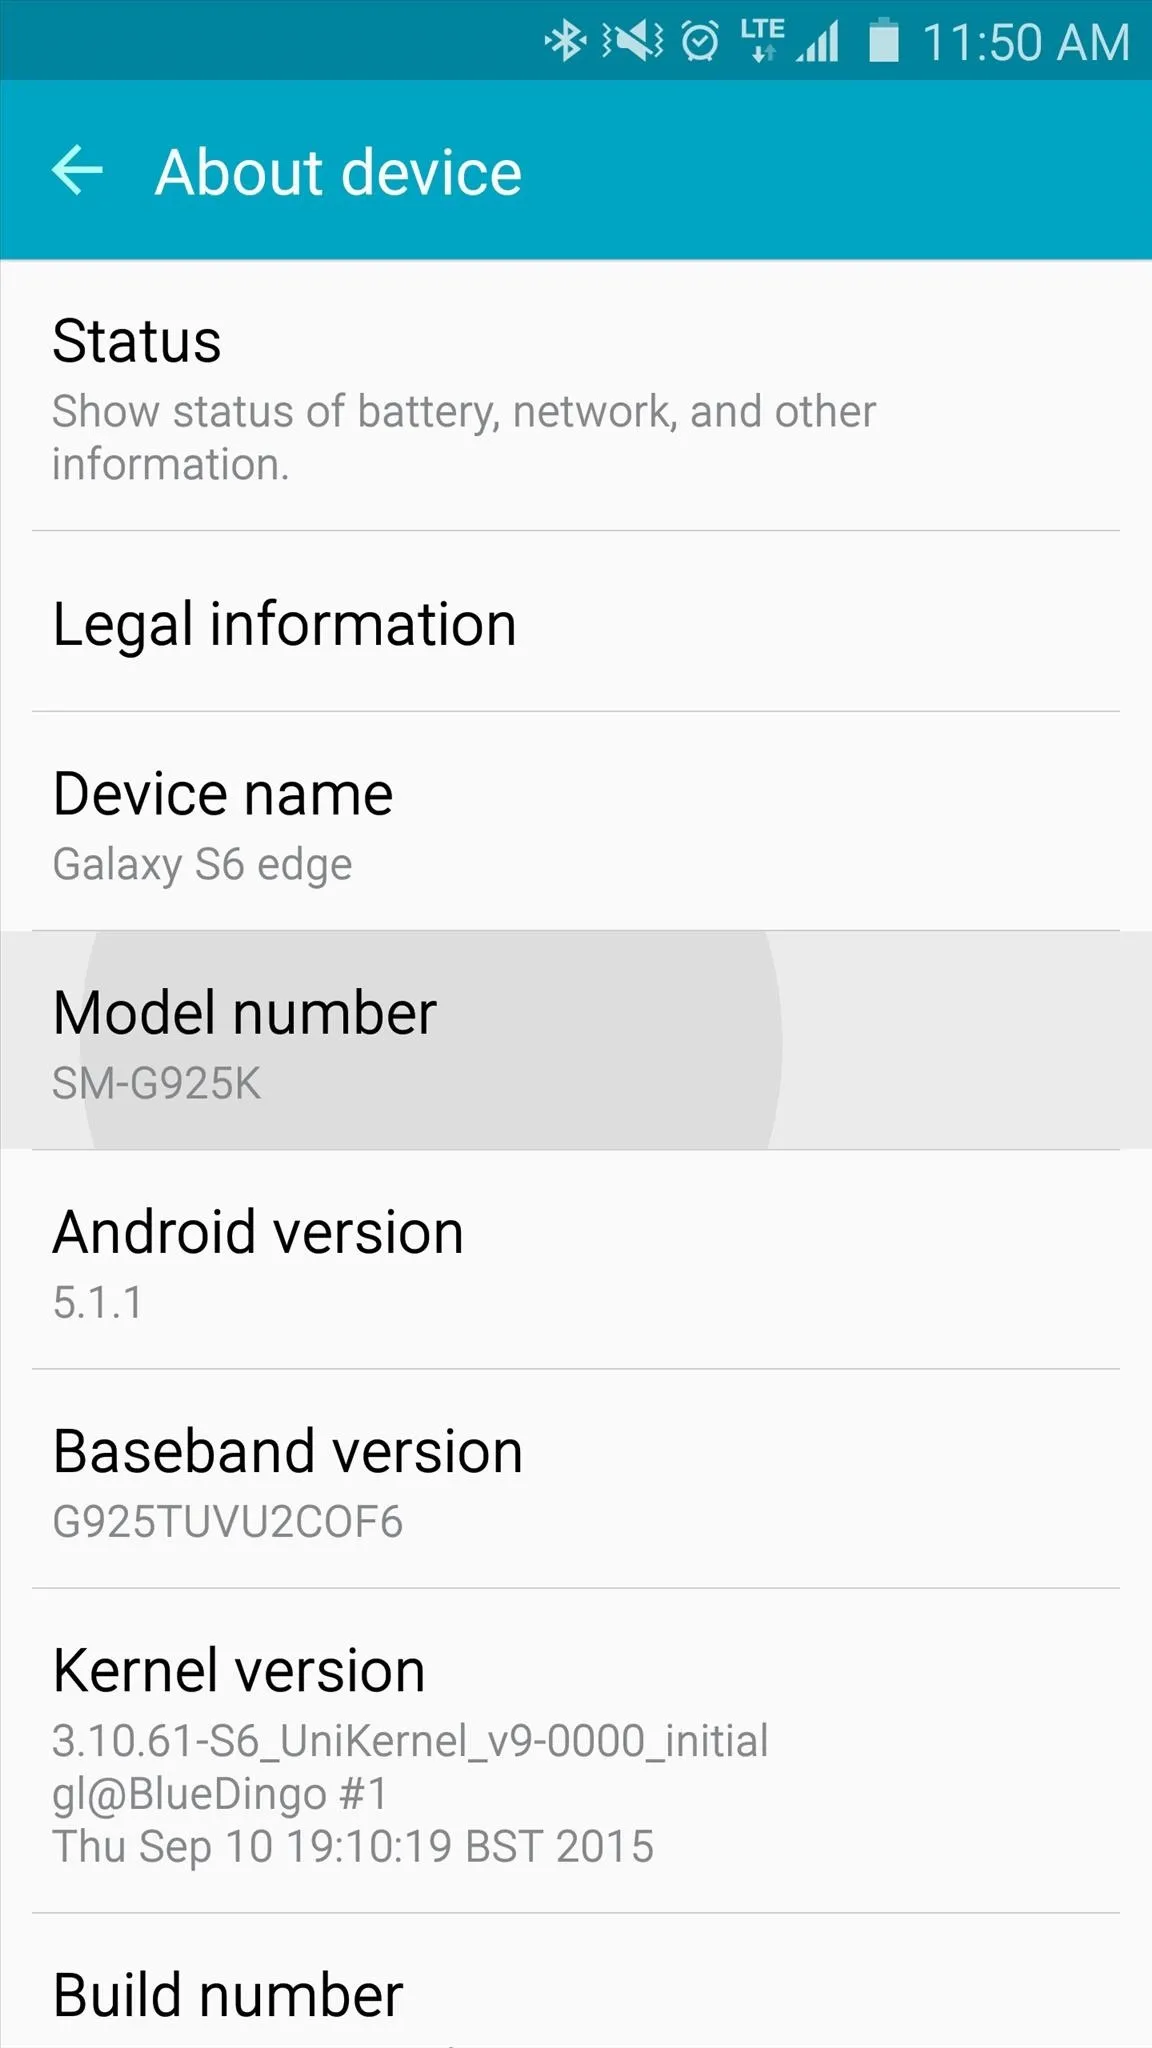
Galaxy S6 Edge model number.
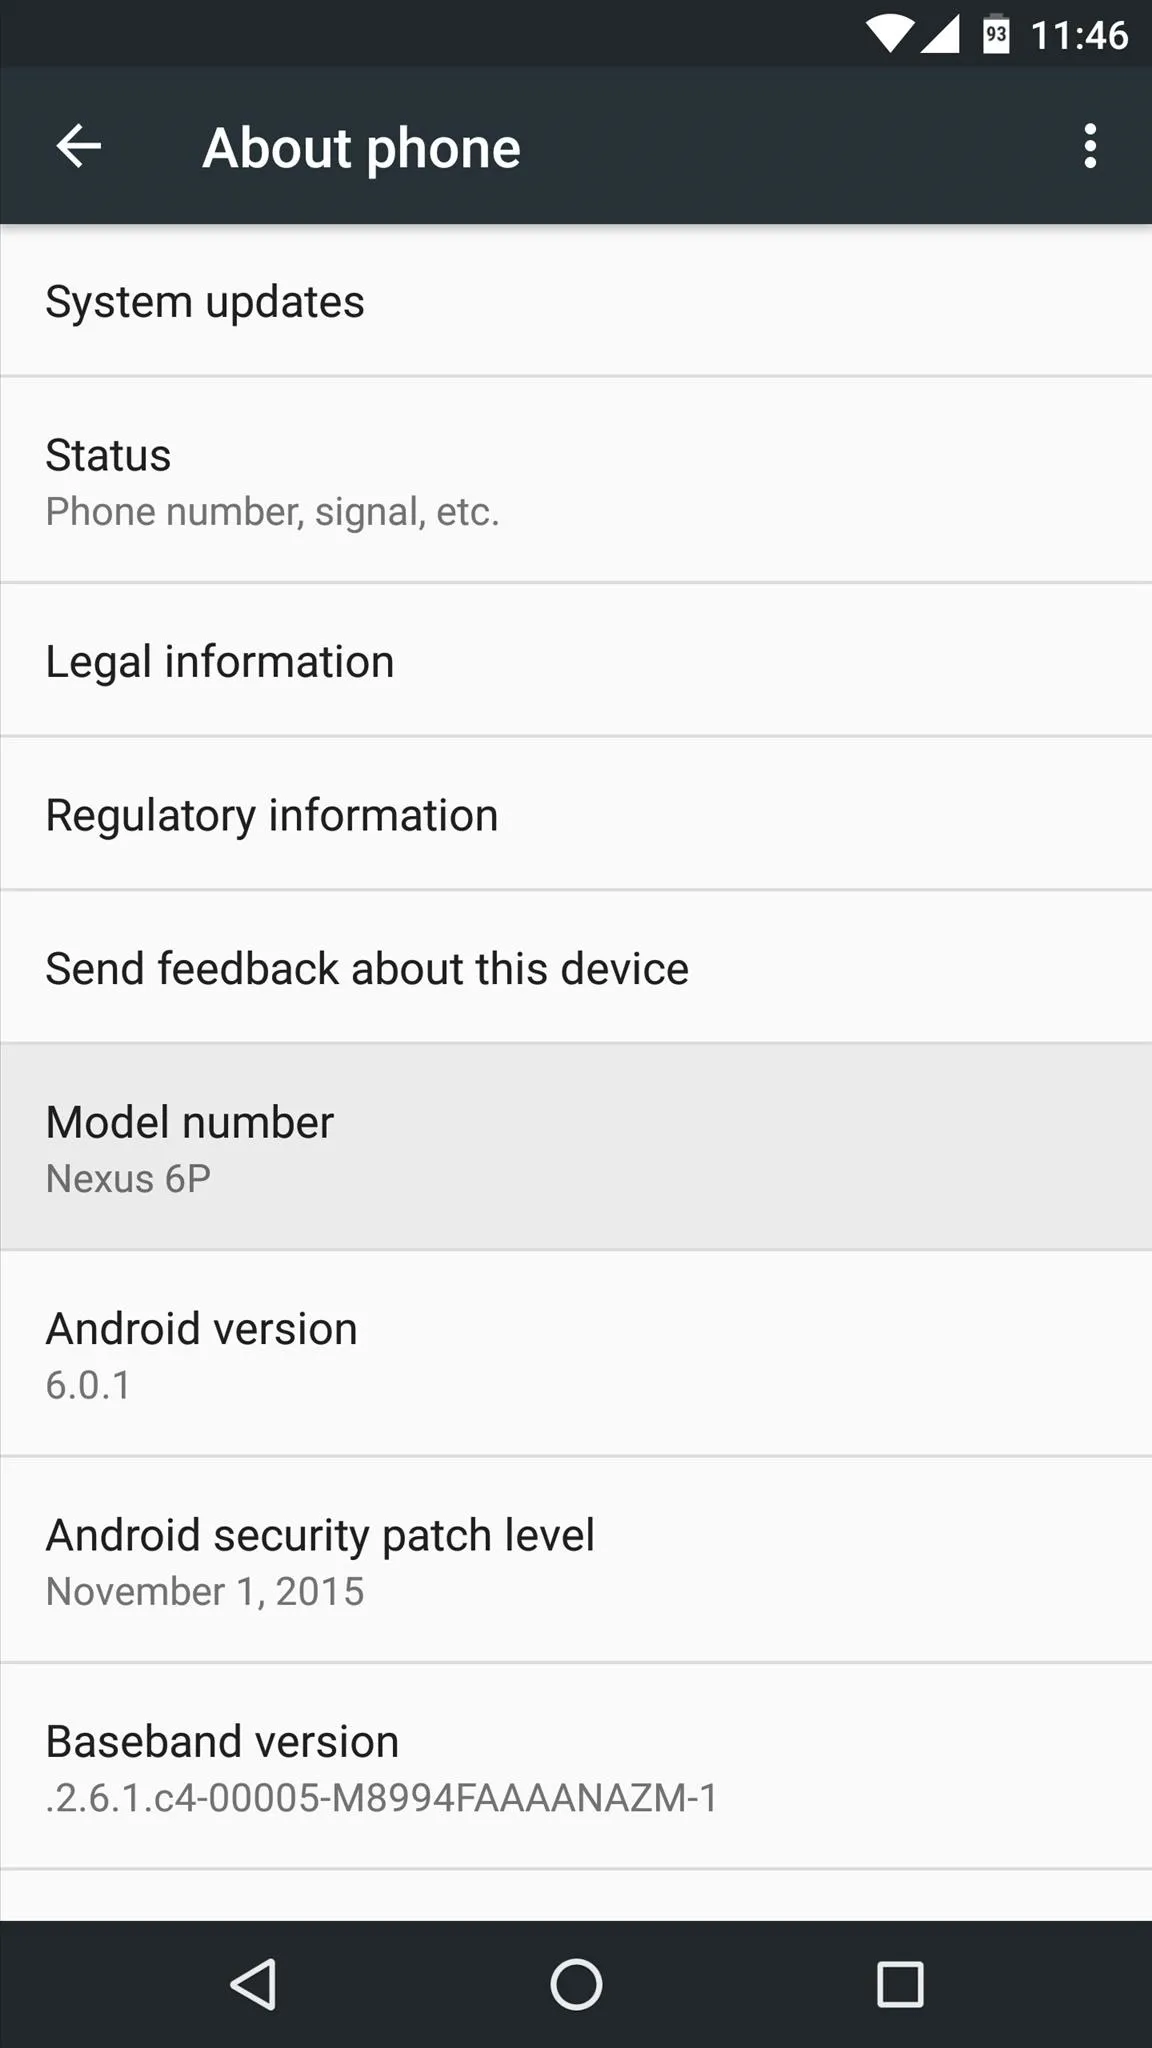
Nexus 6P model number.

Galaxy S6 Edge model number.

Nexus 6P model number.
Once you know your model number, you'll also have to find your Android version number to make sure you're getting the right CF Auto Root package. From the same About phone menu, scroll down a bit further and note the number listed beneath the "Android version" entry.
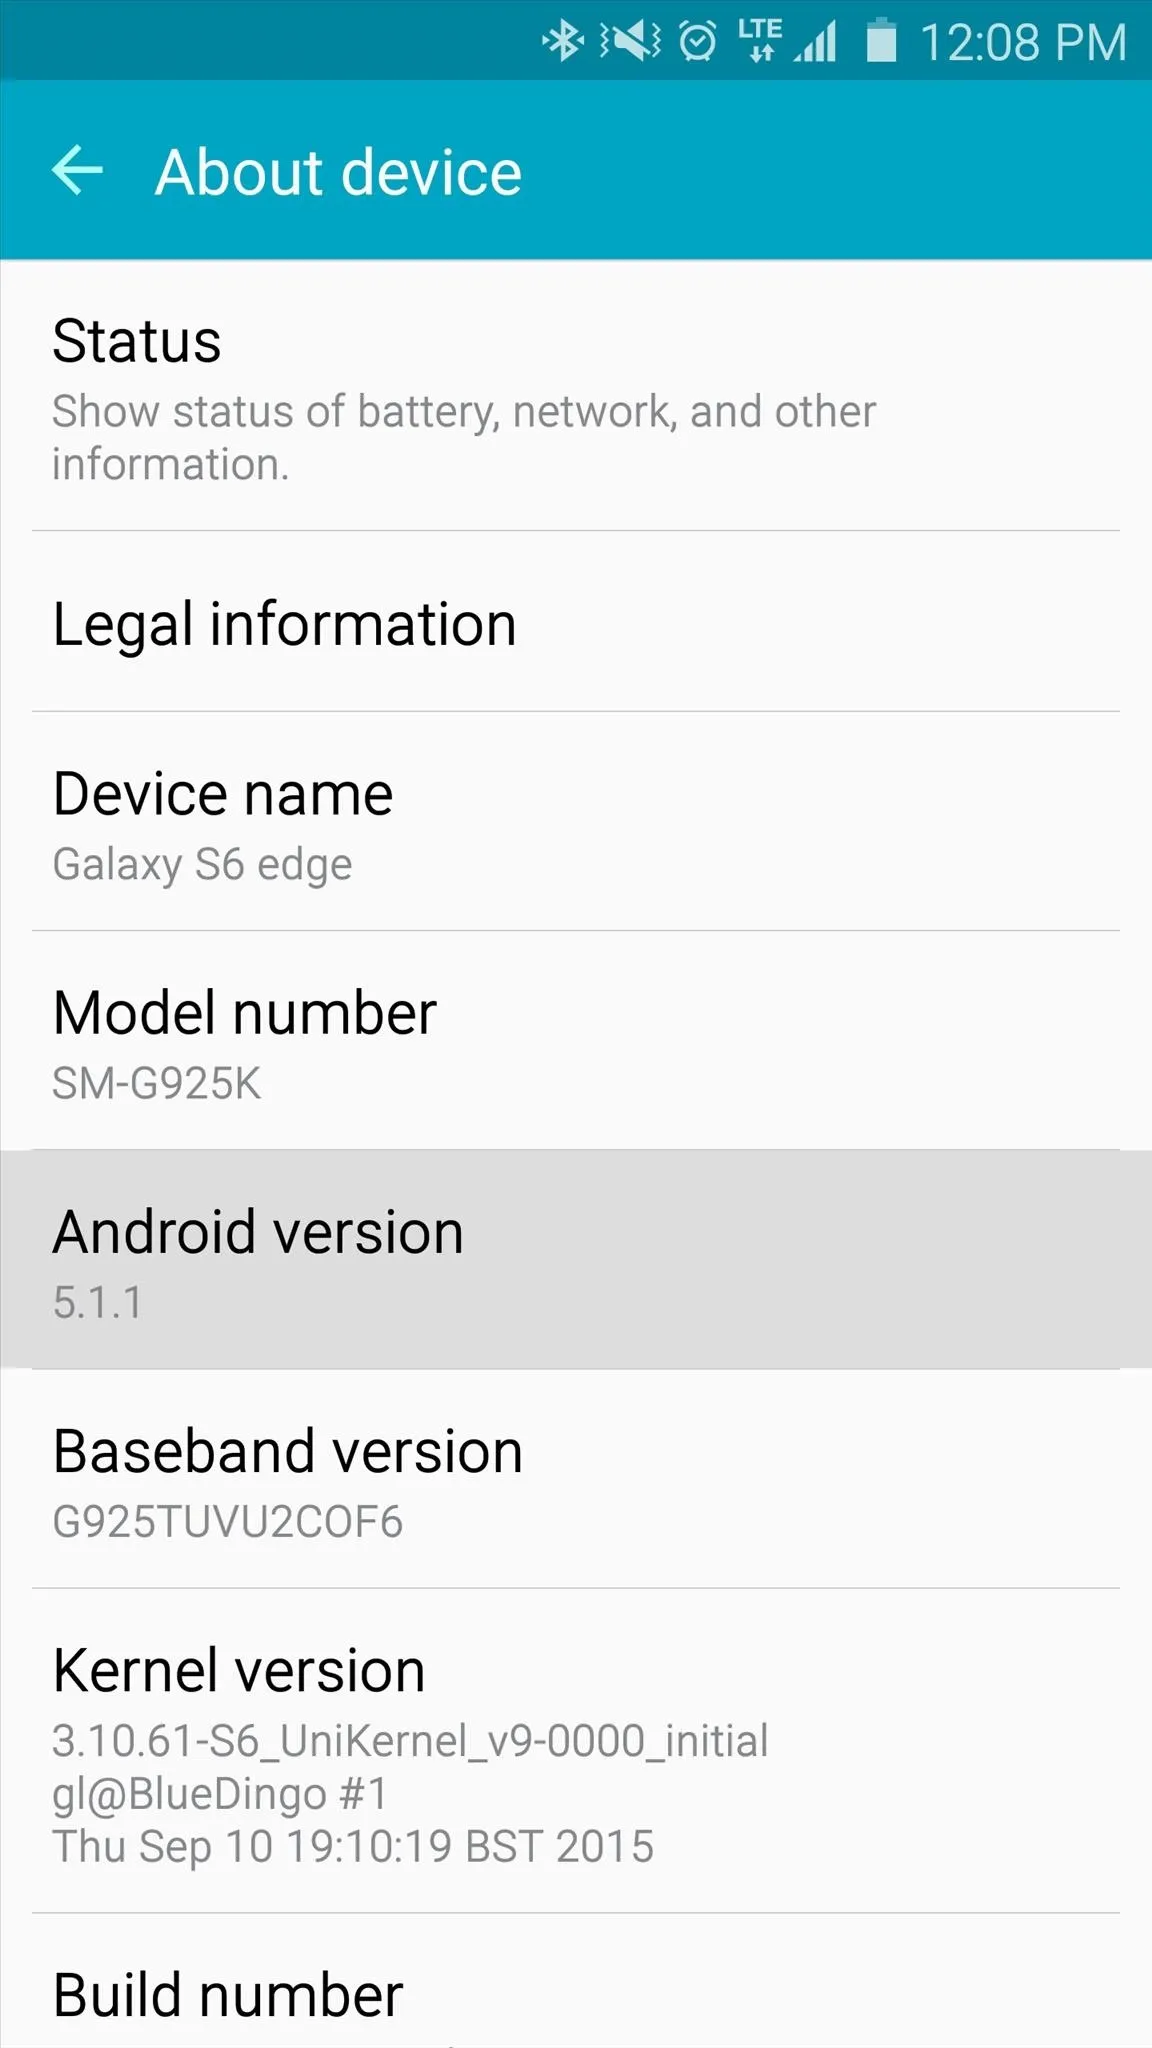
Galaxy S6 Edge Android version.
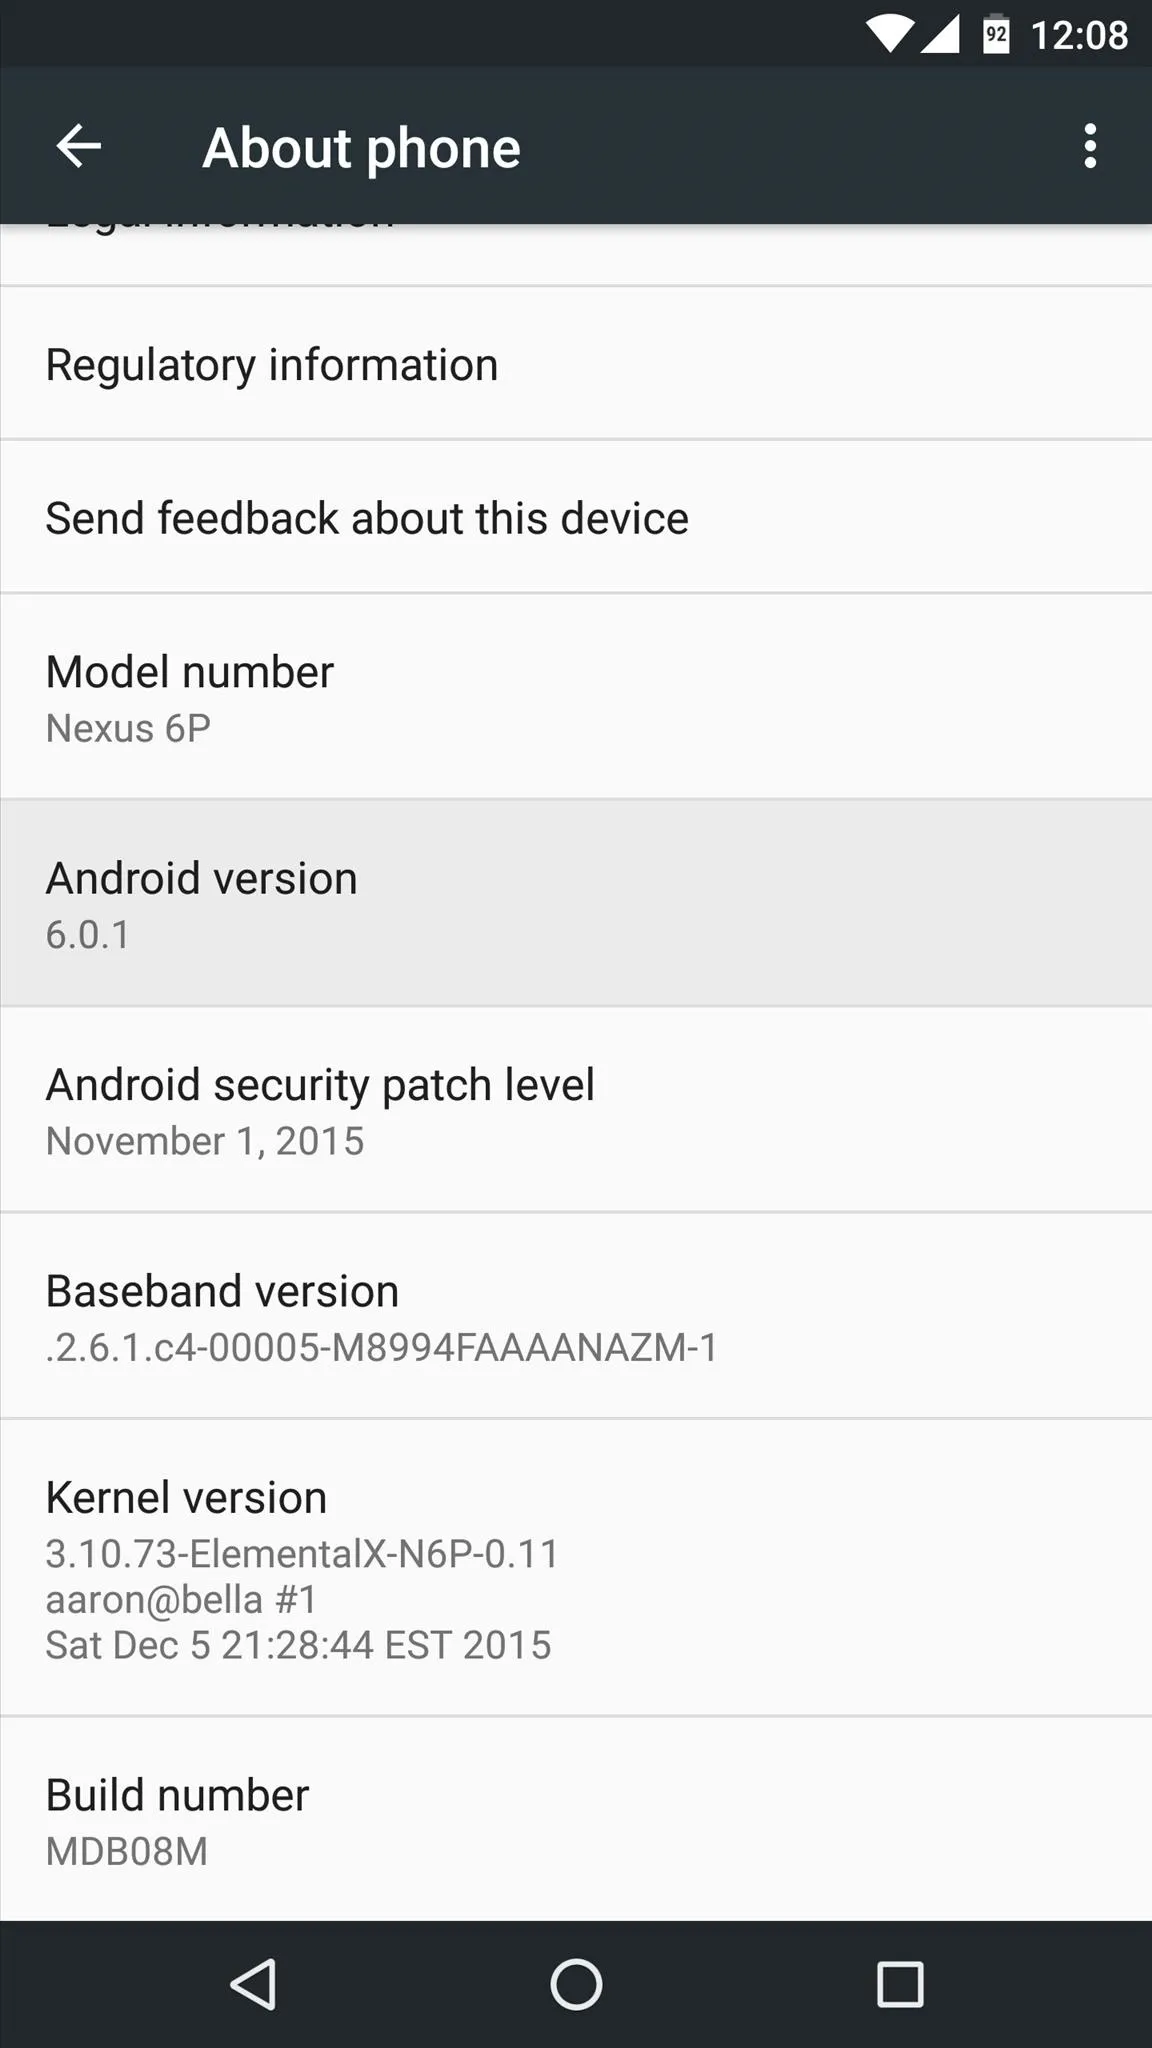
Nexus 6P Android version.

Galaxy S6 Edge Android version.

Nexus 6P Android version.
With that information in hand, head to the CF Auto Root page at the following link, then locate your device's model number in the list. From there, make sure the numbers in the "Android" column match up with the Android version you found earlier. If everything looks to be in order, click the "Download" link on the right to get the proper version of CF Auto Root for your device.
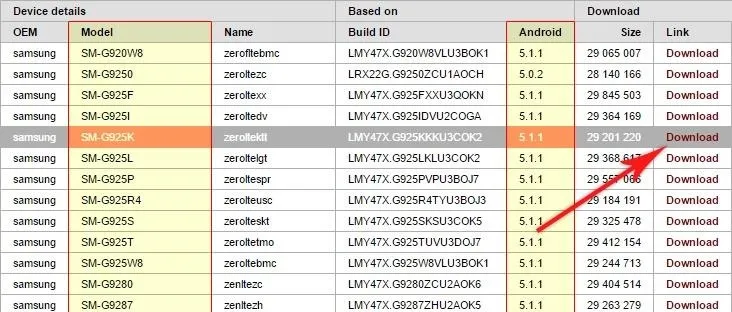
If model number and Android version match, click "Download" to get CF Auto Root.
Step 3: Extract the CF Auto Root ZIP
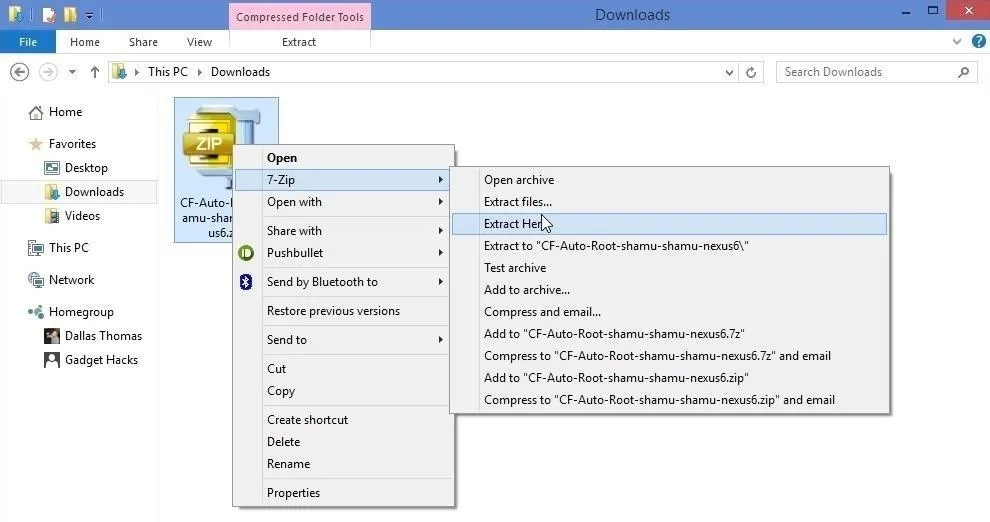
Once you've downloaded the CF Auto Root package, locate the file on your hard drive and extract the contents of the ZIP. You can extract the files to any folder on your computer, but make sure to remember this folder's location for later.
Step 4: Root with Odin (Samsung Devices)
Next, if you're using a Samsung device, I'll outline the root process in this step. Otherwise, if you're using any other Android phone or tablet, skip ahead to Step 5 to see the rooting instructions for your device.
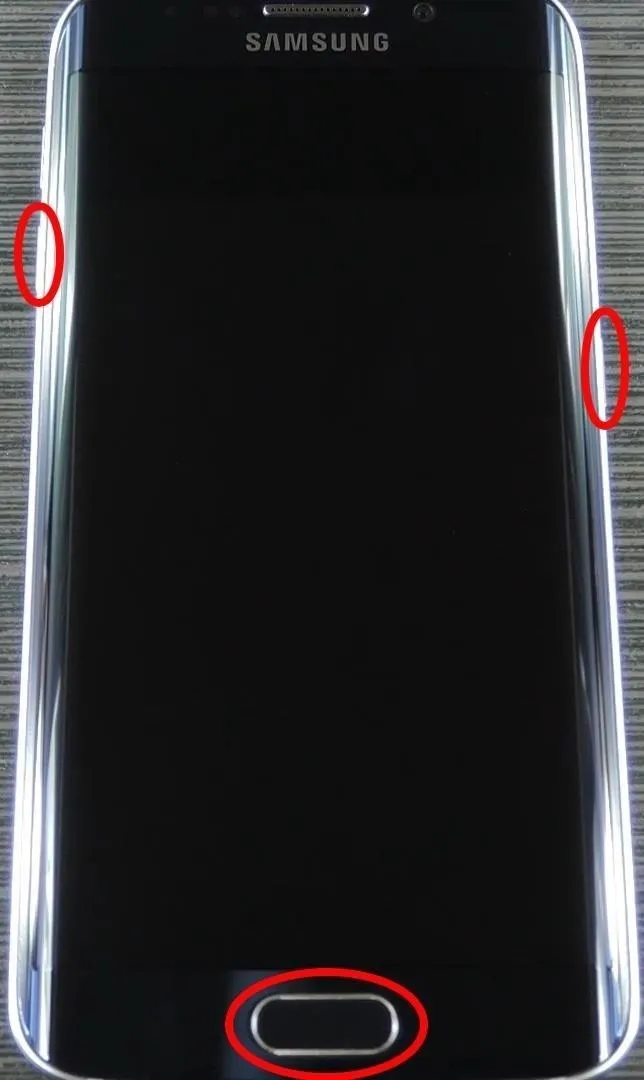
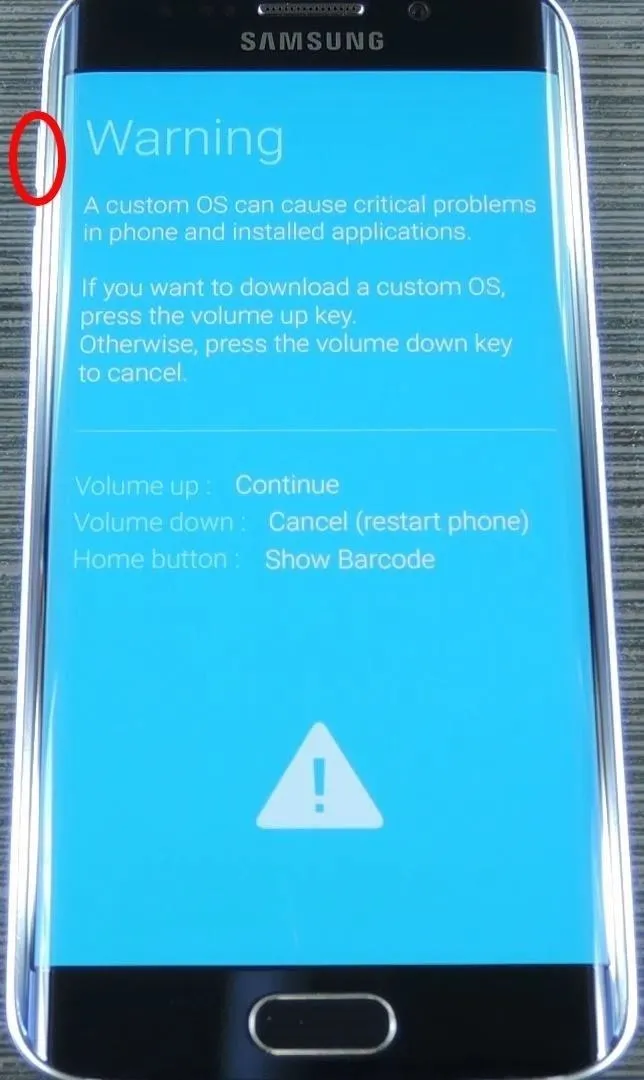
First, you'll have to put your Samsung device into Download Mode. From a powered-off state, press and hold the volume down, home, and power buttons simultaneously. At this point, you'll see a warning message—but like it says, just press the volume up button to enter Download Mode. After that, connect your phone to your PC with a USB data cable, then the rest of the work will be done on Windows.


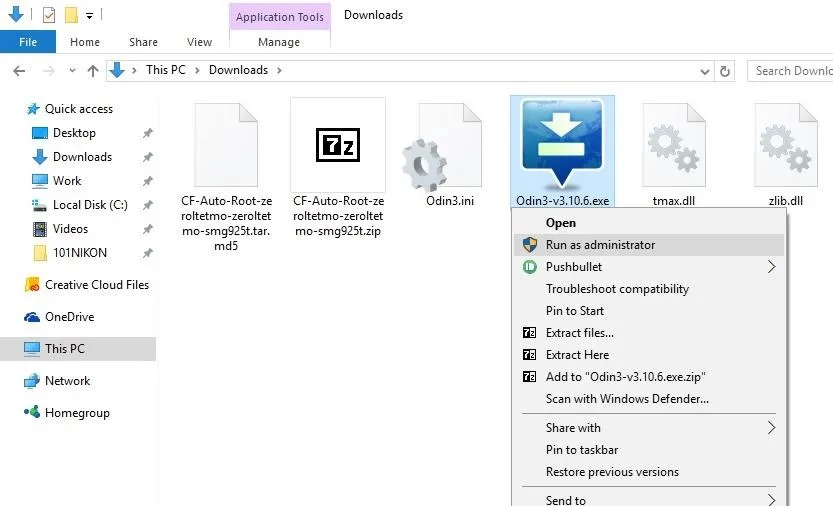
Next, head to the folder on your PC where you extracted the contents of the CF Auto Root ZIP. From here, right-click the Odin3-v3.X.X.exe file, then choose "Run as administrator."
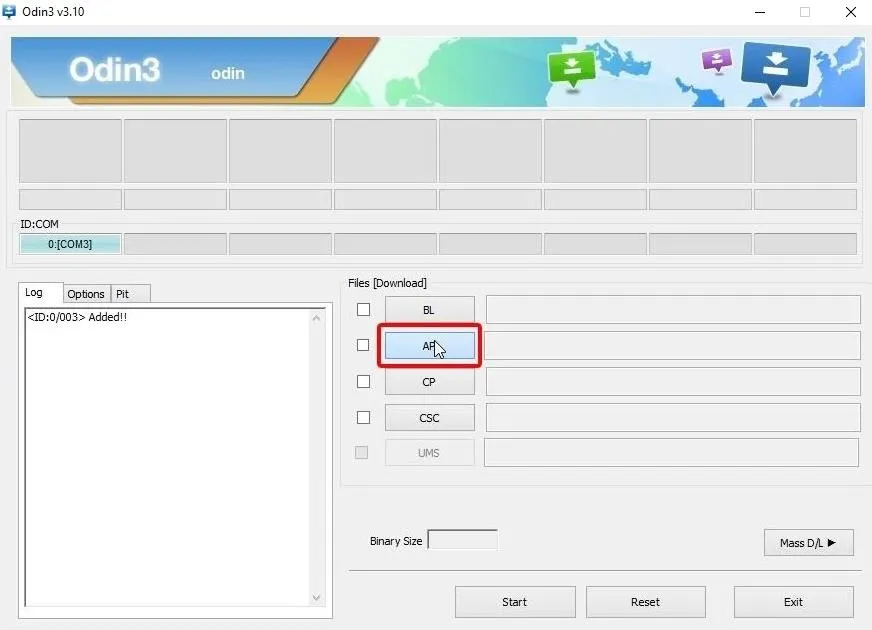
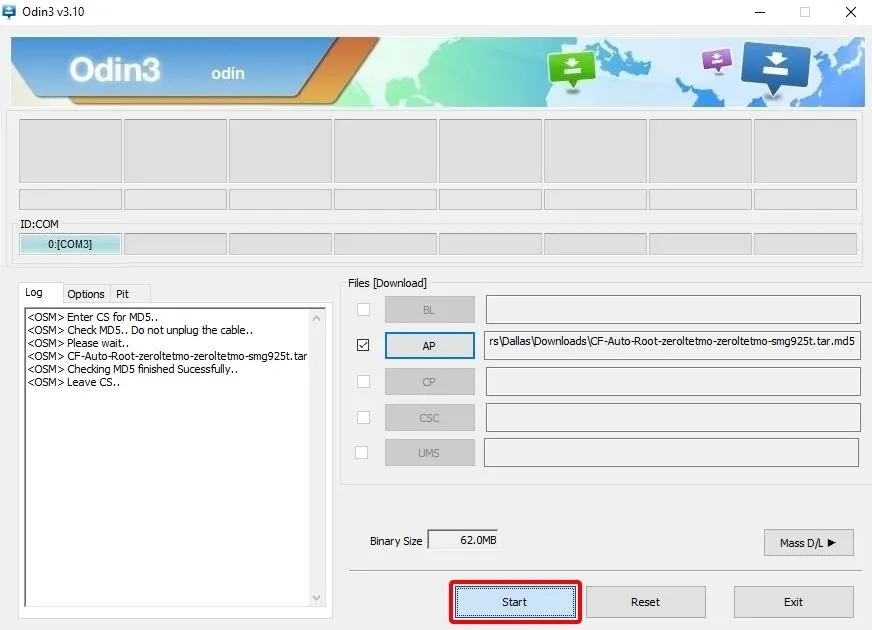
Once Odin is running, wait until the box under the "ID:COM" field turns blue. Once that happens, leave all of the options selected exactly as they are, then click the "AP" button near the center of the window.
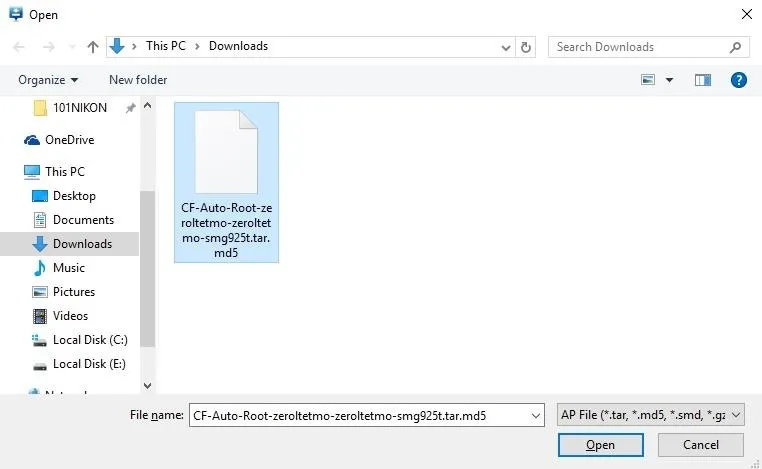
At this point, a file browser menu will pop up, so use this navigate to the folder where you extracted the contents of the CF Auto Root ZIP. Finally, select the CF-Auto-Root-XXX-XXX-XXX.tar.md5 file, then click "Open."
From here, wait until the Log tab shows a message that says "Leave CS," then click the "Start" button to root your device. The entire root process will happen automatically, and when it's finished, your phone will reboot back into Android.
If you'd like to follow along with a visual guide, check out Neil's video below, which outlines the process of using CF Auto Root and Odin to root a Galaxy S6 Edge. Otherwise, to make sure everything went off without a hitch and you're successfully rooted now, skip ahead to Step 6.
Step 5: Root with Fastboot (All Other Devices)
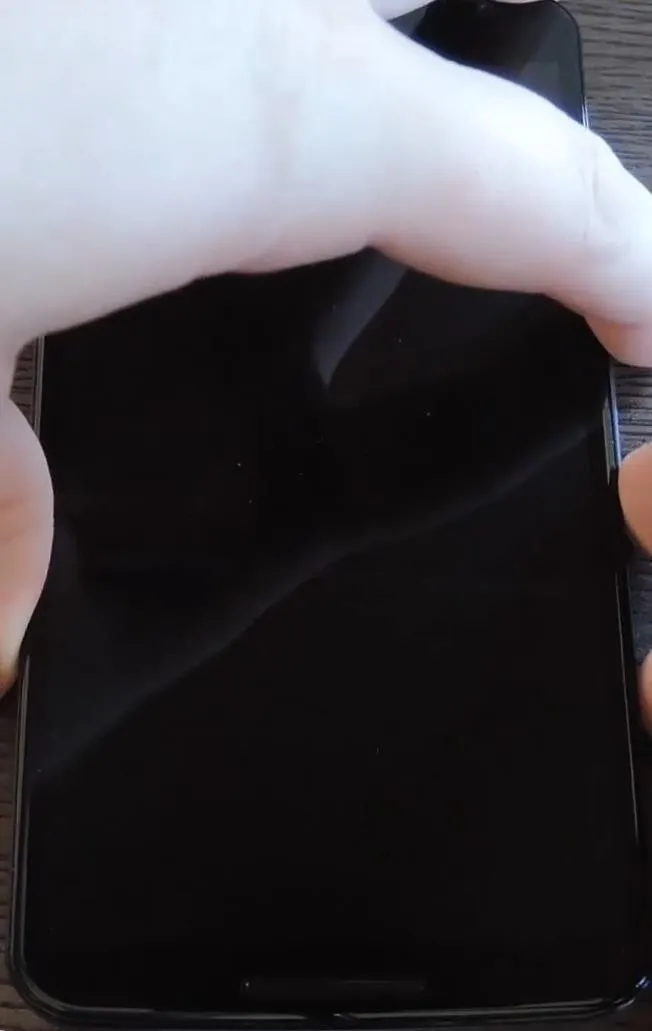
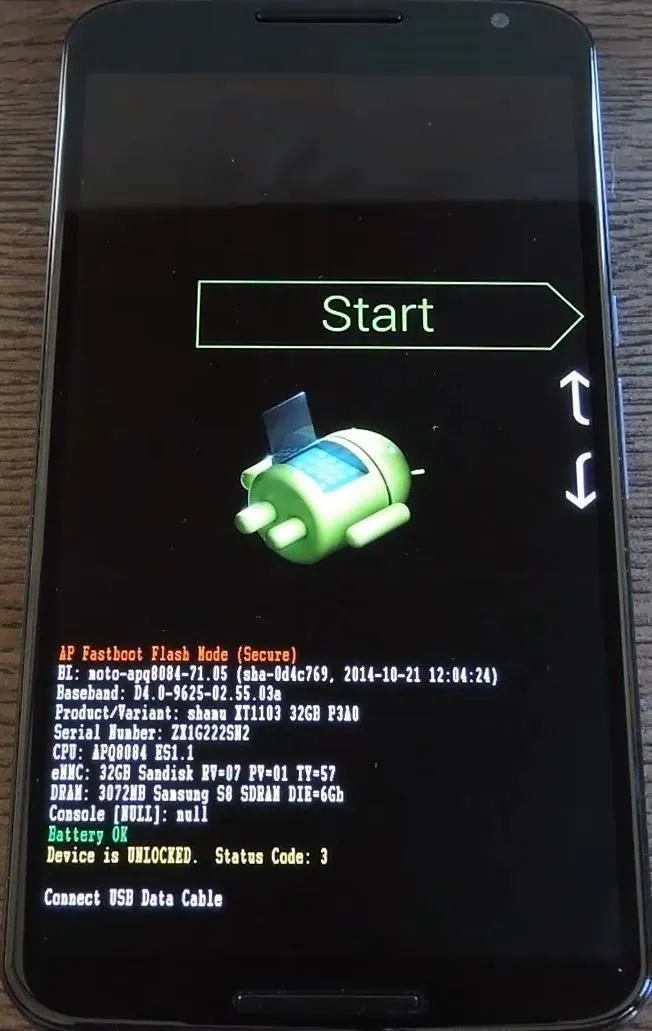
If you're using a non-Samsung device, the actual rooting process is a tiny bit different. First, you'll need to put your device into bootloader mode. From a powered-off state, press and hold the volume down and power button simultaneously. Once you arrive at the bootloader menu (pictured below), connect your phone to your computer with a USB data cable.


Back on your computer, navigate to the folder where you extracted the CF Auto Root ZIP earlier. From here, you'll find 2 folders and 3 files—root-linux.sh, root-mac.sh, and root-windows.bat. Double-click the file that corresponds to your computer's operating system to begin.

At this point, a command prompt window will inform you that CF Auto Root is about to unlock your bootloader and root your device. When you're ready, press any key to execute the rooting script.
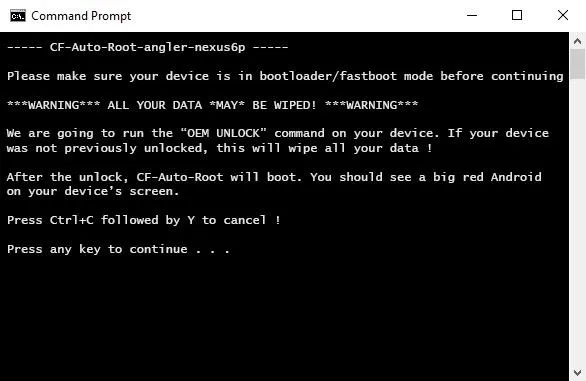
From here, you should see a red Android logo on your phone's screen, and you'll see a wall of text scrolling by—this is CF Auto Root doing its job and rooting your device. When the process is complete, your phone will automatically reboot, and you'll be rooted. At this point, it's safe to unplug your device from your computer.
If you'd like to follow along with a visual guide, check out my video below, which covers using CF Auto Root to root the Nexus 6.
Step 6: Verify Root
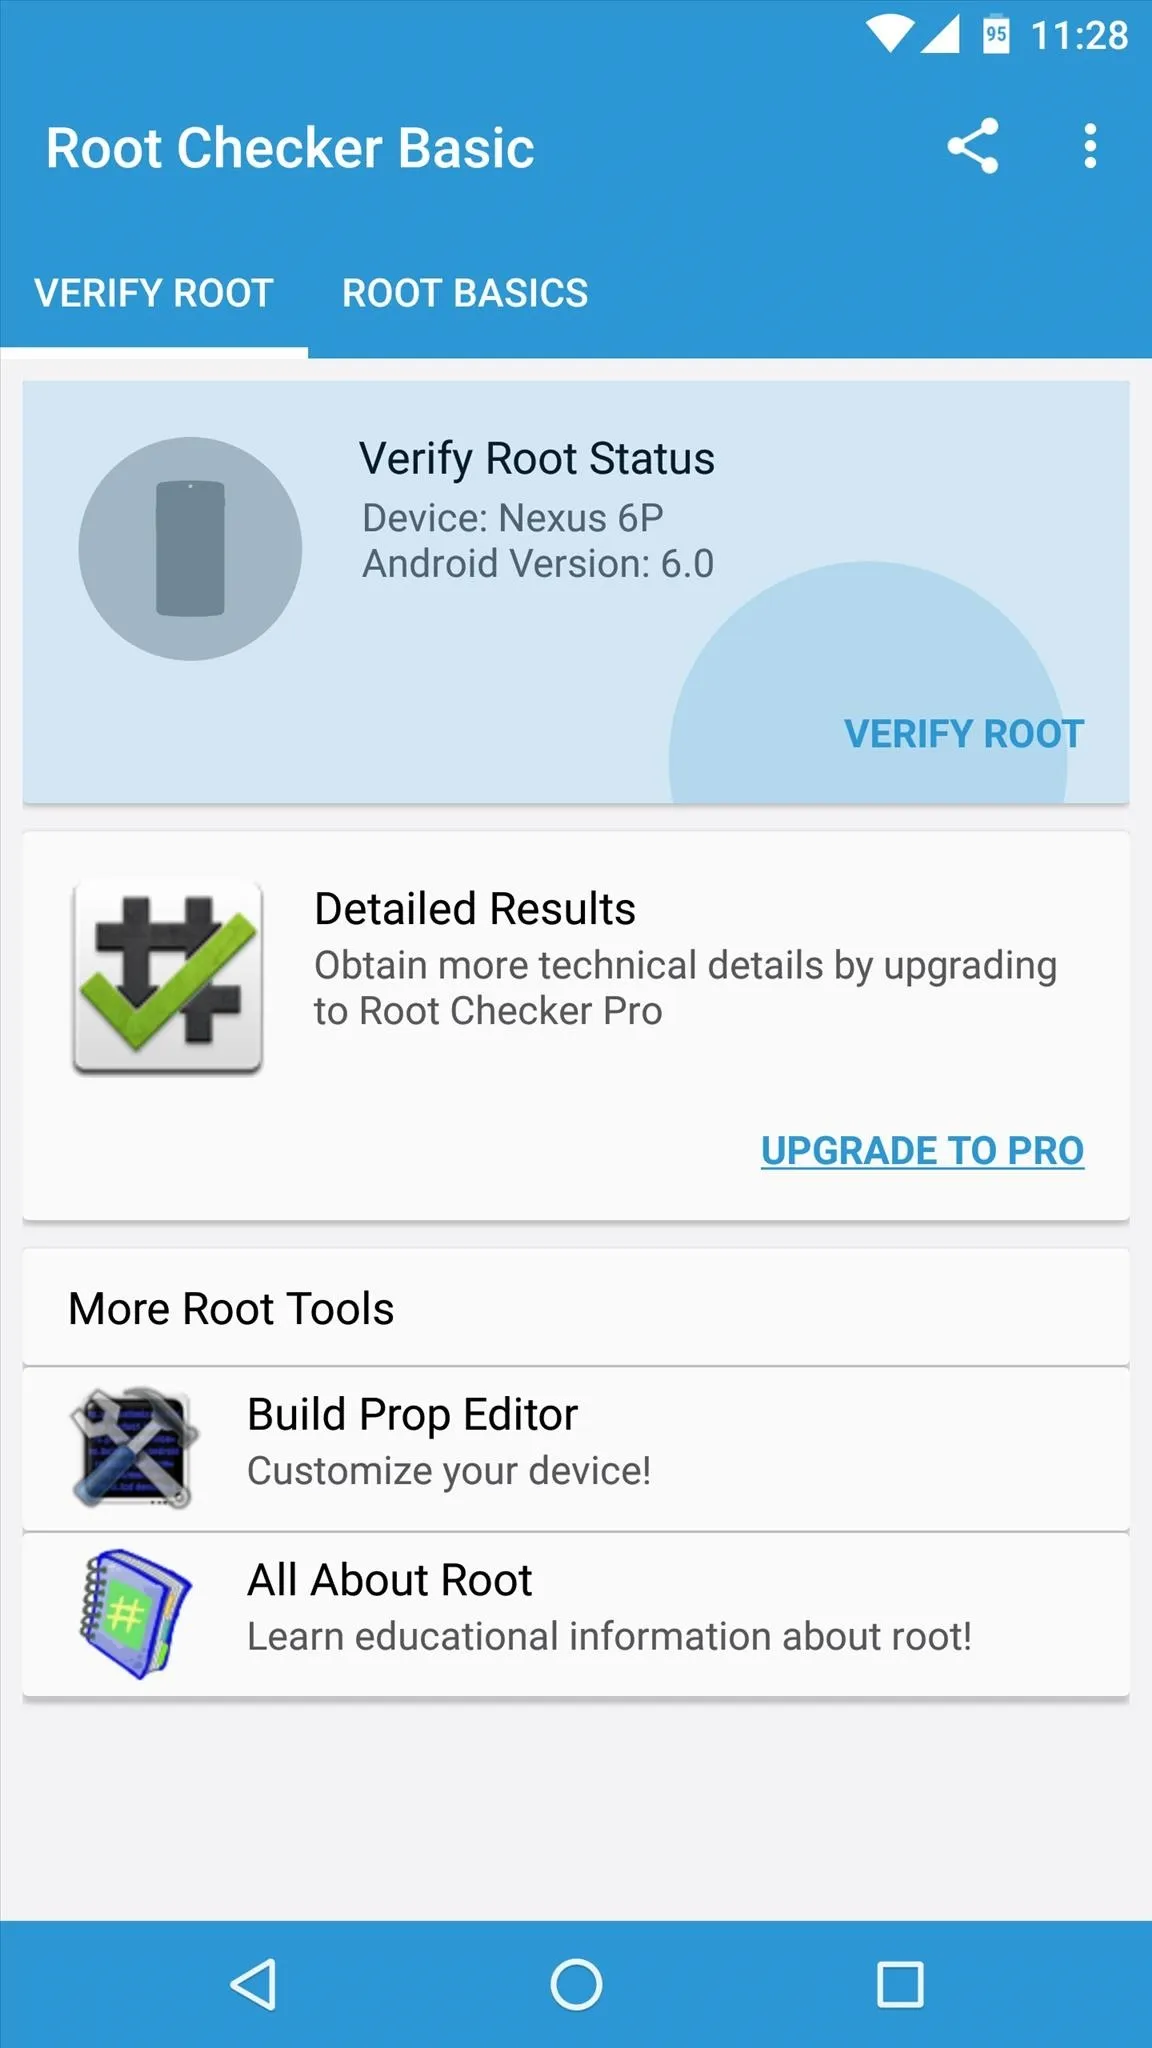
When you get back up, your device should be fully rooted. To verify this, download an app called Root Checker from developer joeykrim.
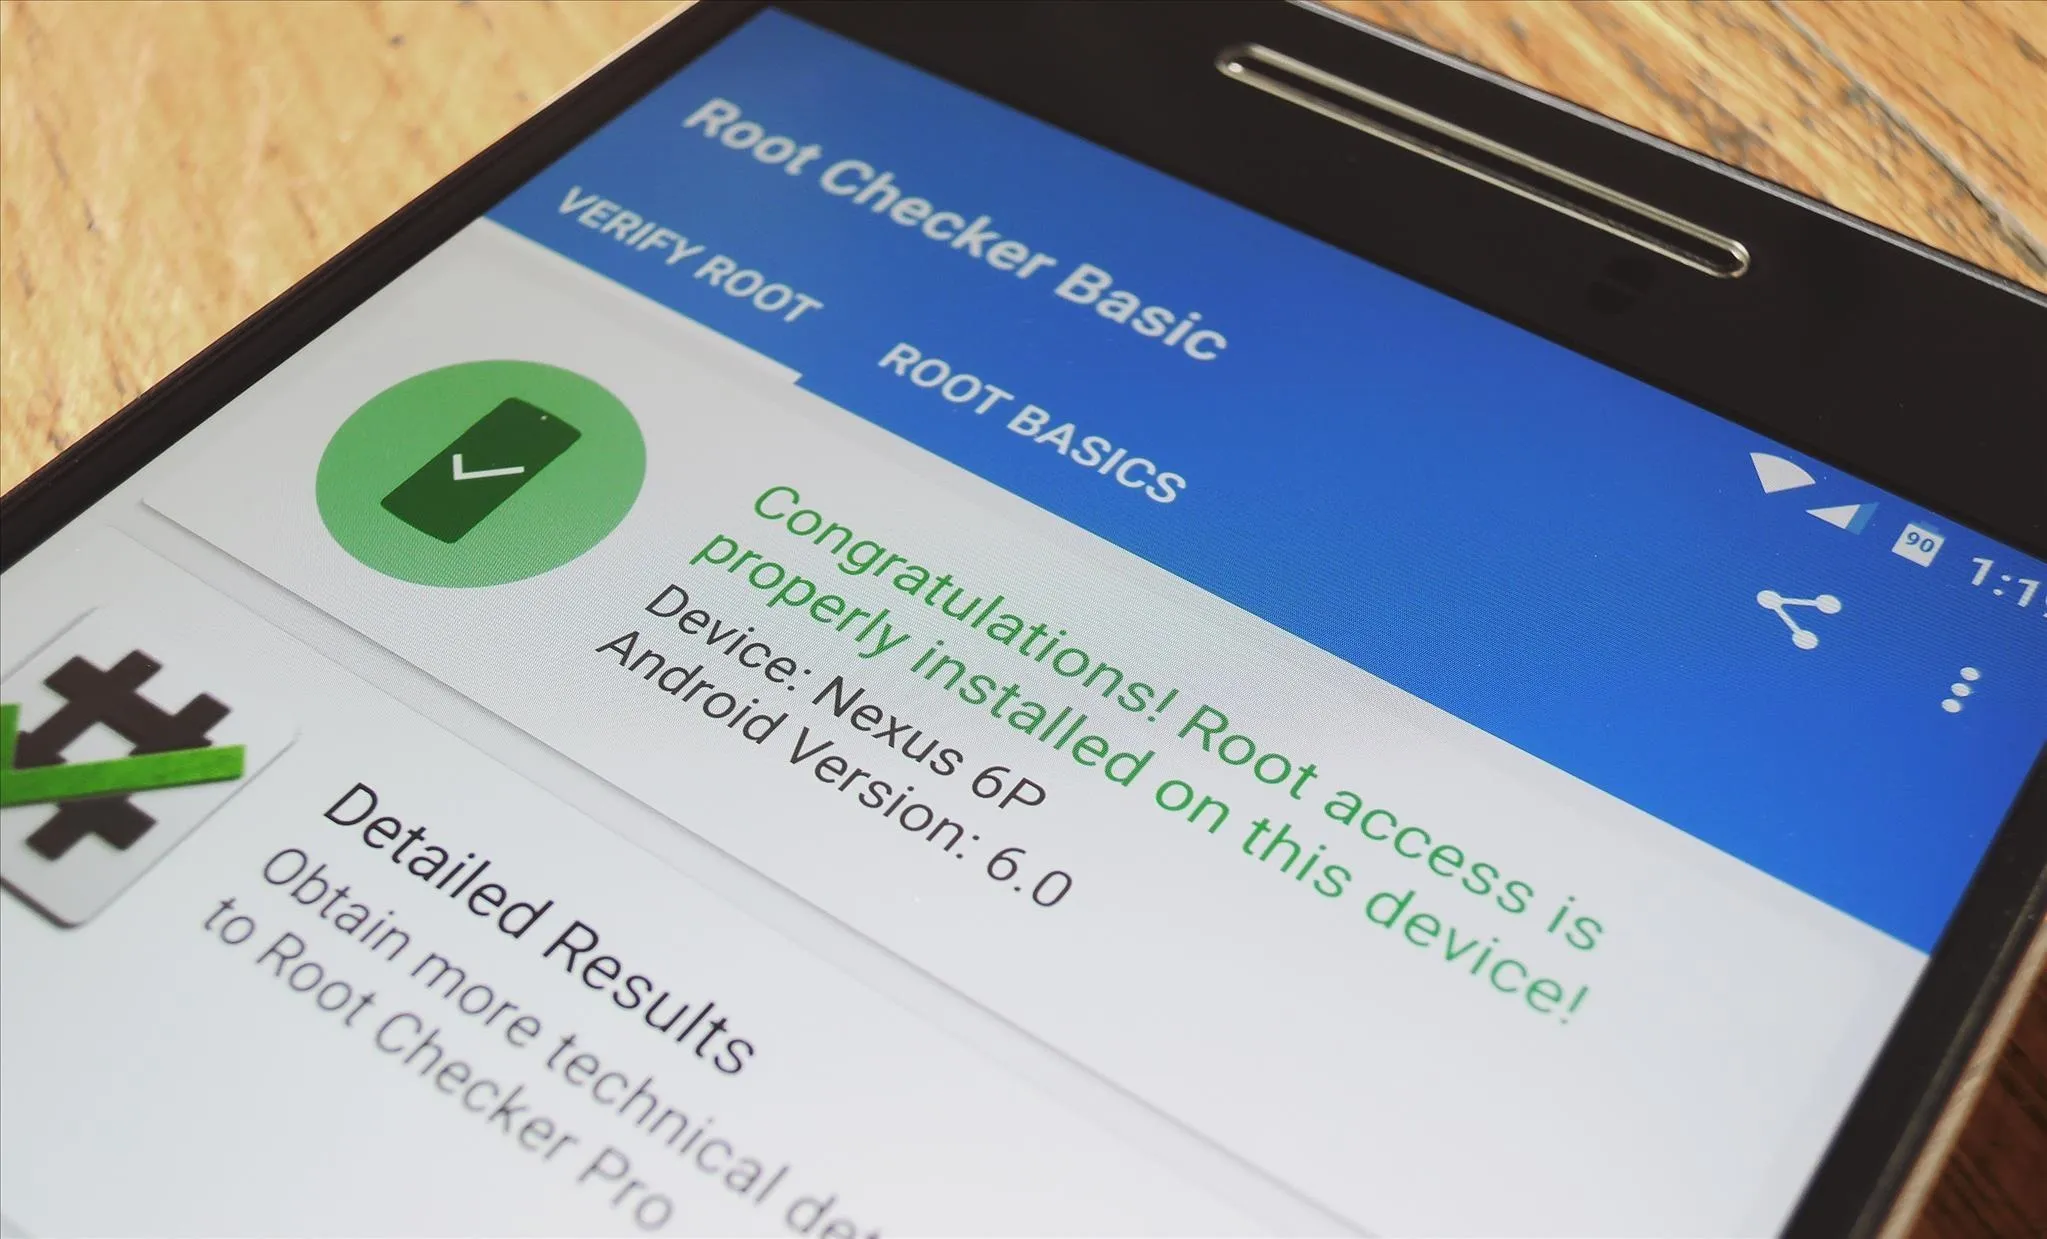
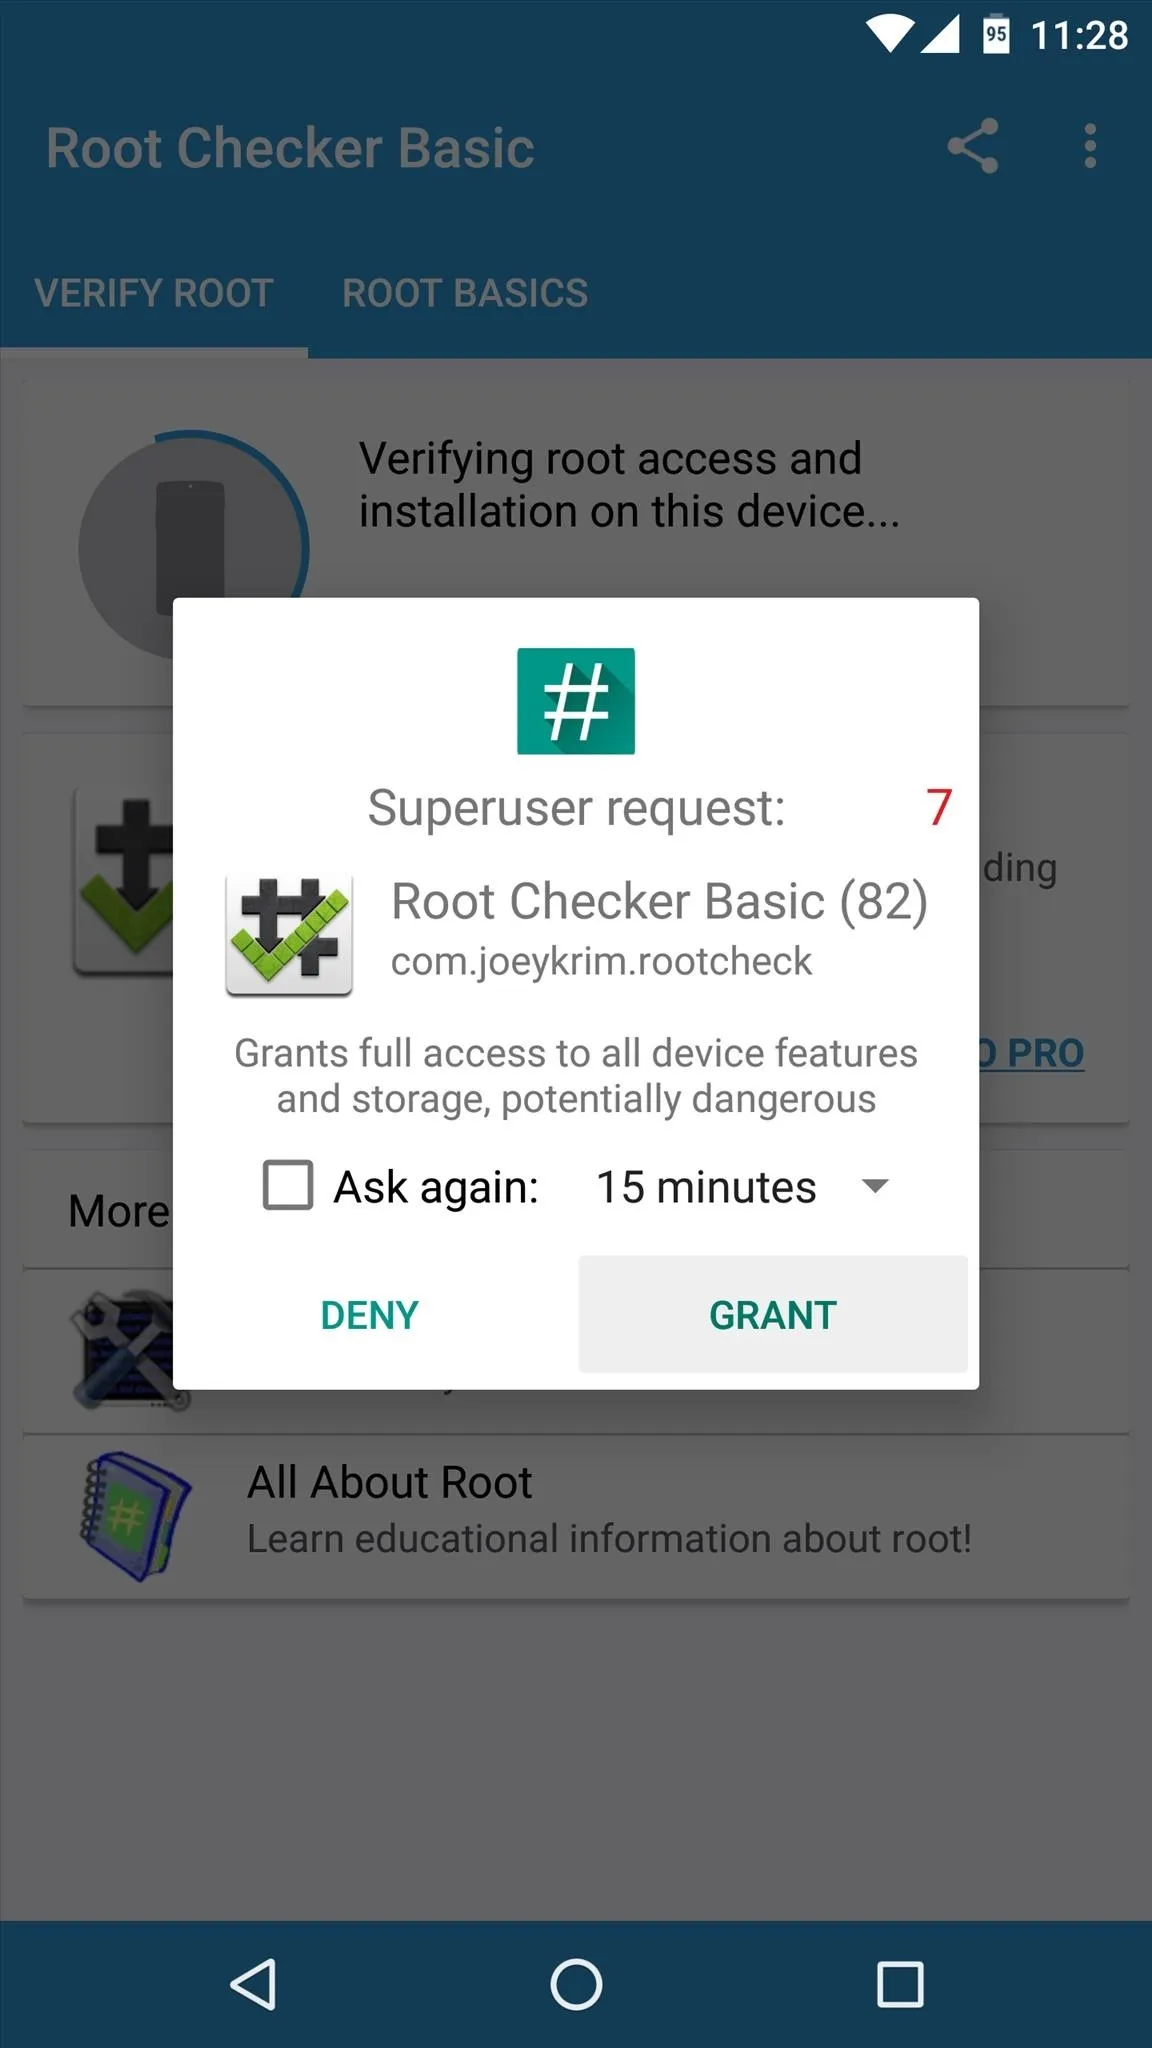
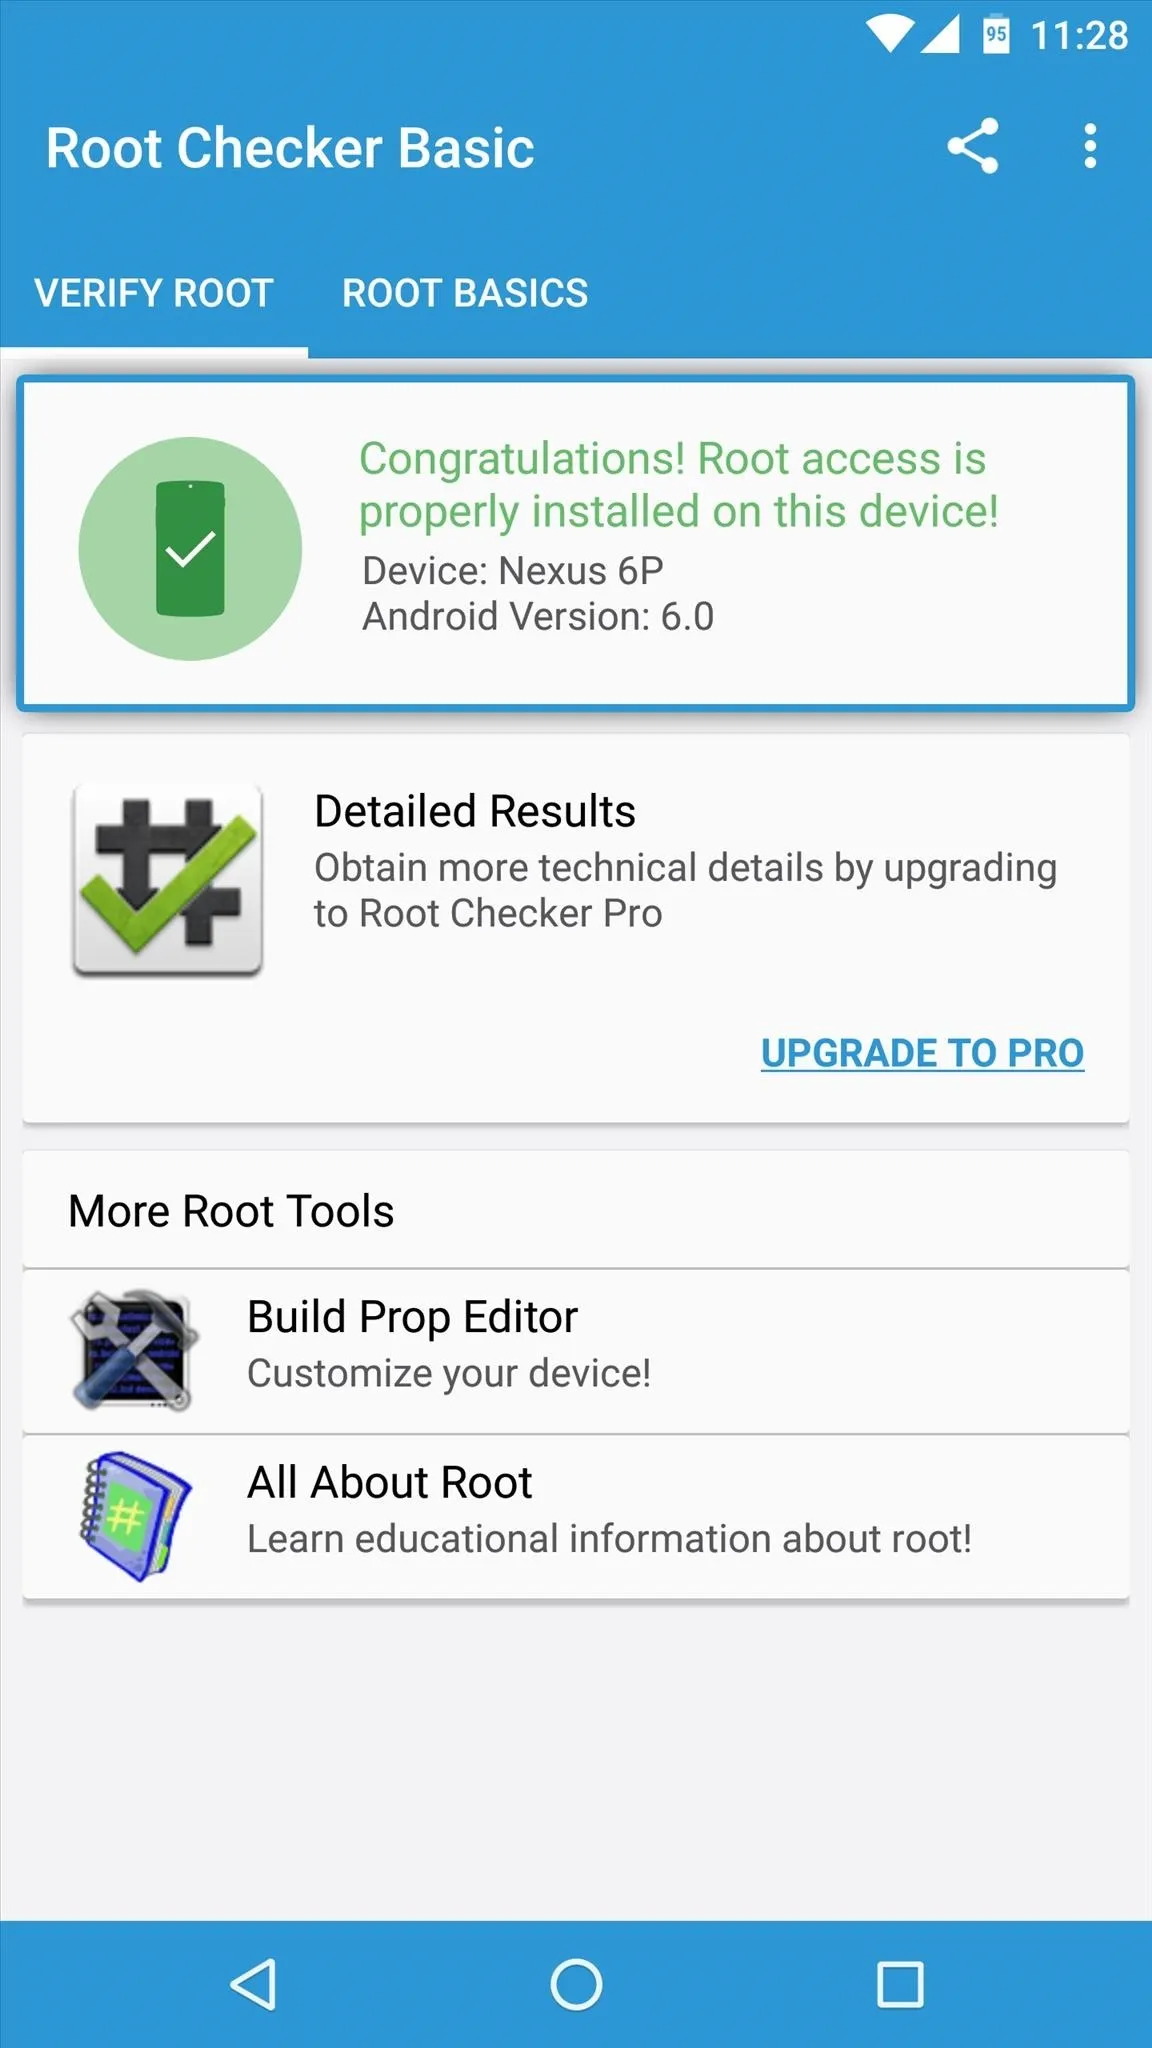
Once you've installed the app, simply open it up and tap "Verify Root." From here, tap "Grant" when prompted to give the app Superuser access, and if everything went off without a hitch, you'll see a message saying "Congratulations! Root access is properly installed on this device!"


Now that you're rooted, what's the first mod or app you installed to take advantage of your new Superuser status? Let us know in the comment section below, or drop us a line on Android Hacks' Facebook or Twitter, or Gadget Hacks' Facebook, Google+, or Twitter.


Comments
No Comments Exist
Be the first, drop a comment!