There are two core components to any Tasker automation: A profile and a task. Profiles are basically a set of conditions that must be met before Tasker will do anything. Tasks, on the other hand, are the actions Tasker will perform when your profile's conditions have been met. Think of them like triggers and actions, respectively. Or a cause and an effect.
Even though profiles are the first thing you see when you open the Tasker app, tasks are the first thing you should wrap your brain around. Since you're probably using Tasker to actually do something, tasks are what will get the job done. You can even create a task first, then associate it with a profile later.
Tasker is an incredibly powerful app, though. A task can do anything from toggling Bluetooth to mimicking touch input, and it can even run a combination of all possible actions. So to help you make sense of it all, we've outlined the process of creating a task below.
Step 1: Name Your Task
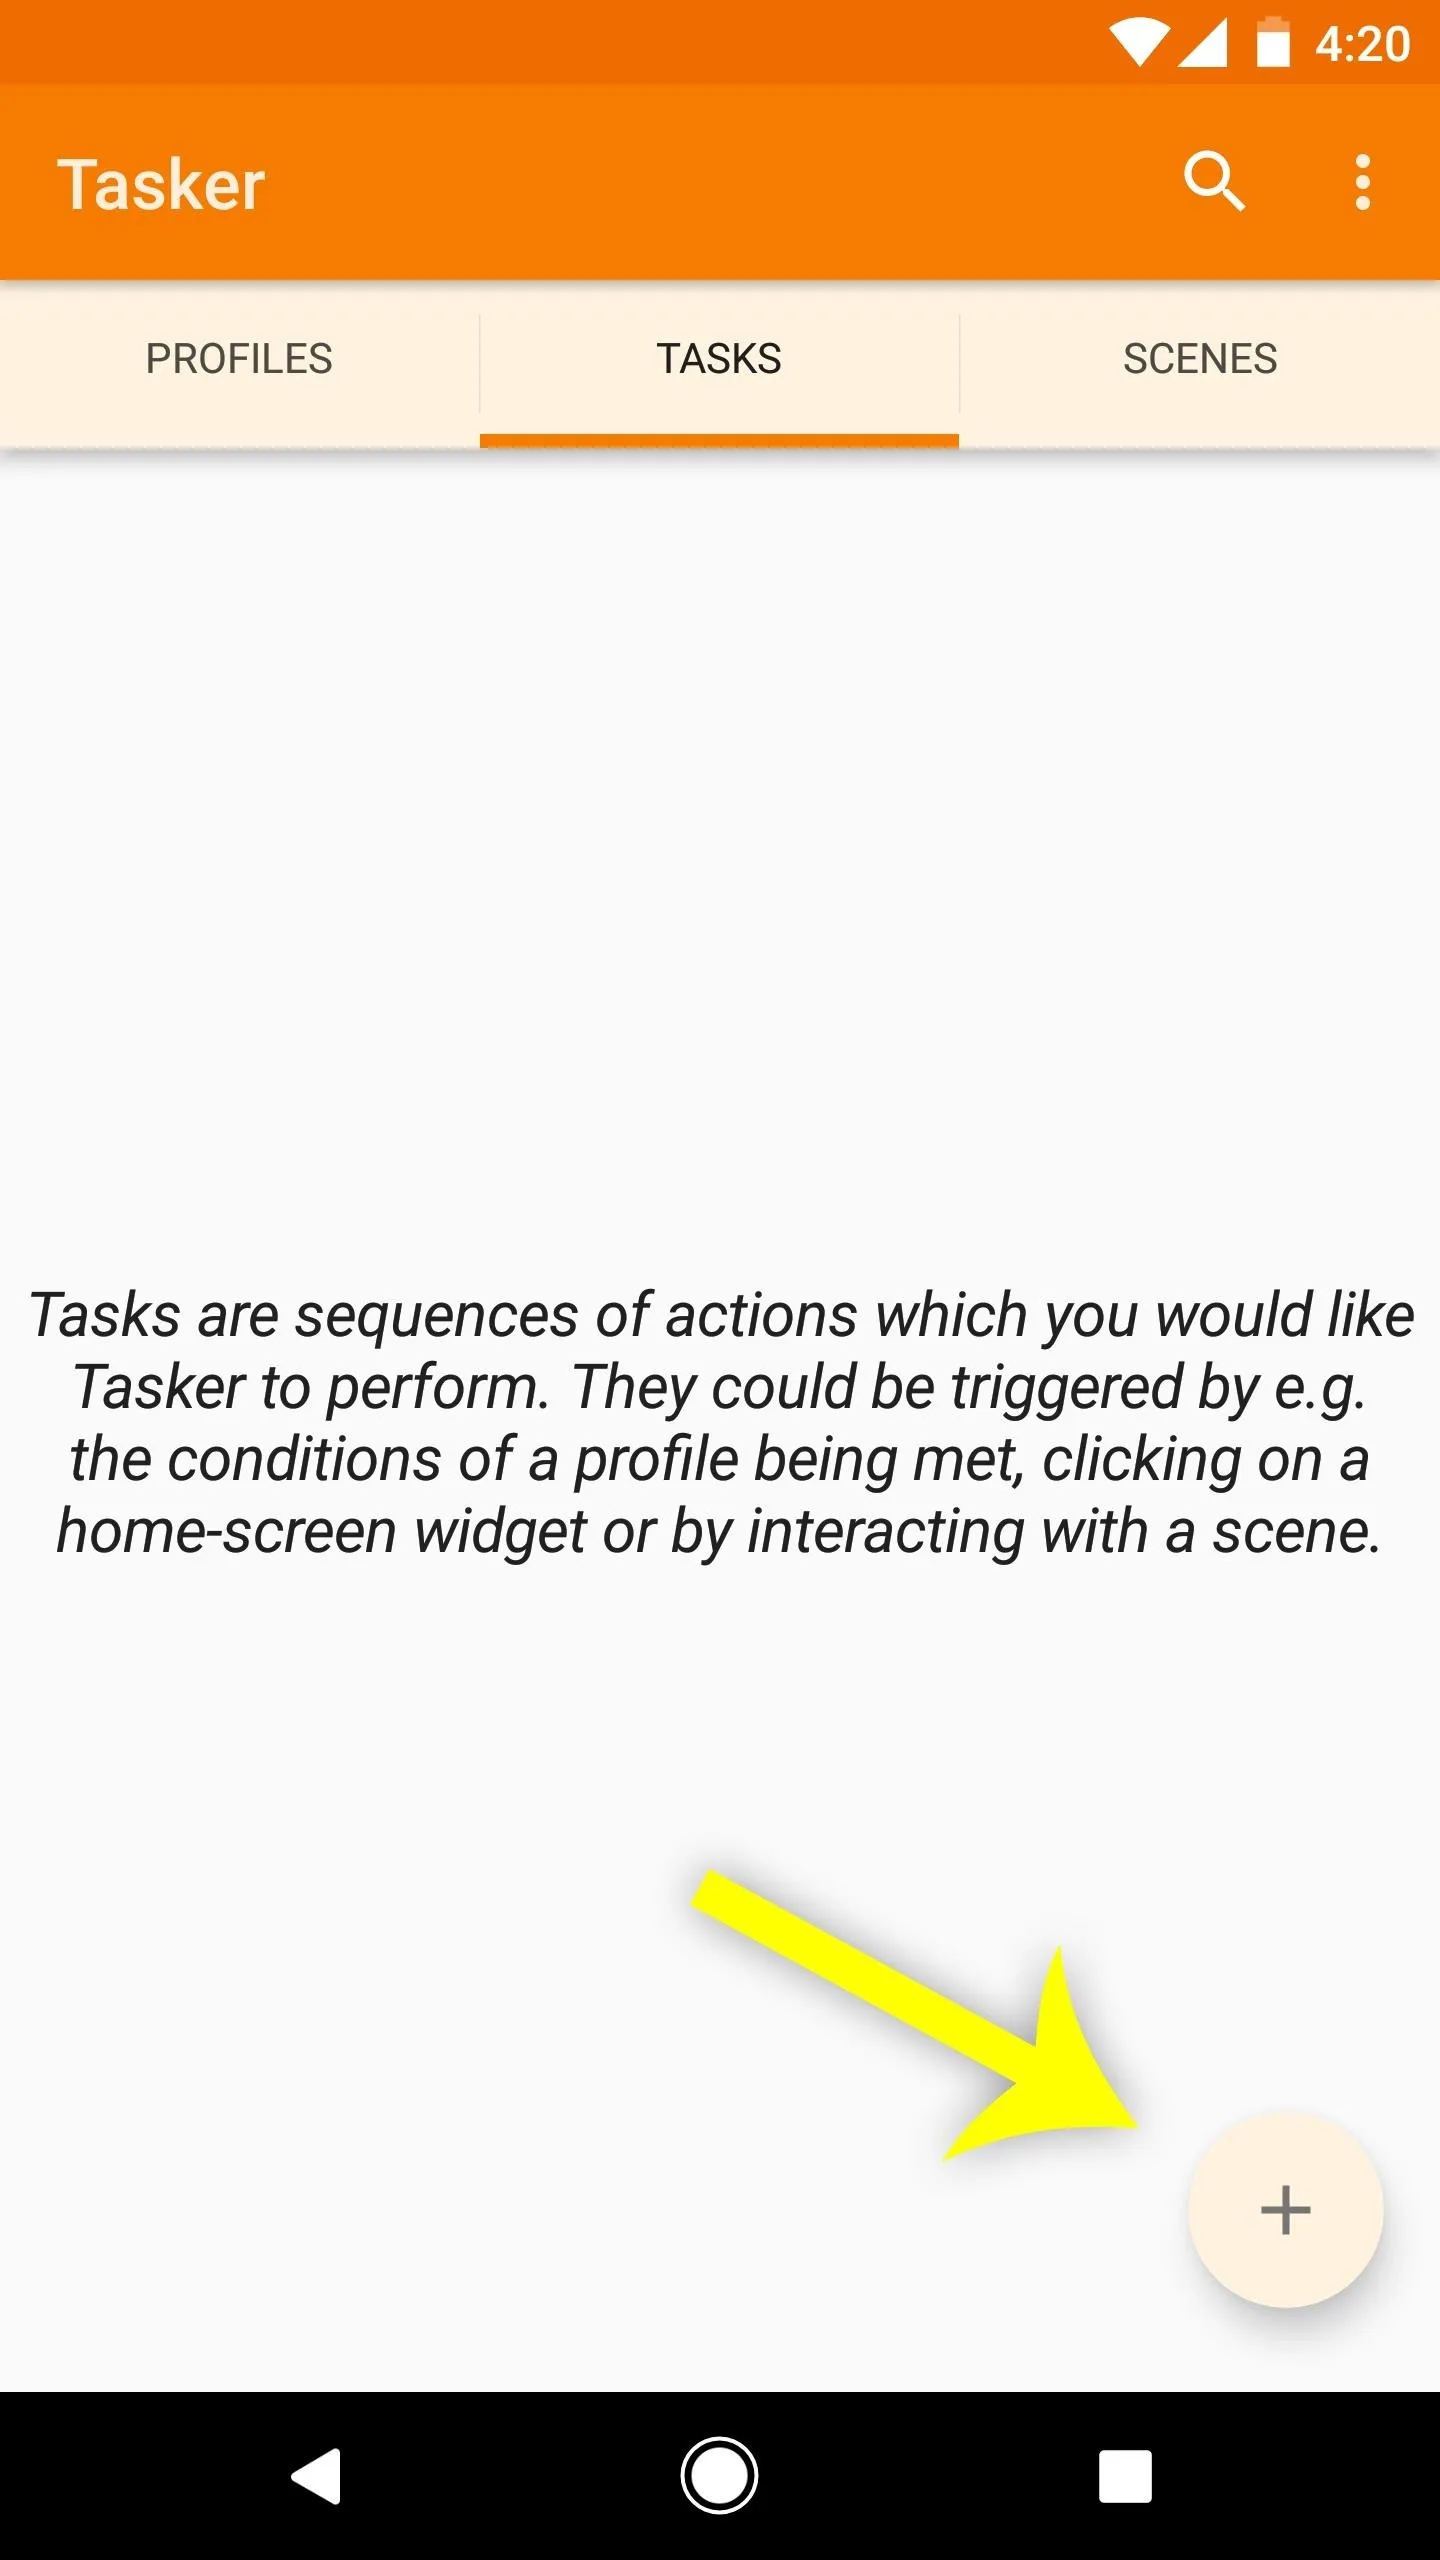
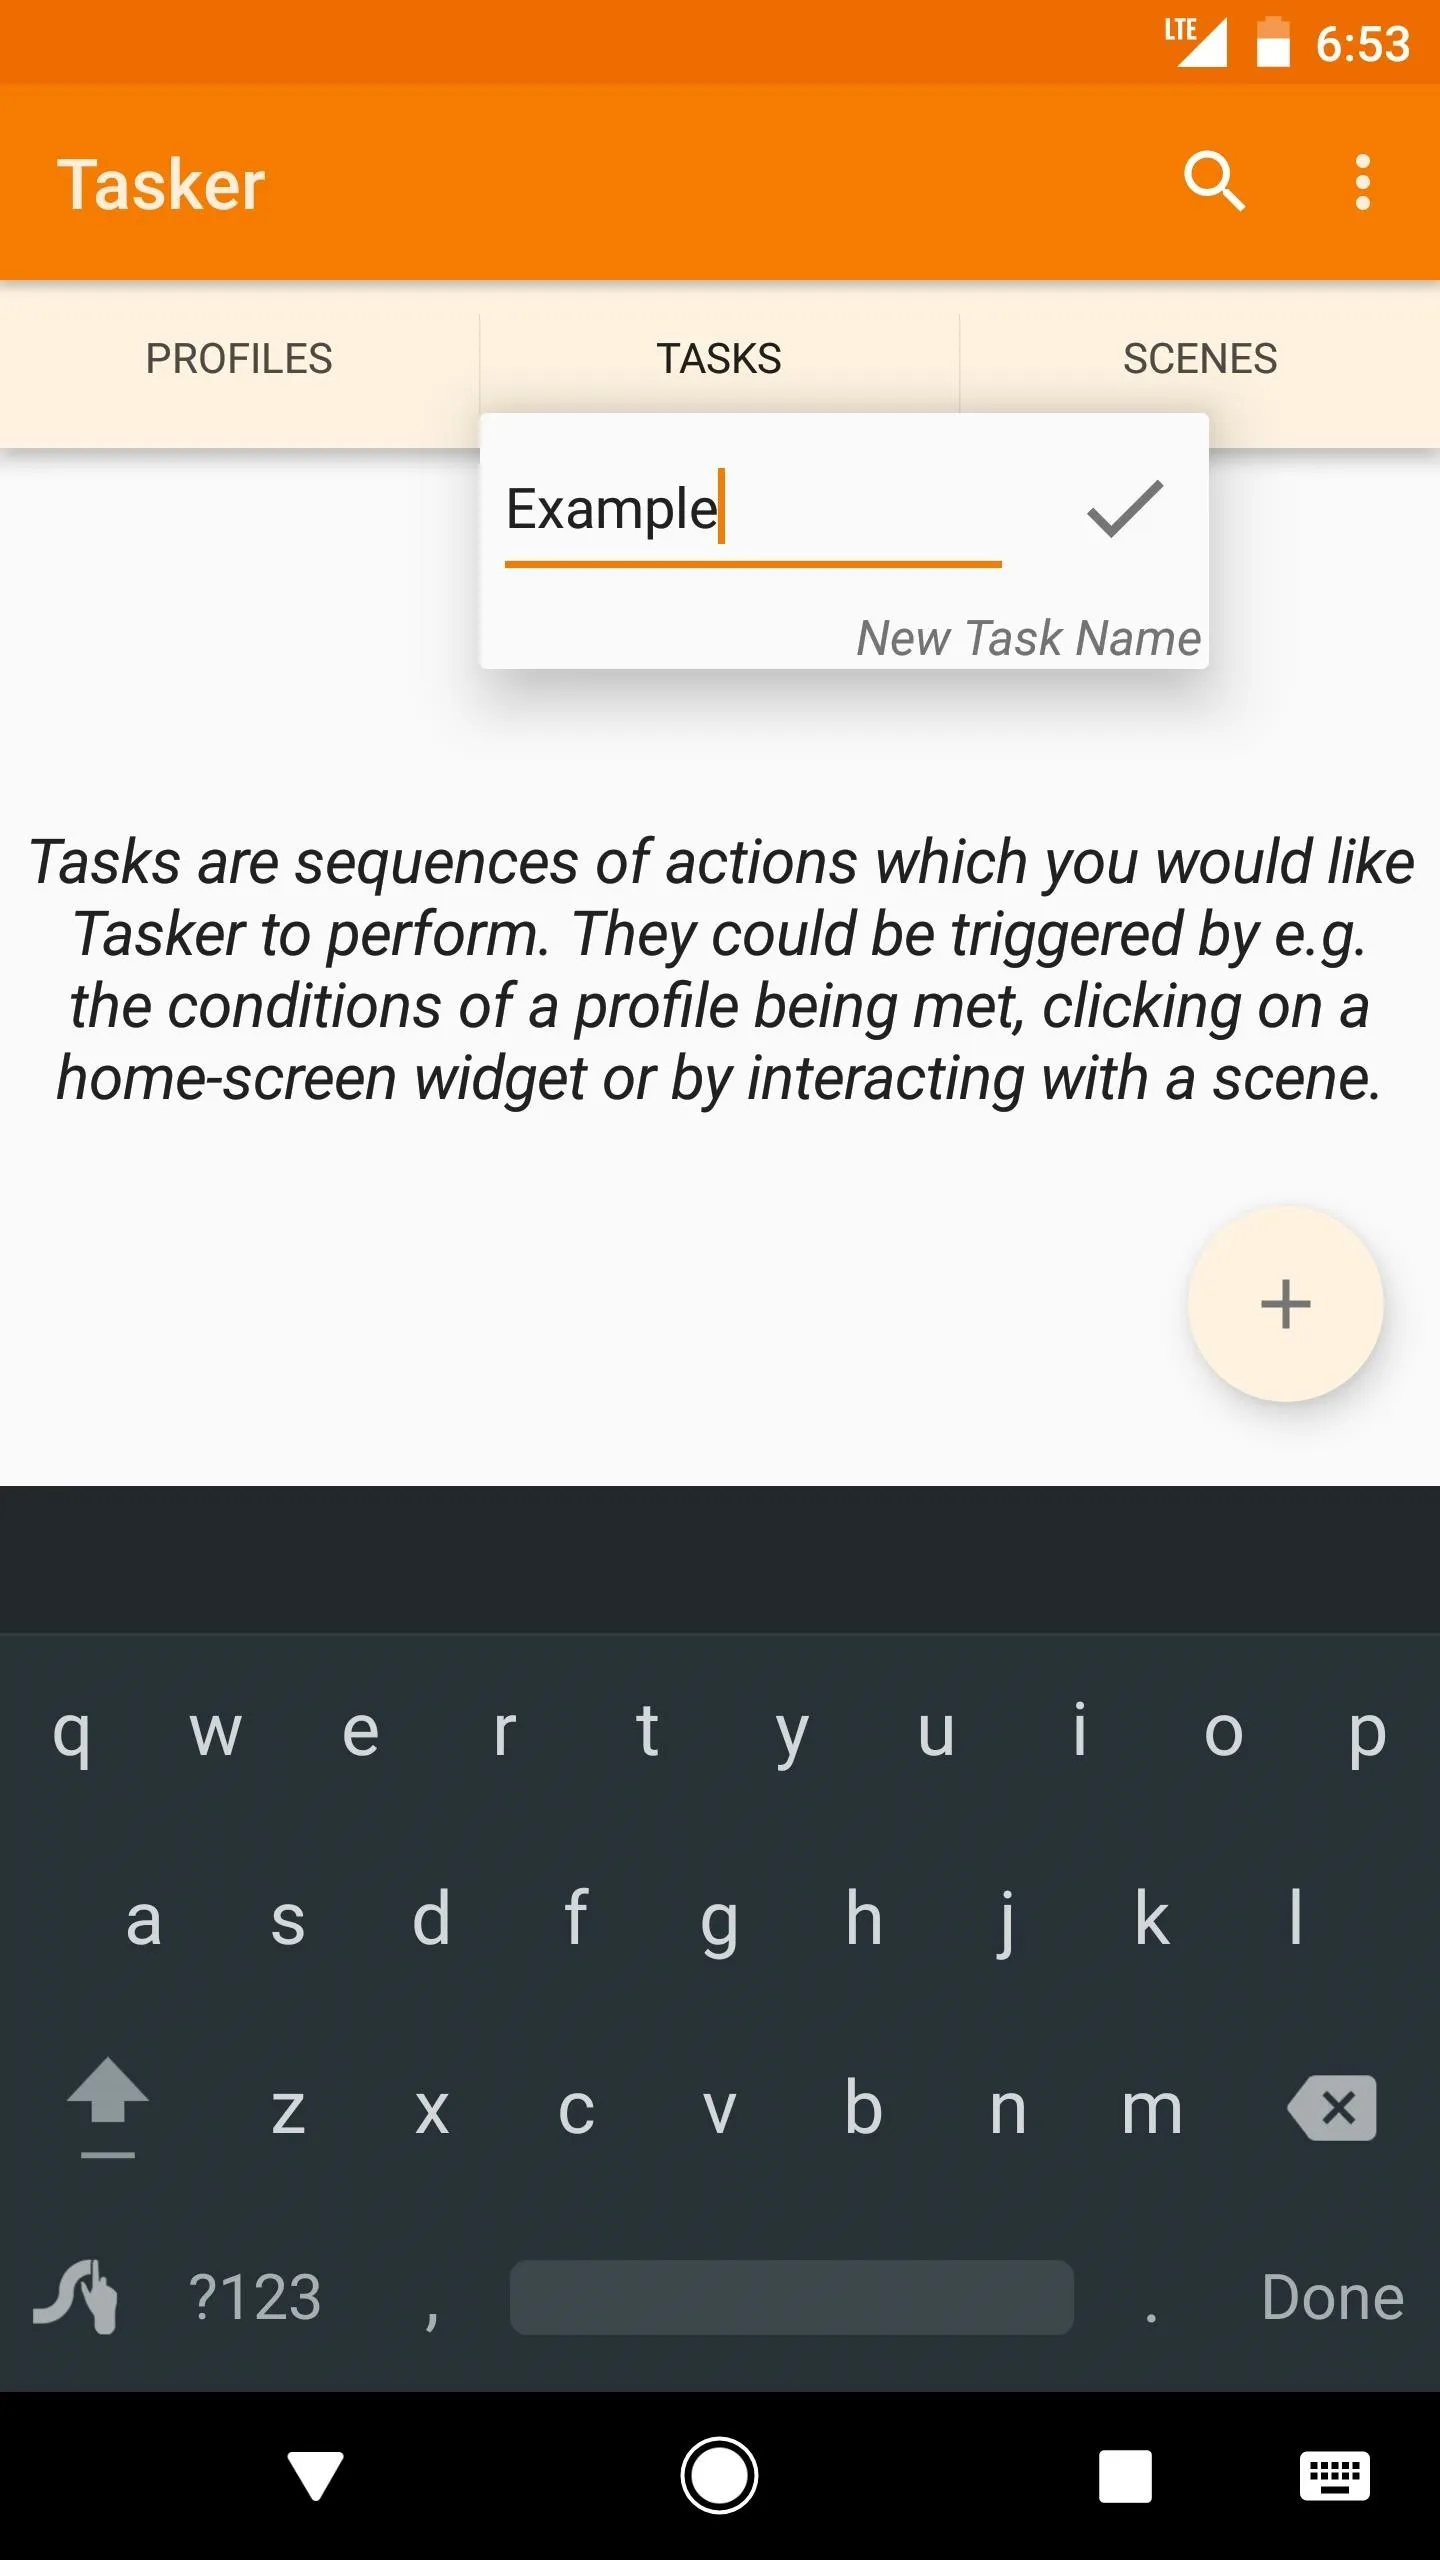
To start, head to the Tasks tab from Tasker's main menu, then tap the floating + button in the bottom-right corner of the screen. Next, type in a name for your task, then hit the check mark. Try to be descriptive with the name so that you don't forget what actions this task performs.


Step 2: Add an Action to Your Task
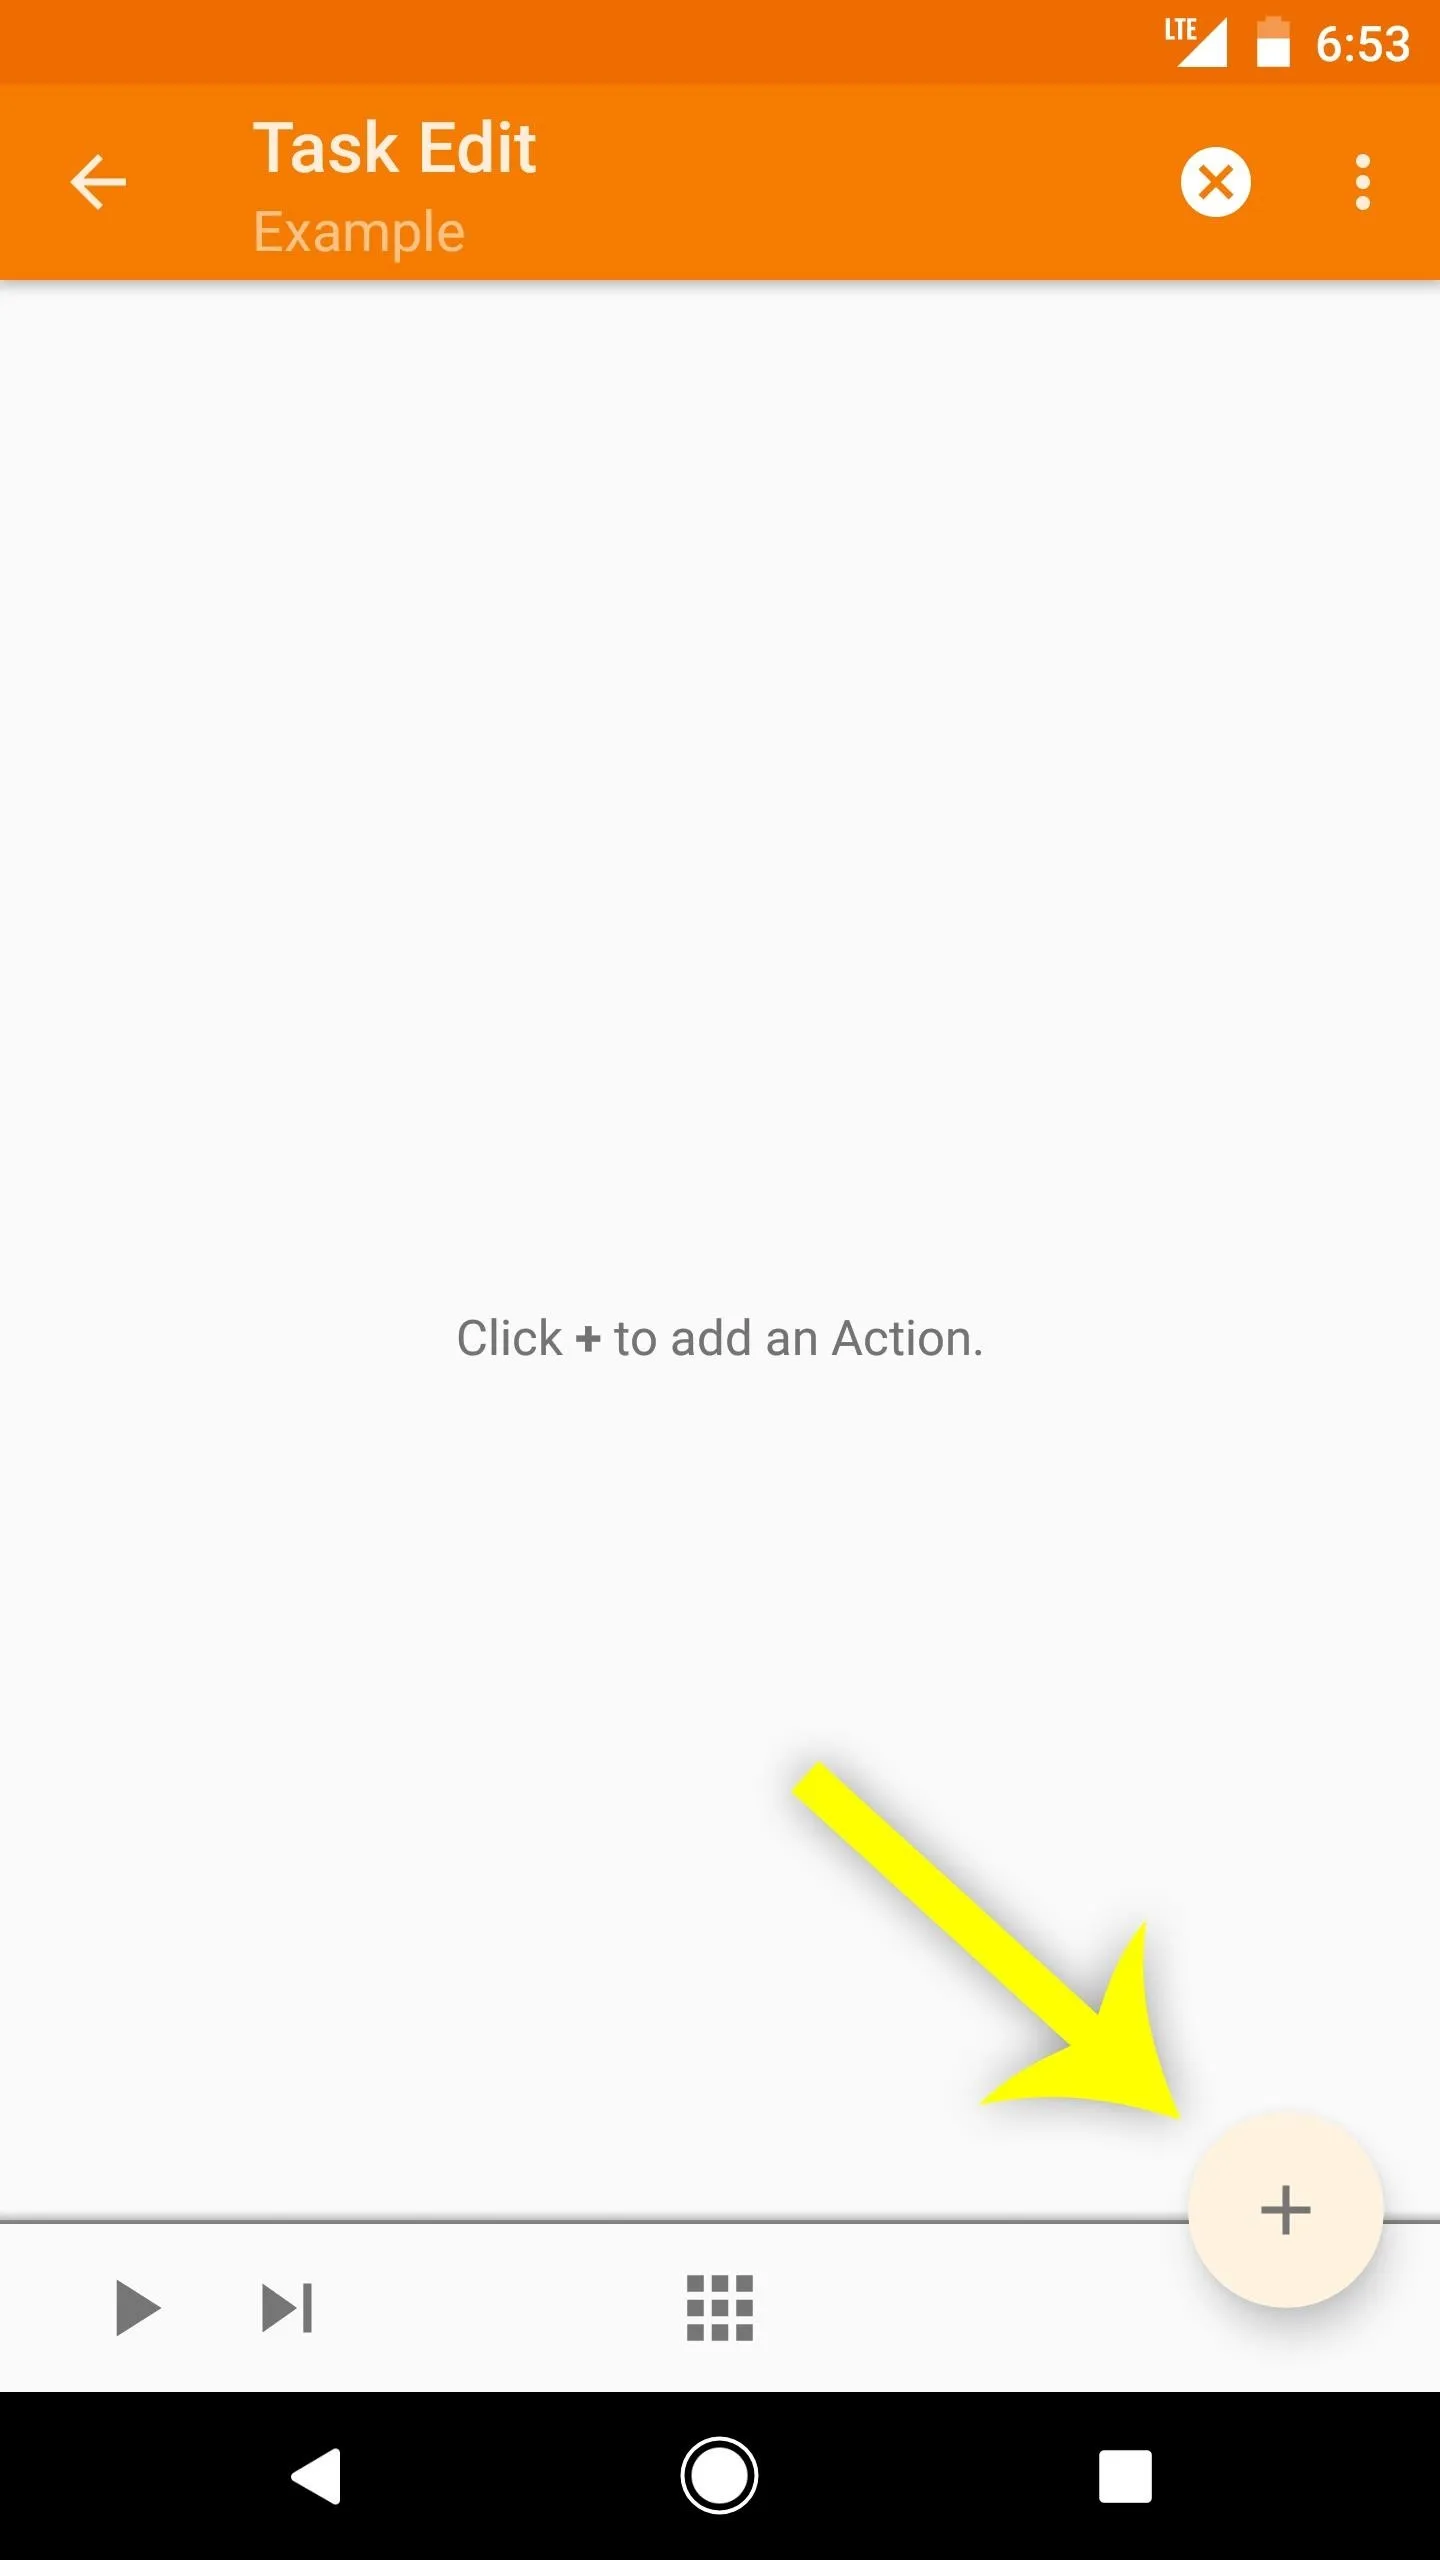
Now it's time to add the first action to your task. Actions are exactly what they sound like, so they're operations that Tasker will perform any time your task is triggered. You can have more than one action in your task, but keep in mind that actions will be performed in sequential order, so make sure this first action is the first operation you'd like Tasker to run.
To add an action, tap the + button in the bottom-right corner of the Task Edit screen. From there, you'll be presented with a menu of categories. There are hundreds of actions that Tasker can perform (and even more if you've installed a Tasker plugin), but if you're having trouble finding something, you can type keywords into the Filter field to narrow down the results.
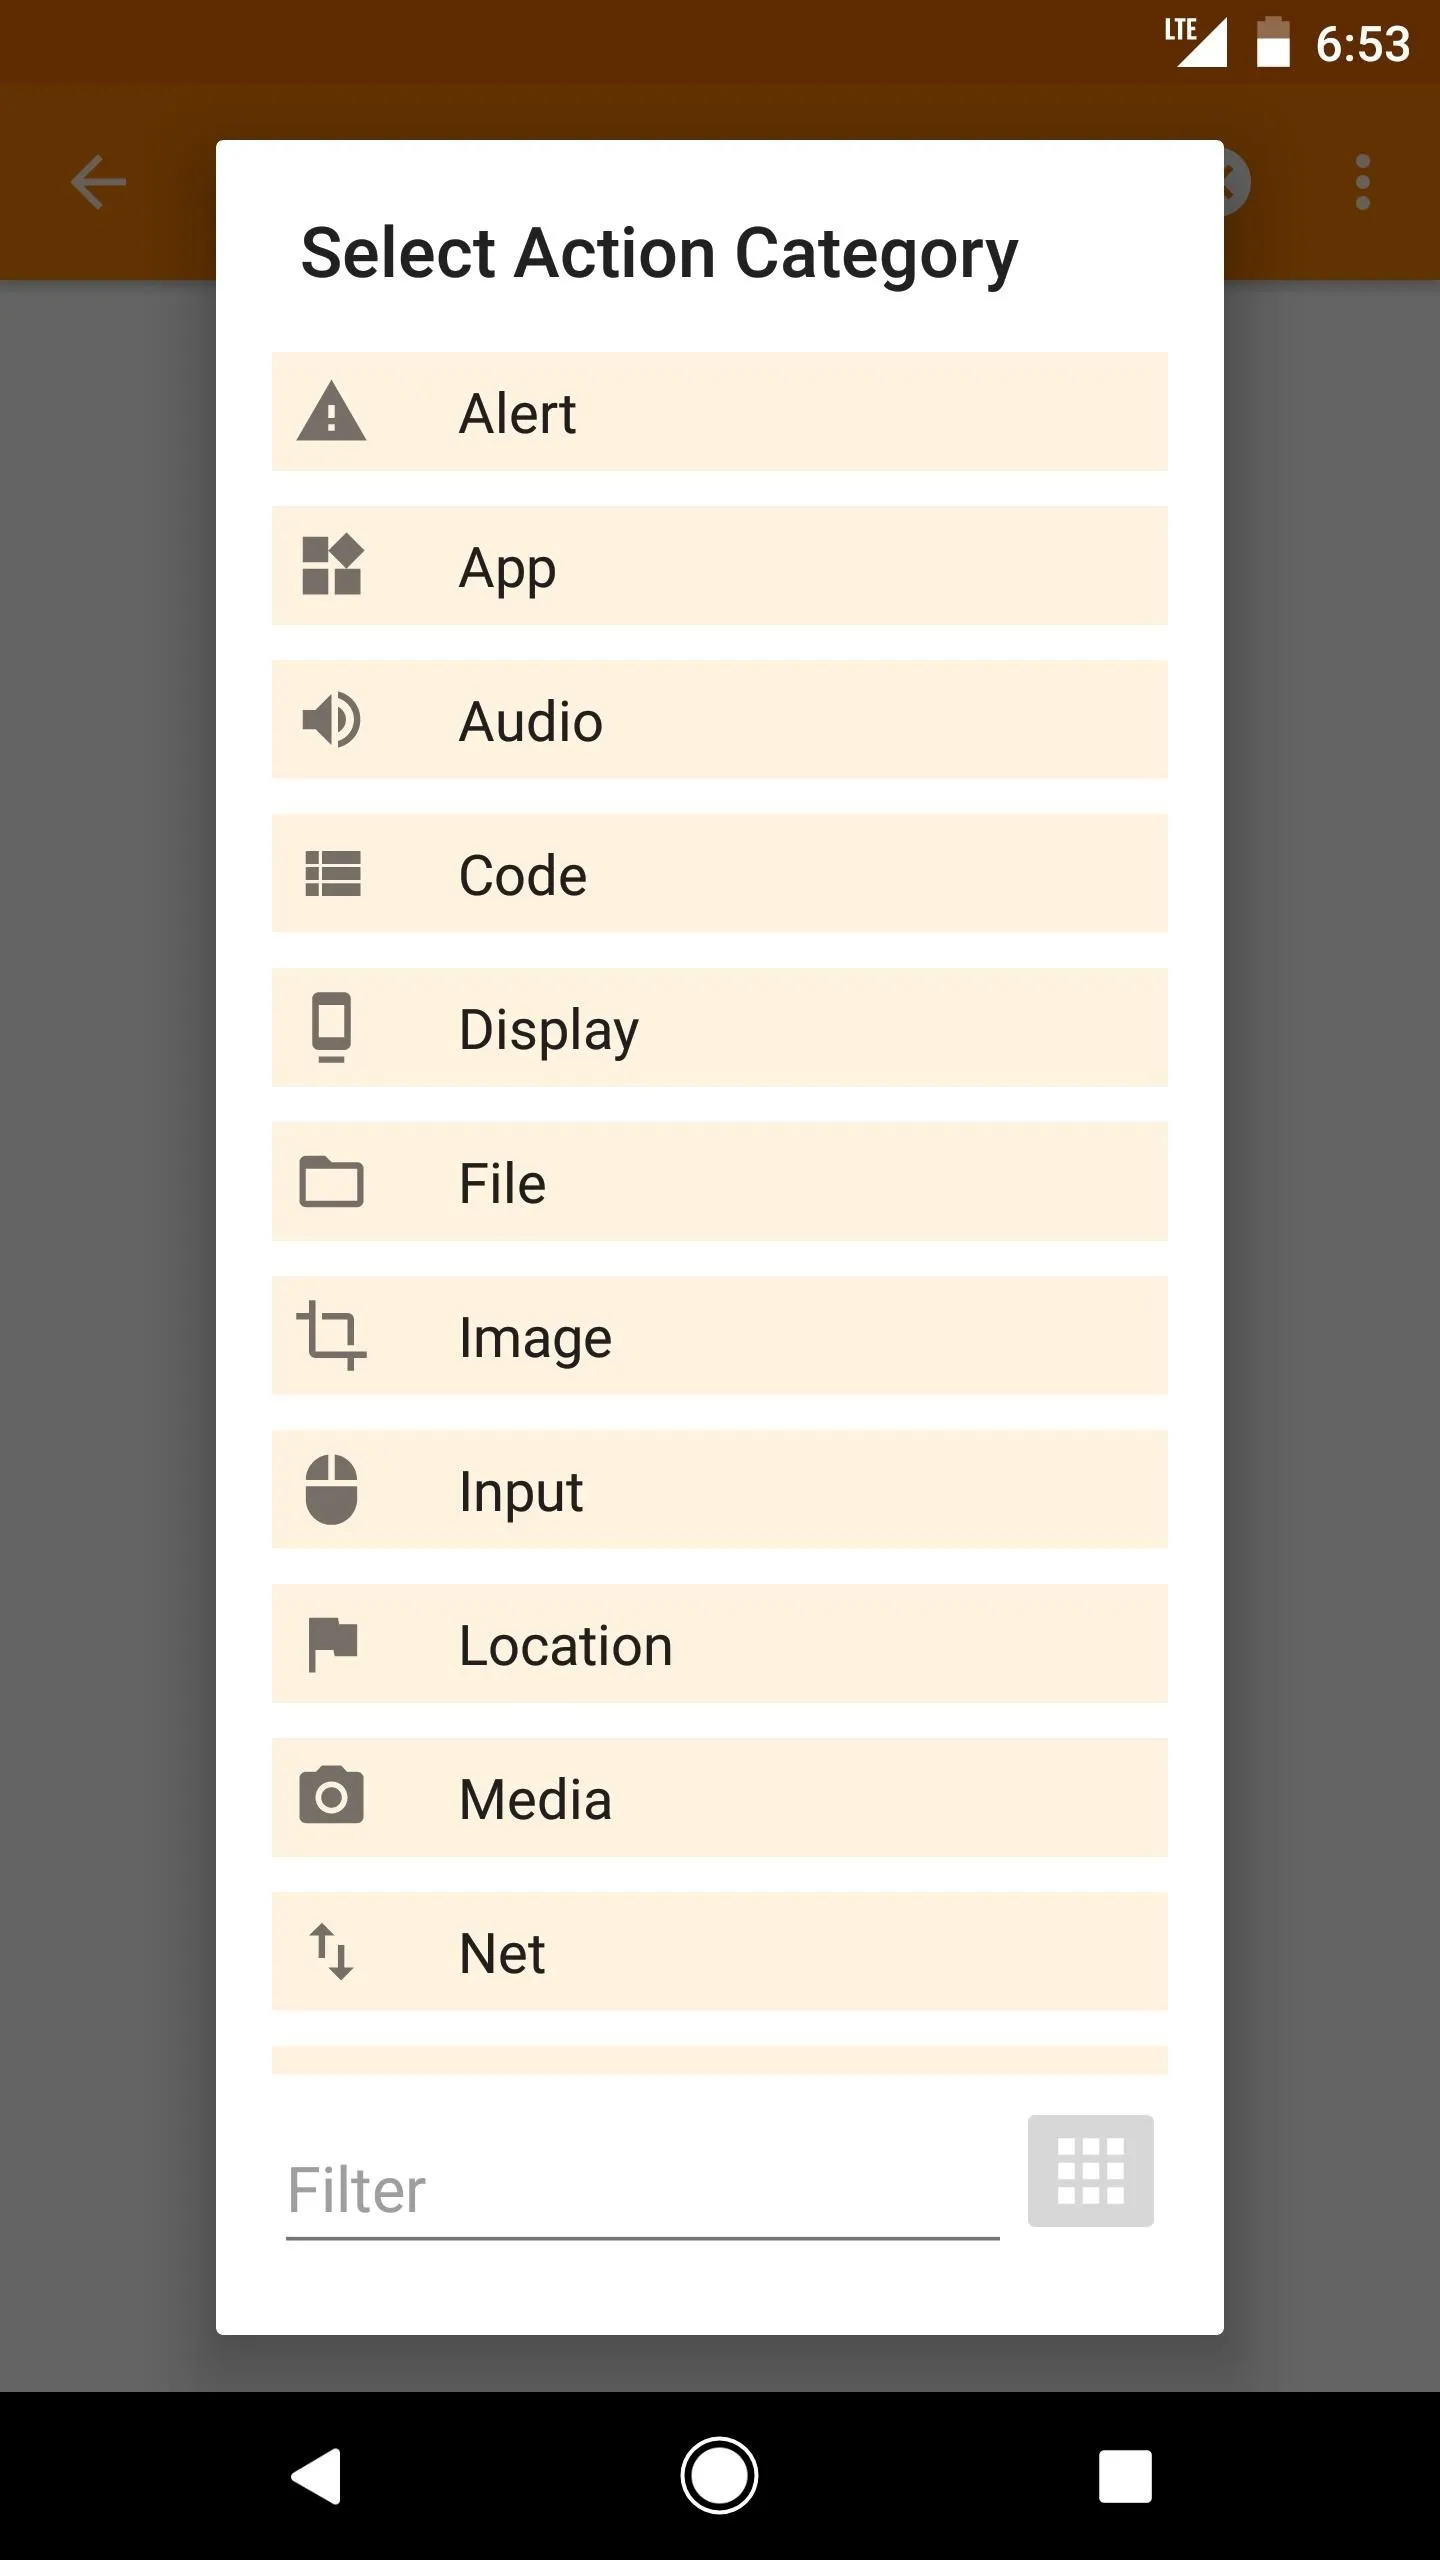
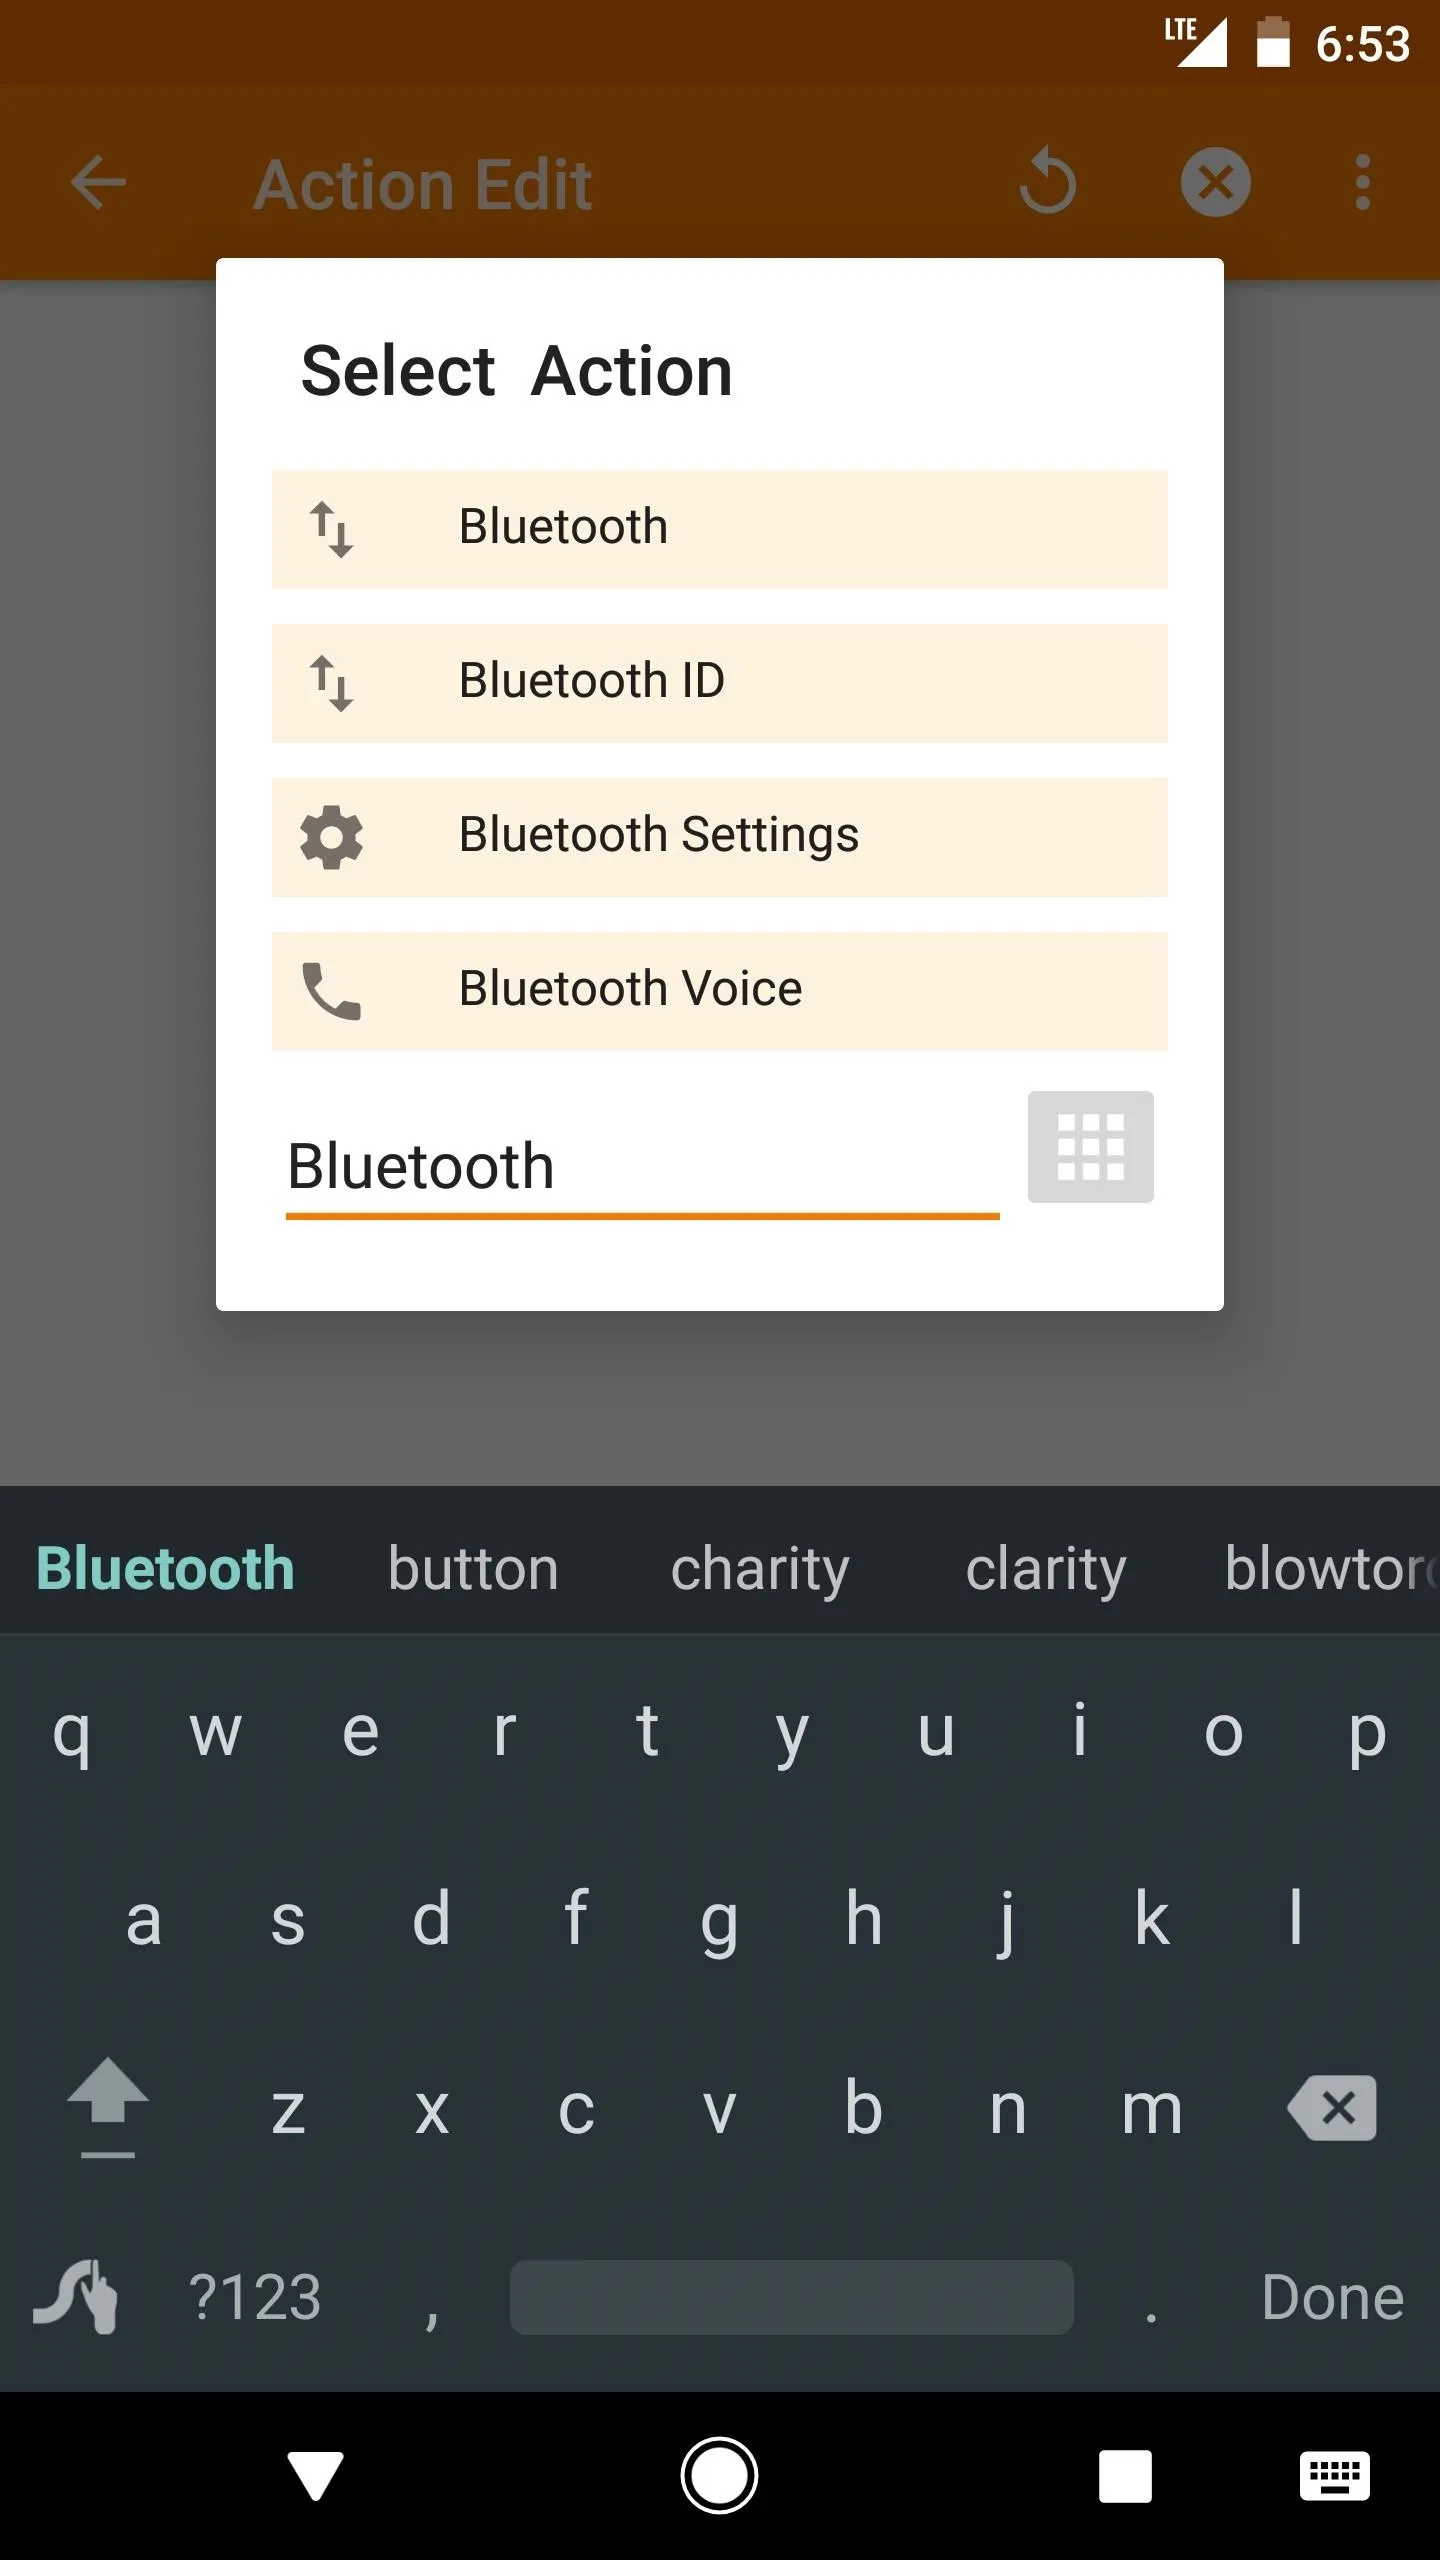


Once you've found the first action you'd like your task to perform, simply select it from the list.
Step 3: Customize the Action
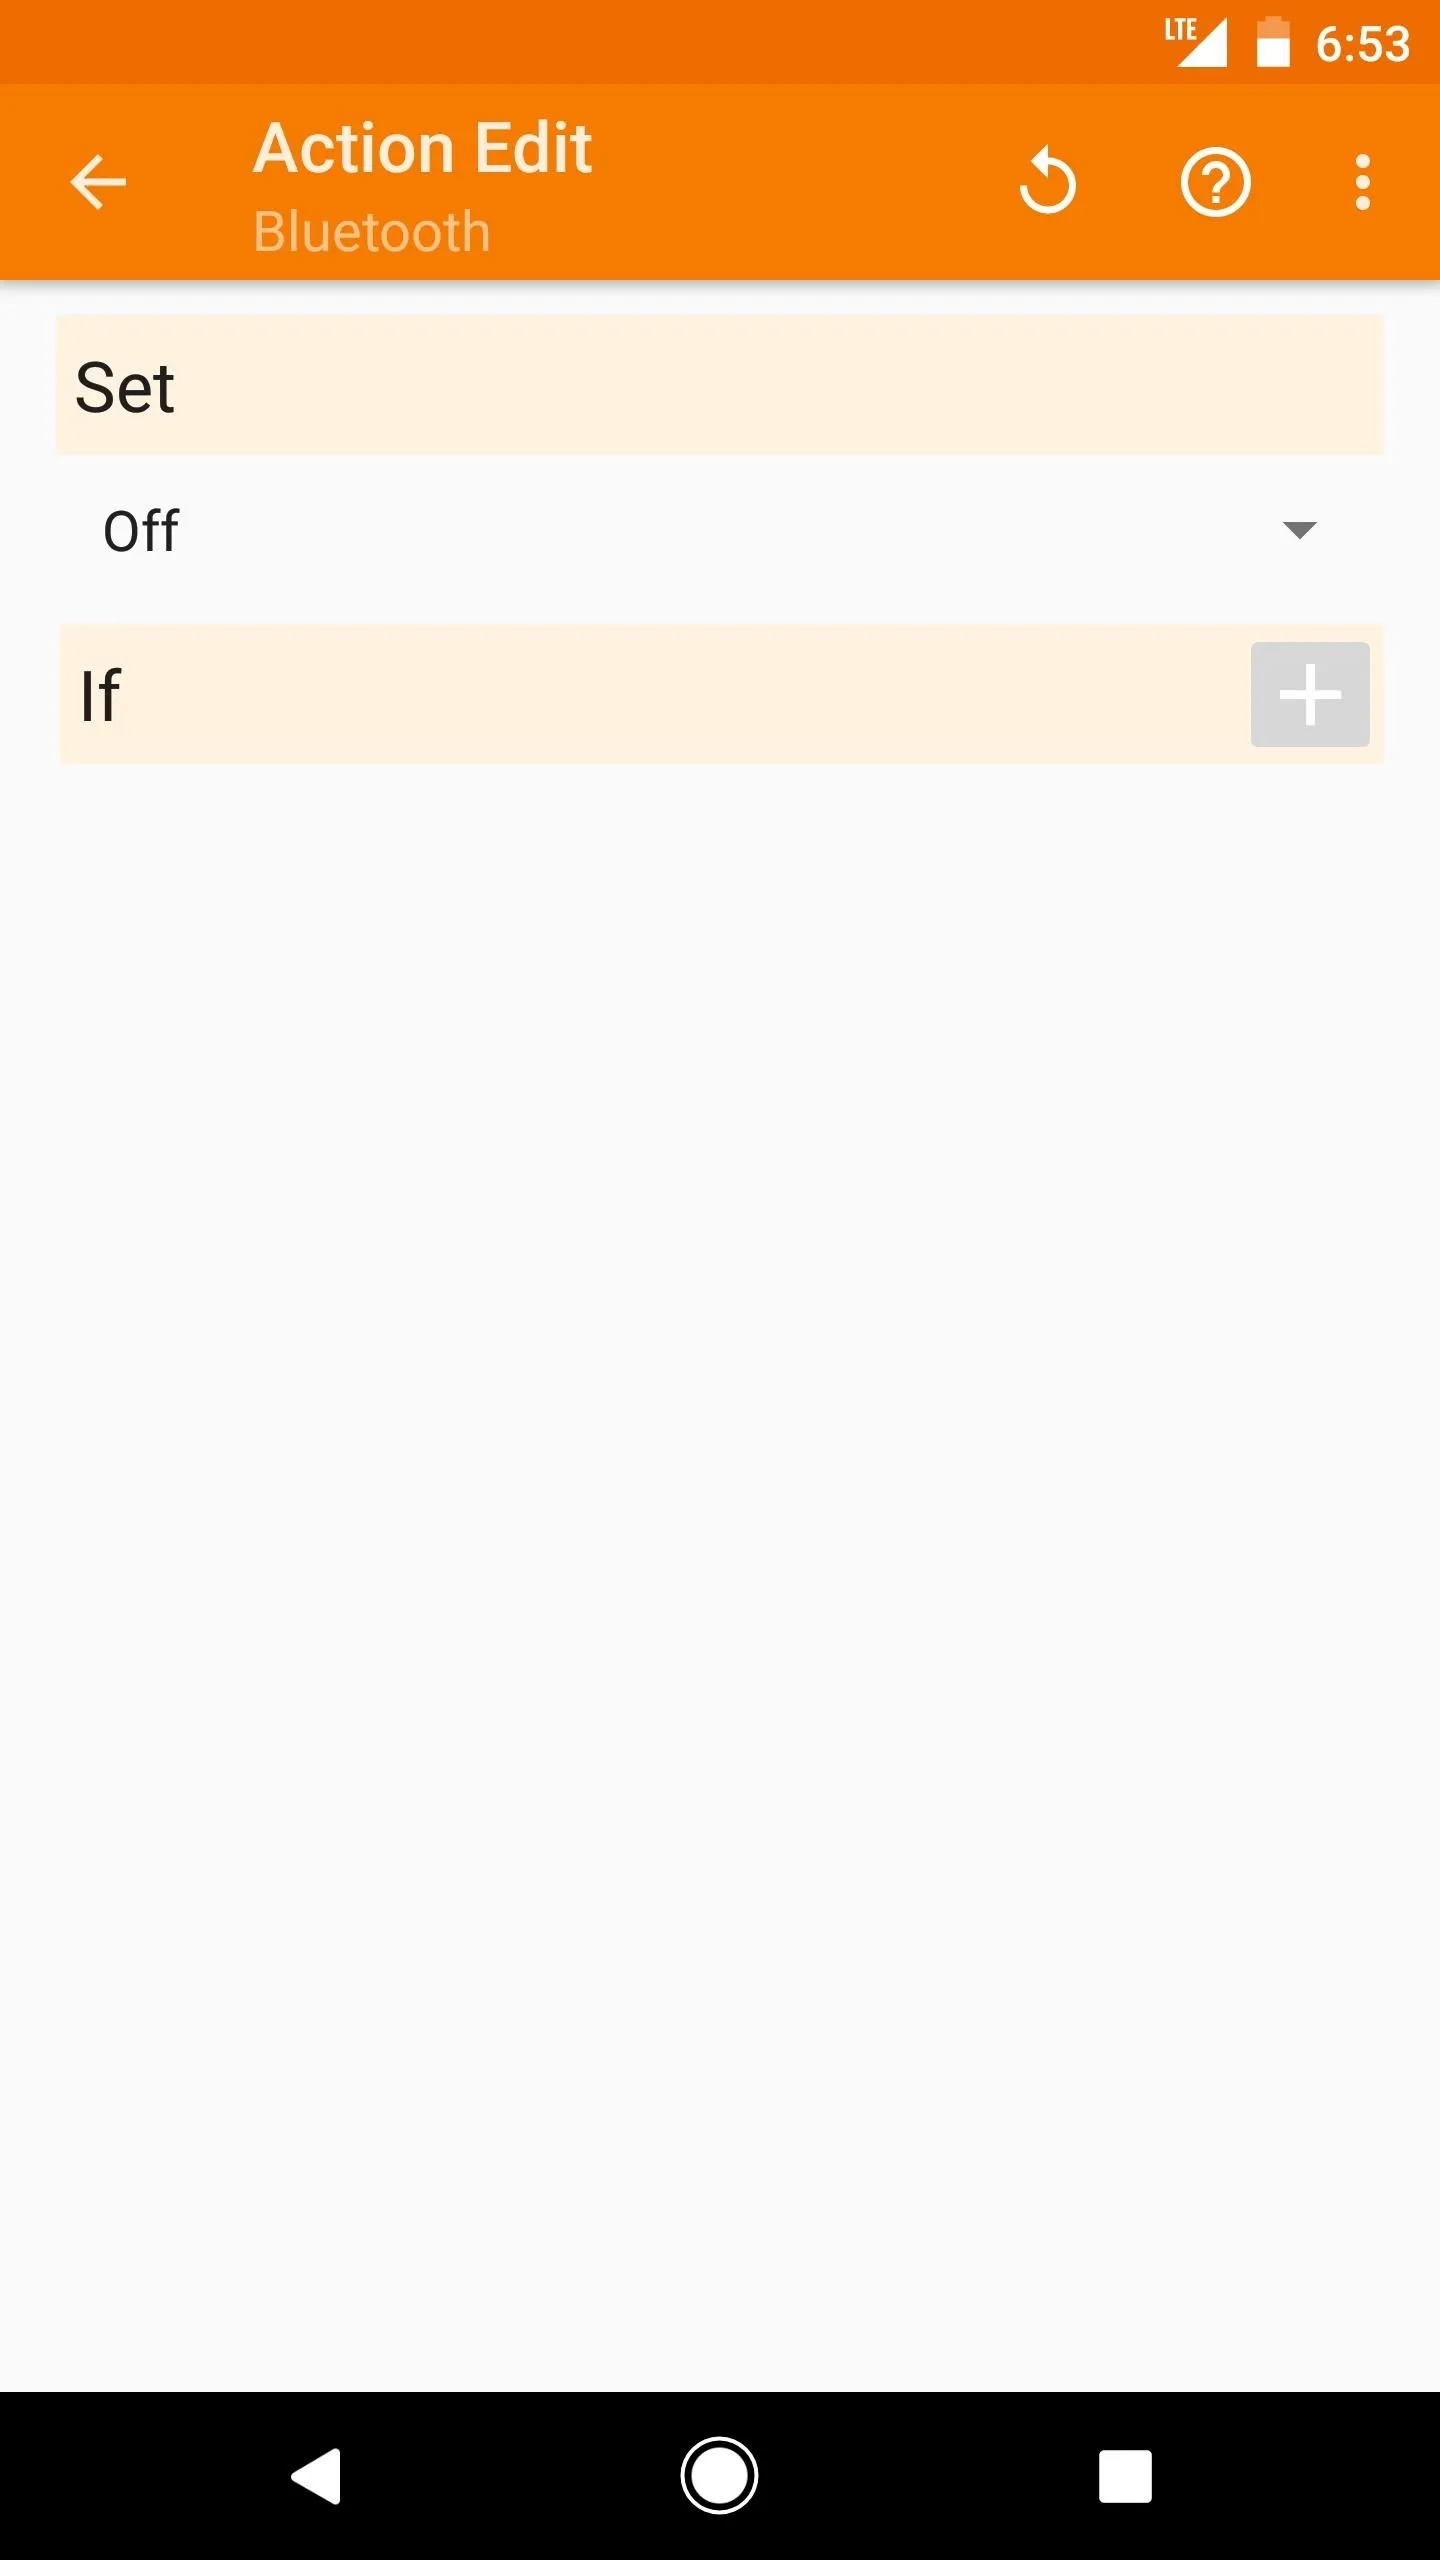
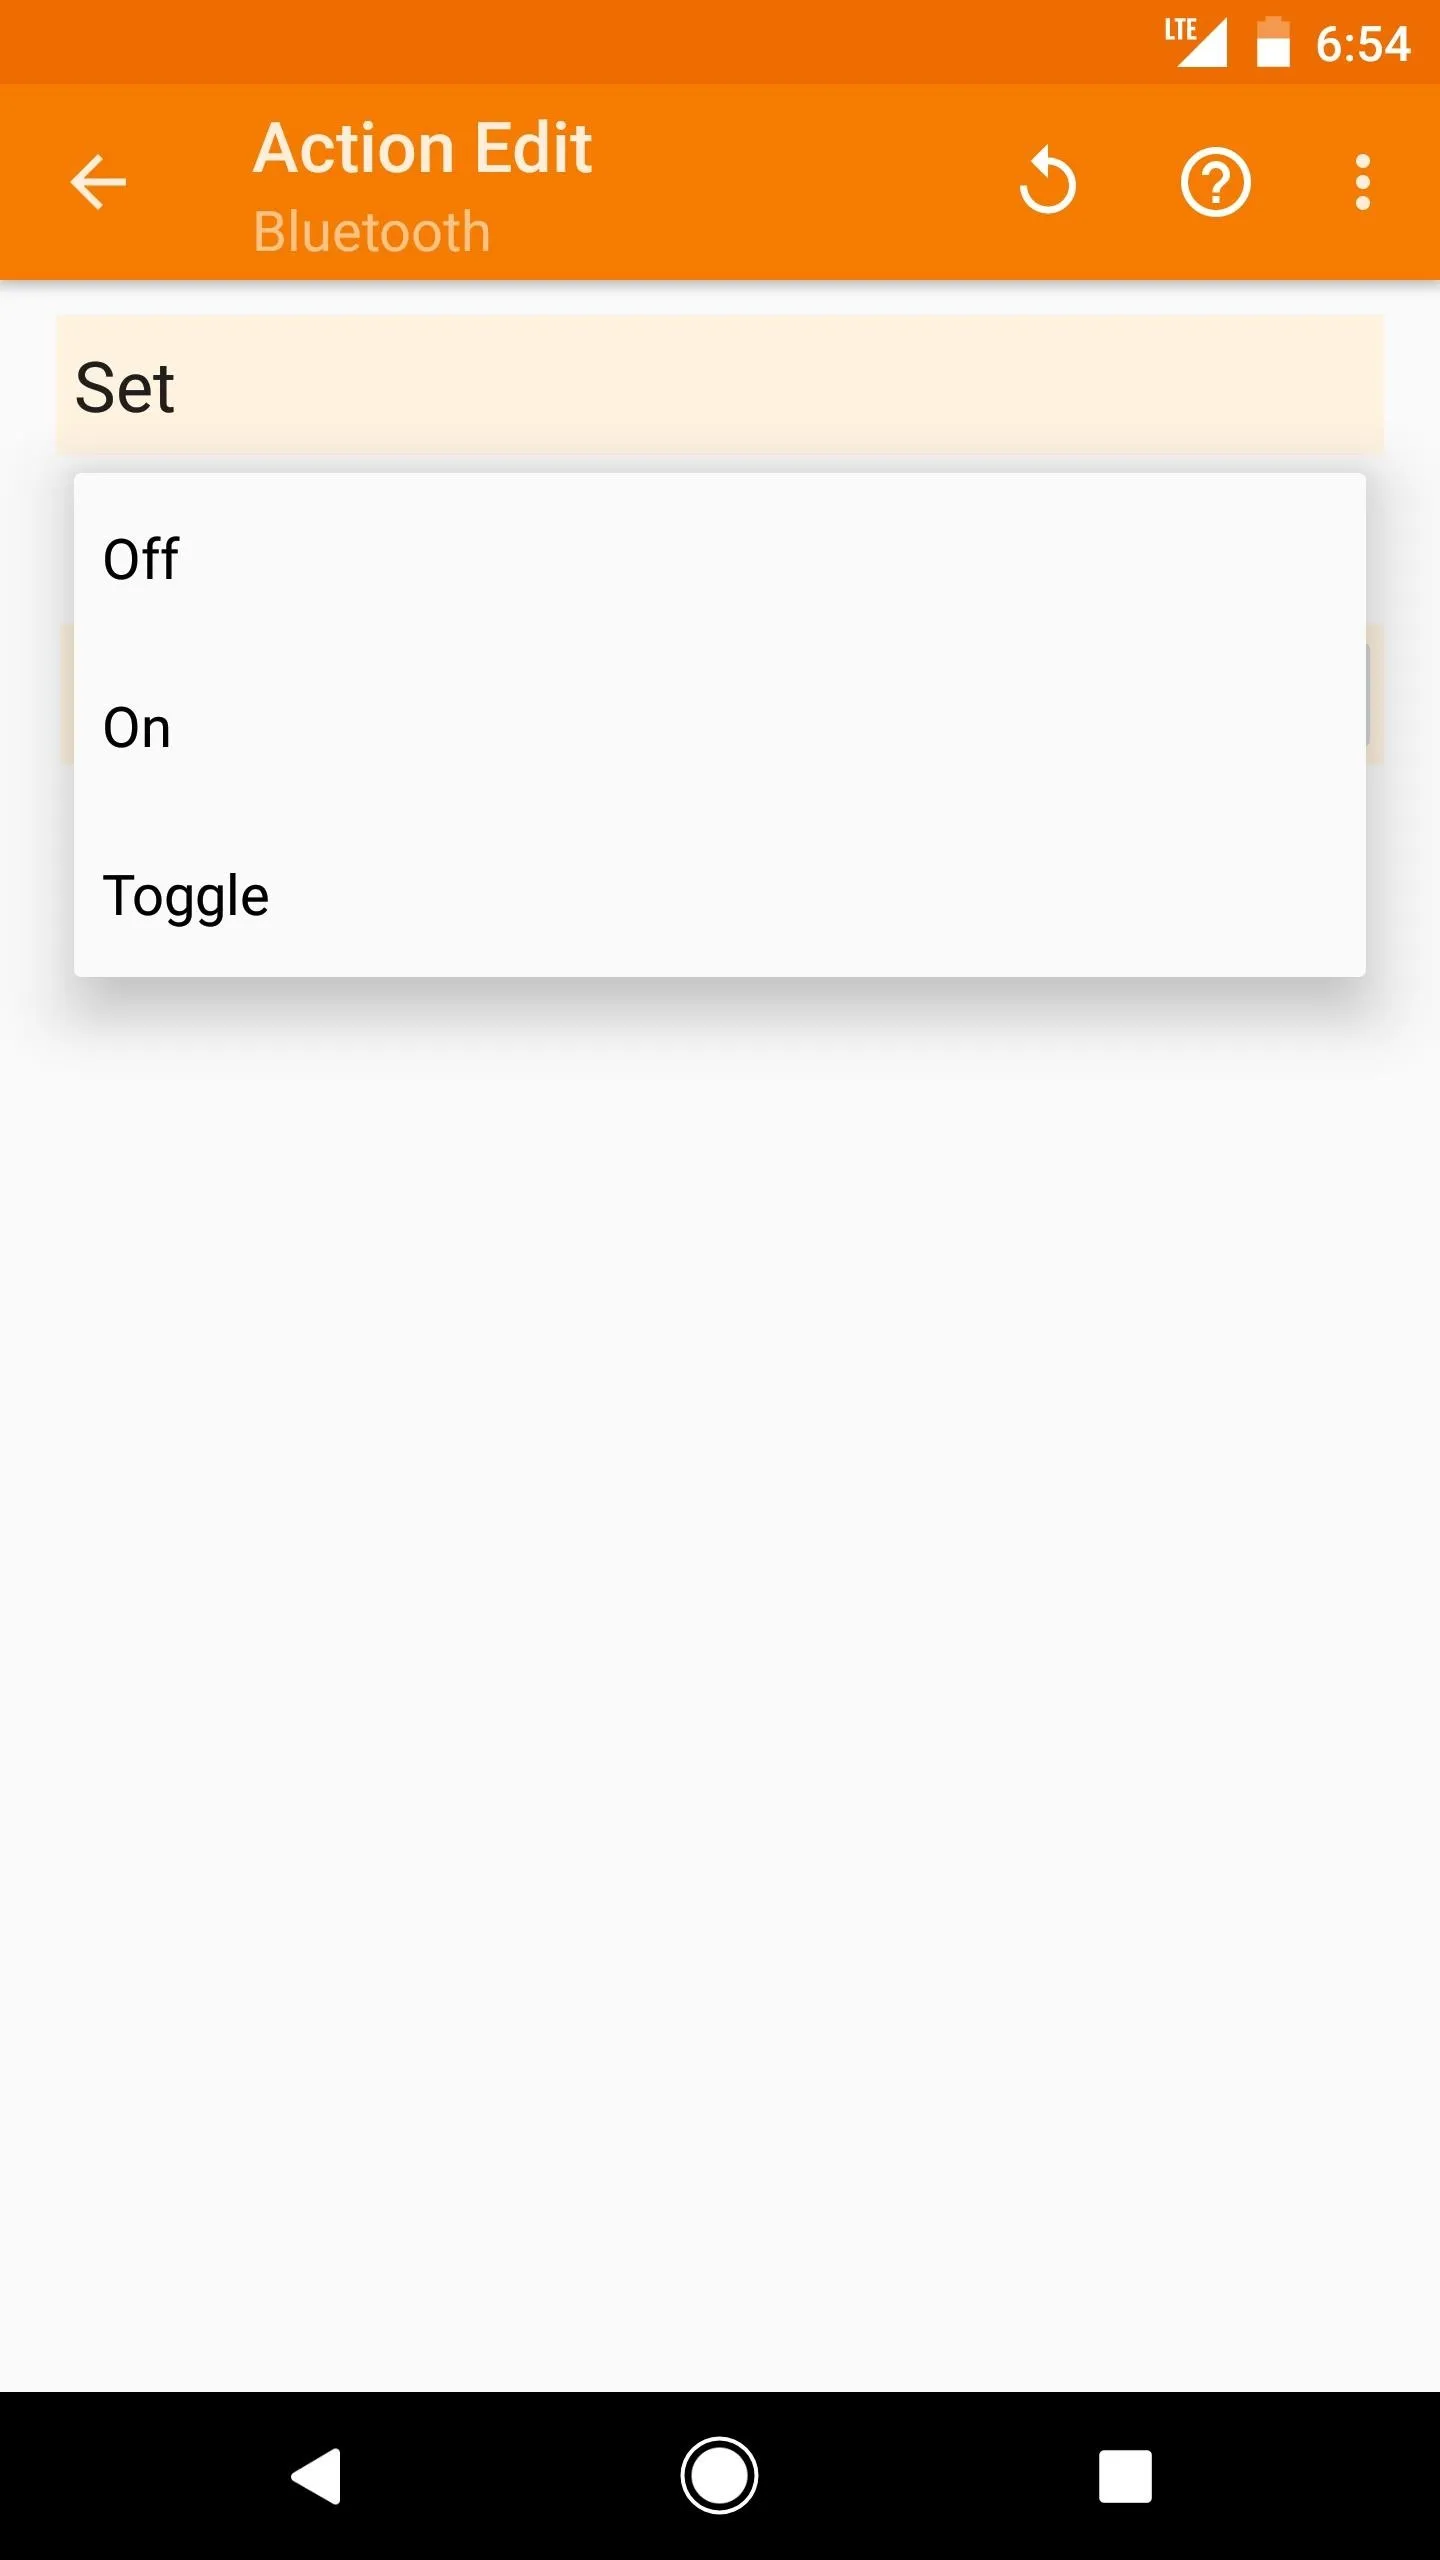
Immediately after adding an action, you'll be taken to the Action Edit screen. The options here will vary depending on which action you selected, but most should be fairly self-explanatory.
For example, I selected "Bluetooth" from the action menu, and now the Action Edit screen lets me choose whether I want this task to turn Bluetooth on, off, or simply toggle its state. So make sure this screen reflects what you want your phone to do when this action is performed, then press your device's back button once.


Step 4: Add More Actions to Your Task (Optional)
Next, you'll be taken back to the Task Edit screen. Just like with Step 2, you can press the + button to add another action to your task if you'd like. You can add as many actions as you need, but keep in mind that Tasker will execute these actions in sequential order. If you added an action in the wrong place, you can drag the list entries to reorder them.
Step 5: Give Your Task an Icon (Optional)
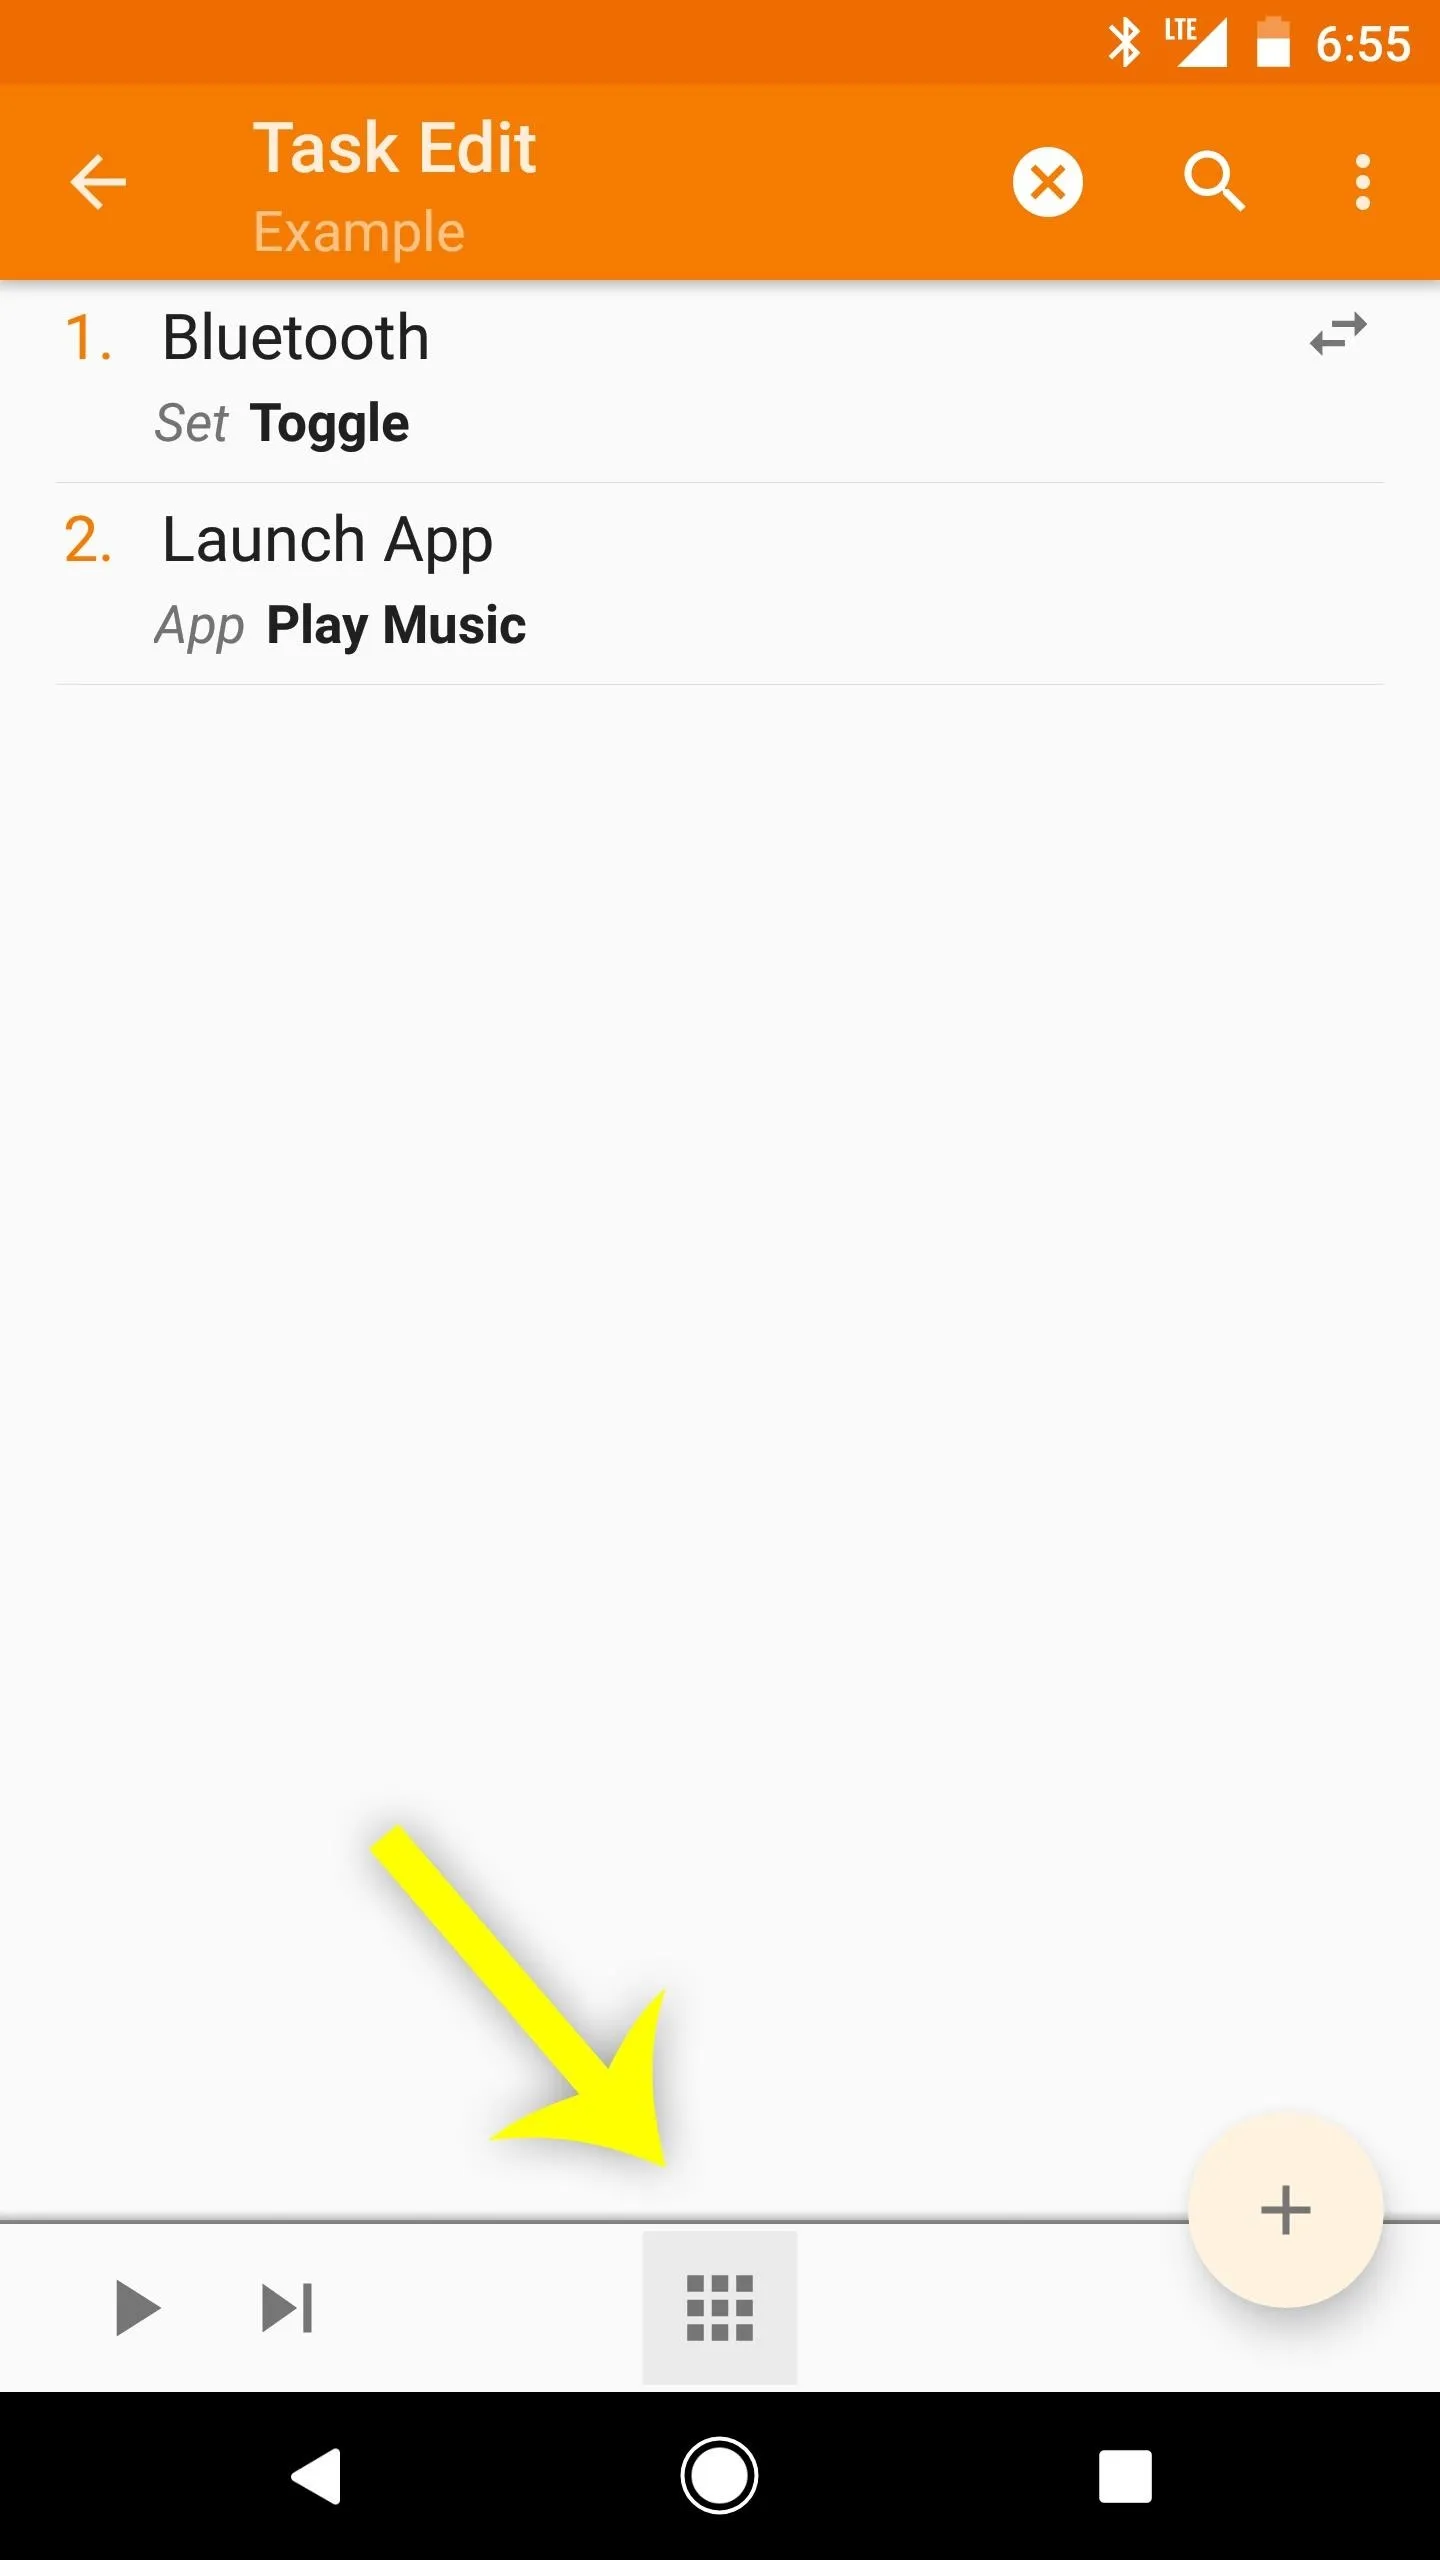
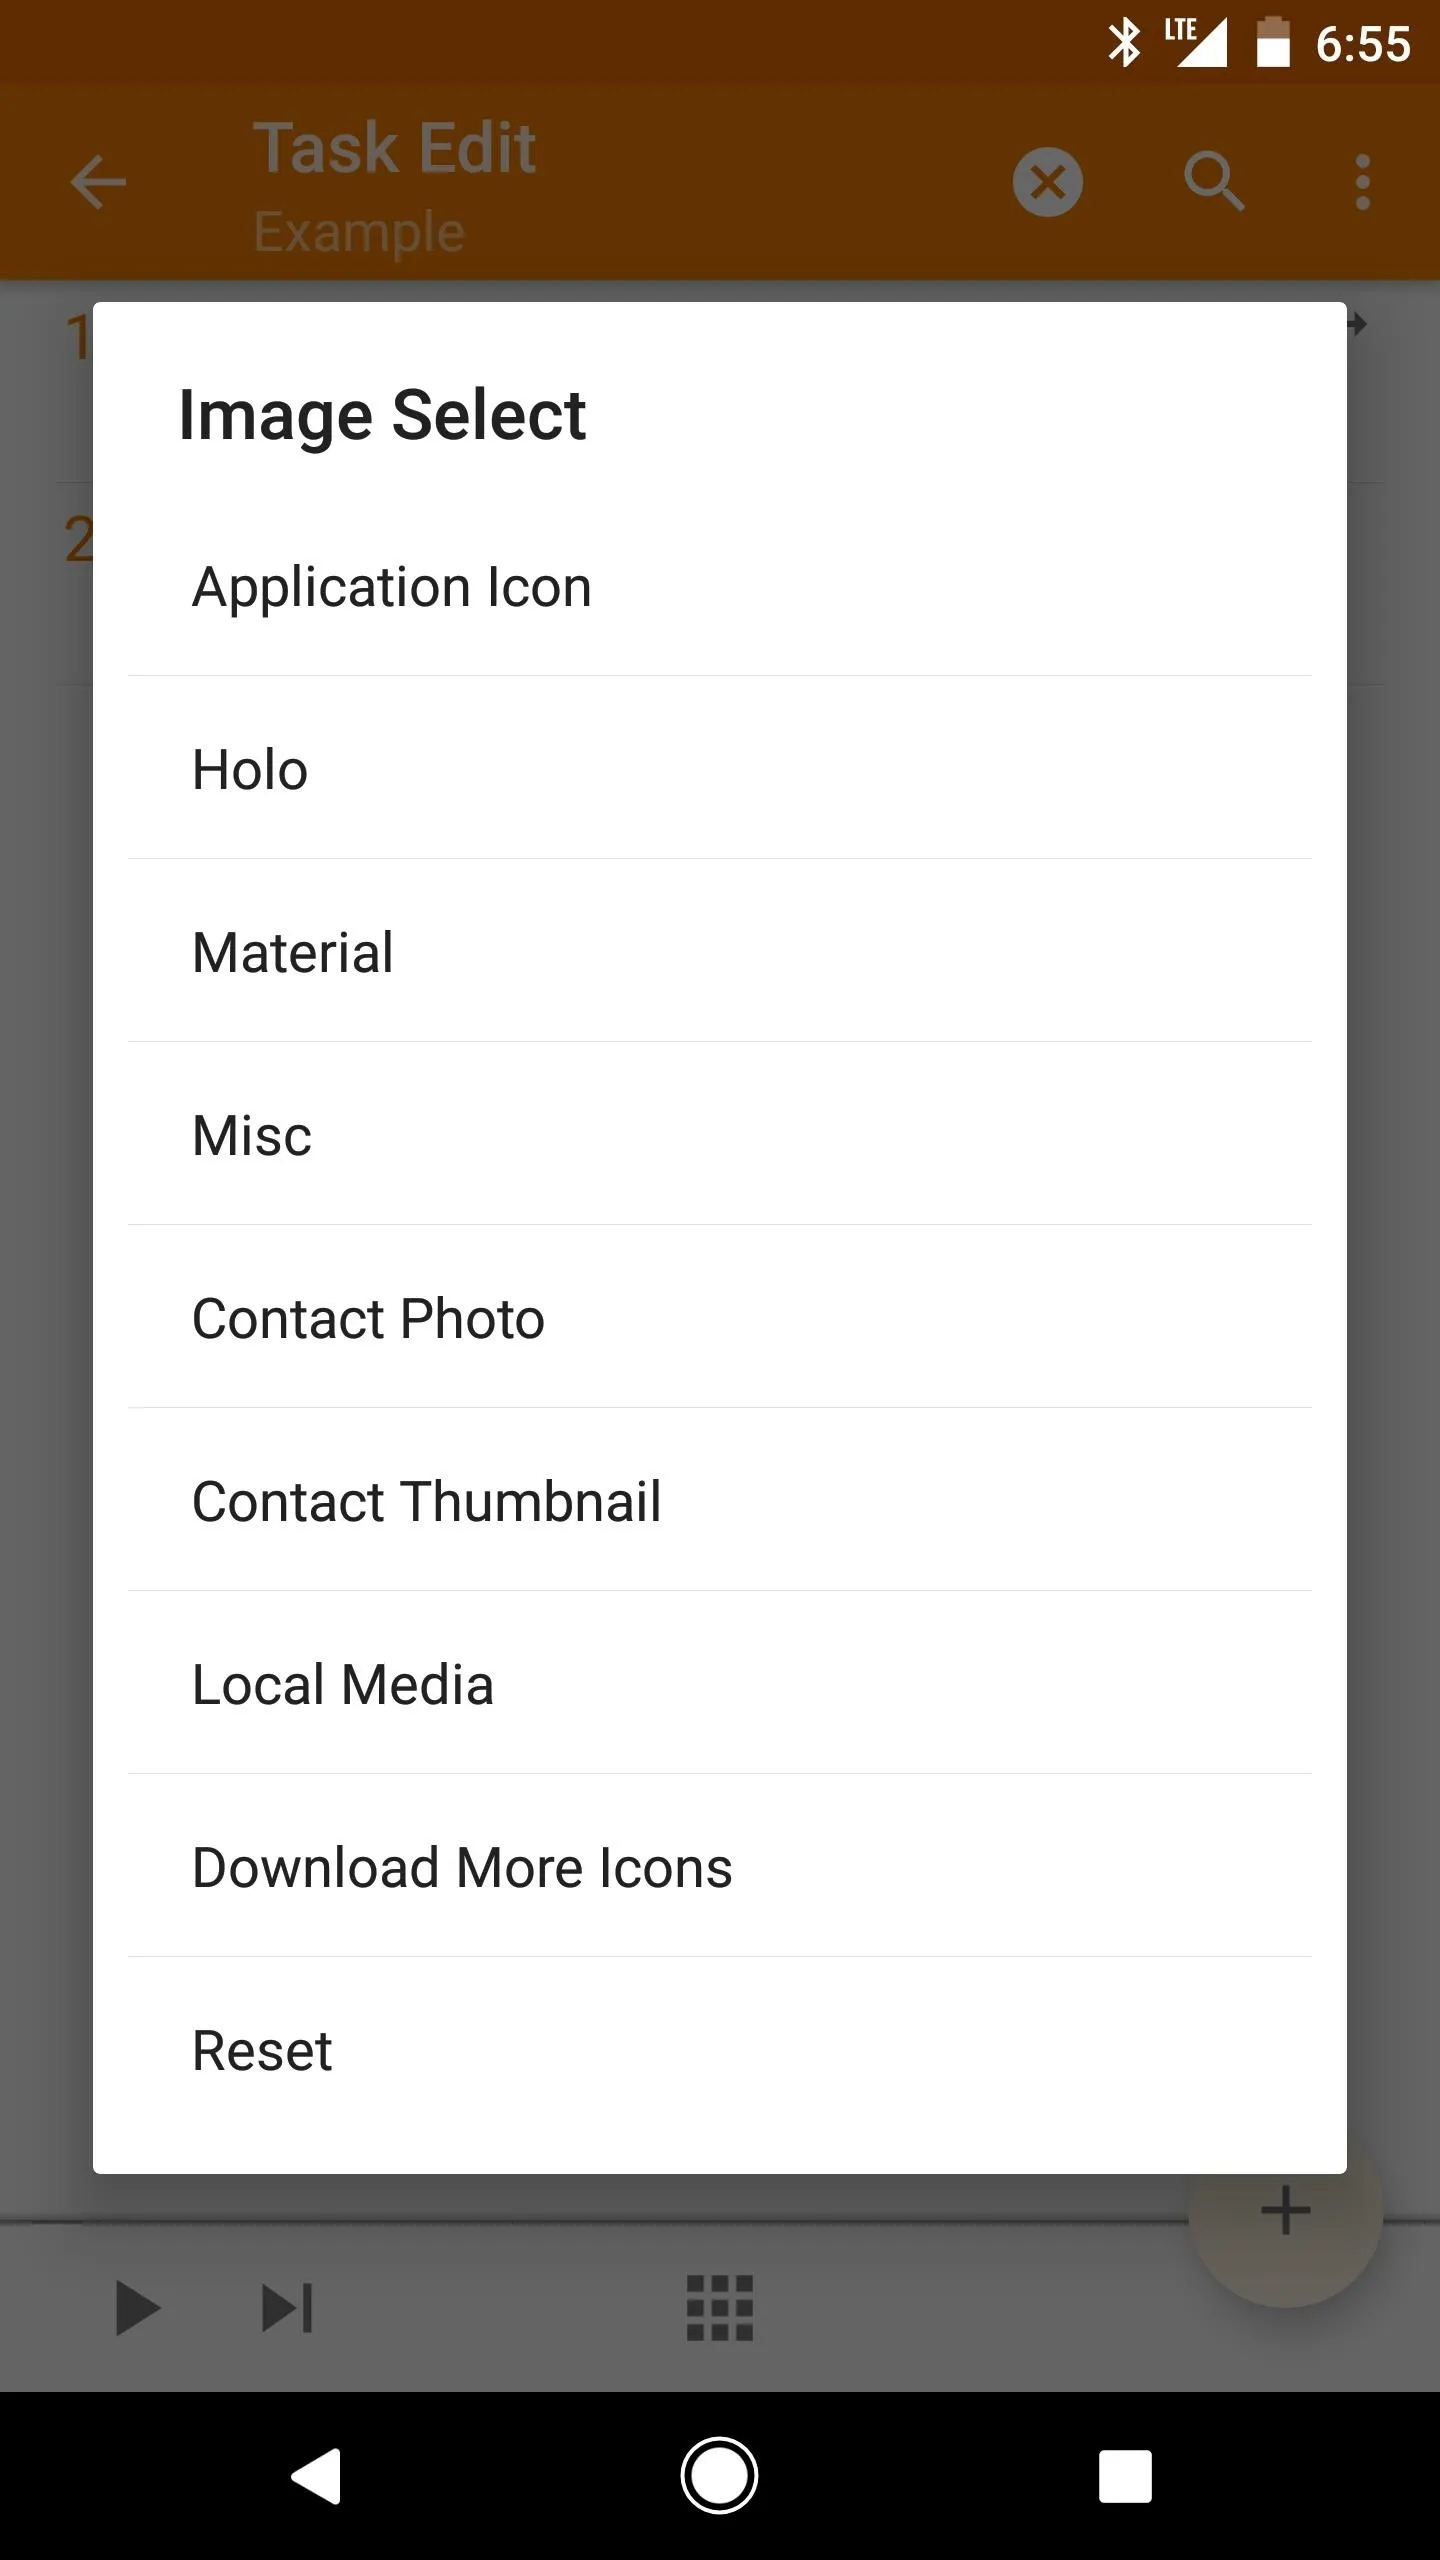
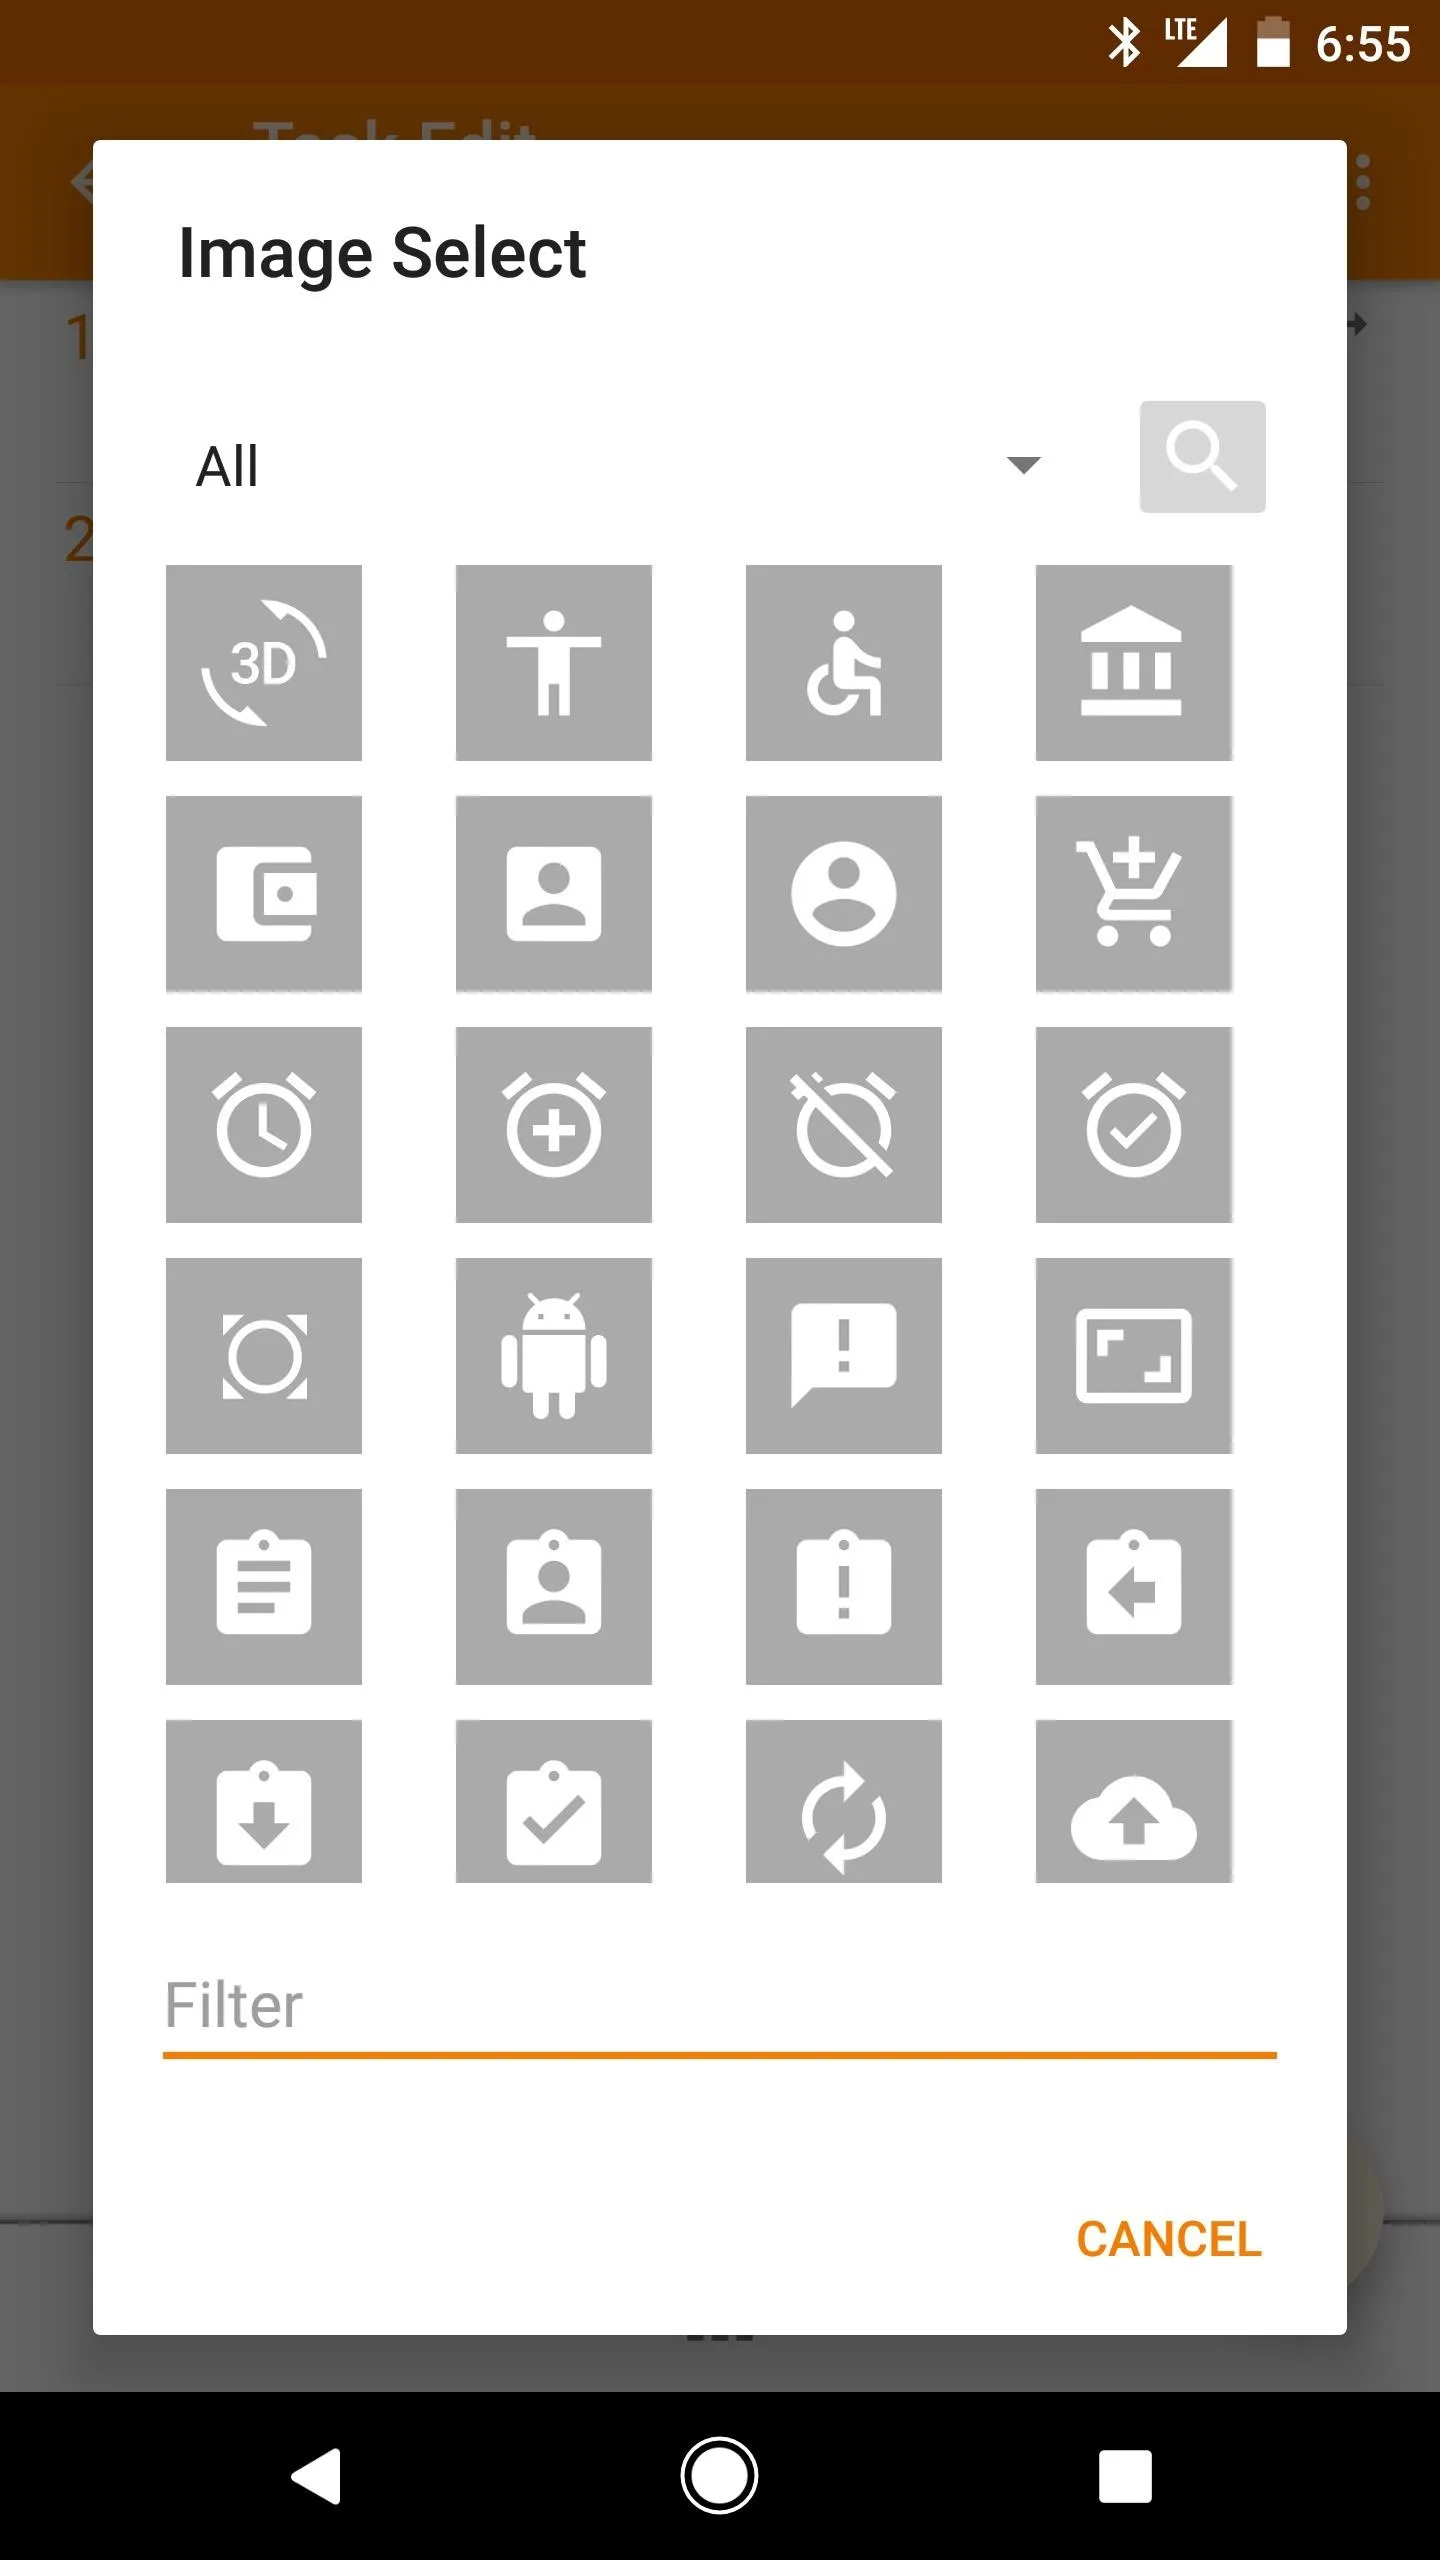
Once you've added all necessary actions to your task, it's good practice to give your task an icon. This is required if you want to create a home screen shortcut that runs this task, as well as several other scenarios when an external (non-Tasker app) runs your task.
To do so, tap the grid icon at the bottom of the Task Edit screen. From there, Tasker offers several categories of icons to use, so select one, then tap an icon to associate it with this task.


Step 6: Test Your Task
With everything set up now, all that's left to do is to double-check your work. From the Task Edit screen, tap the play icon in the bottom-left corner to test your task. If the task works as intended, you're all set to go — just back all the way out of Tasker to finalize your work. Otherwise, now's the time to troubleshoot with your actions to get the task up and running properly.
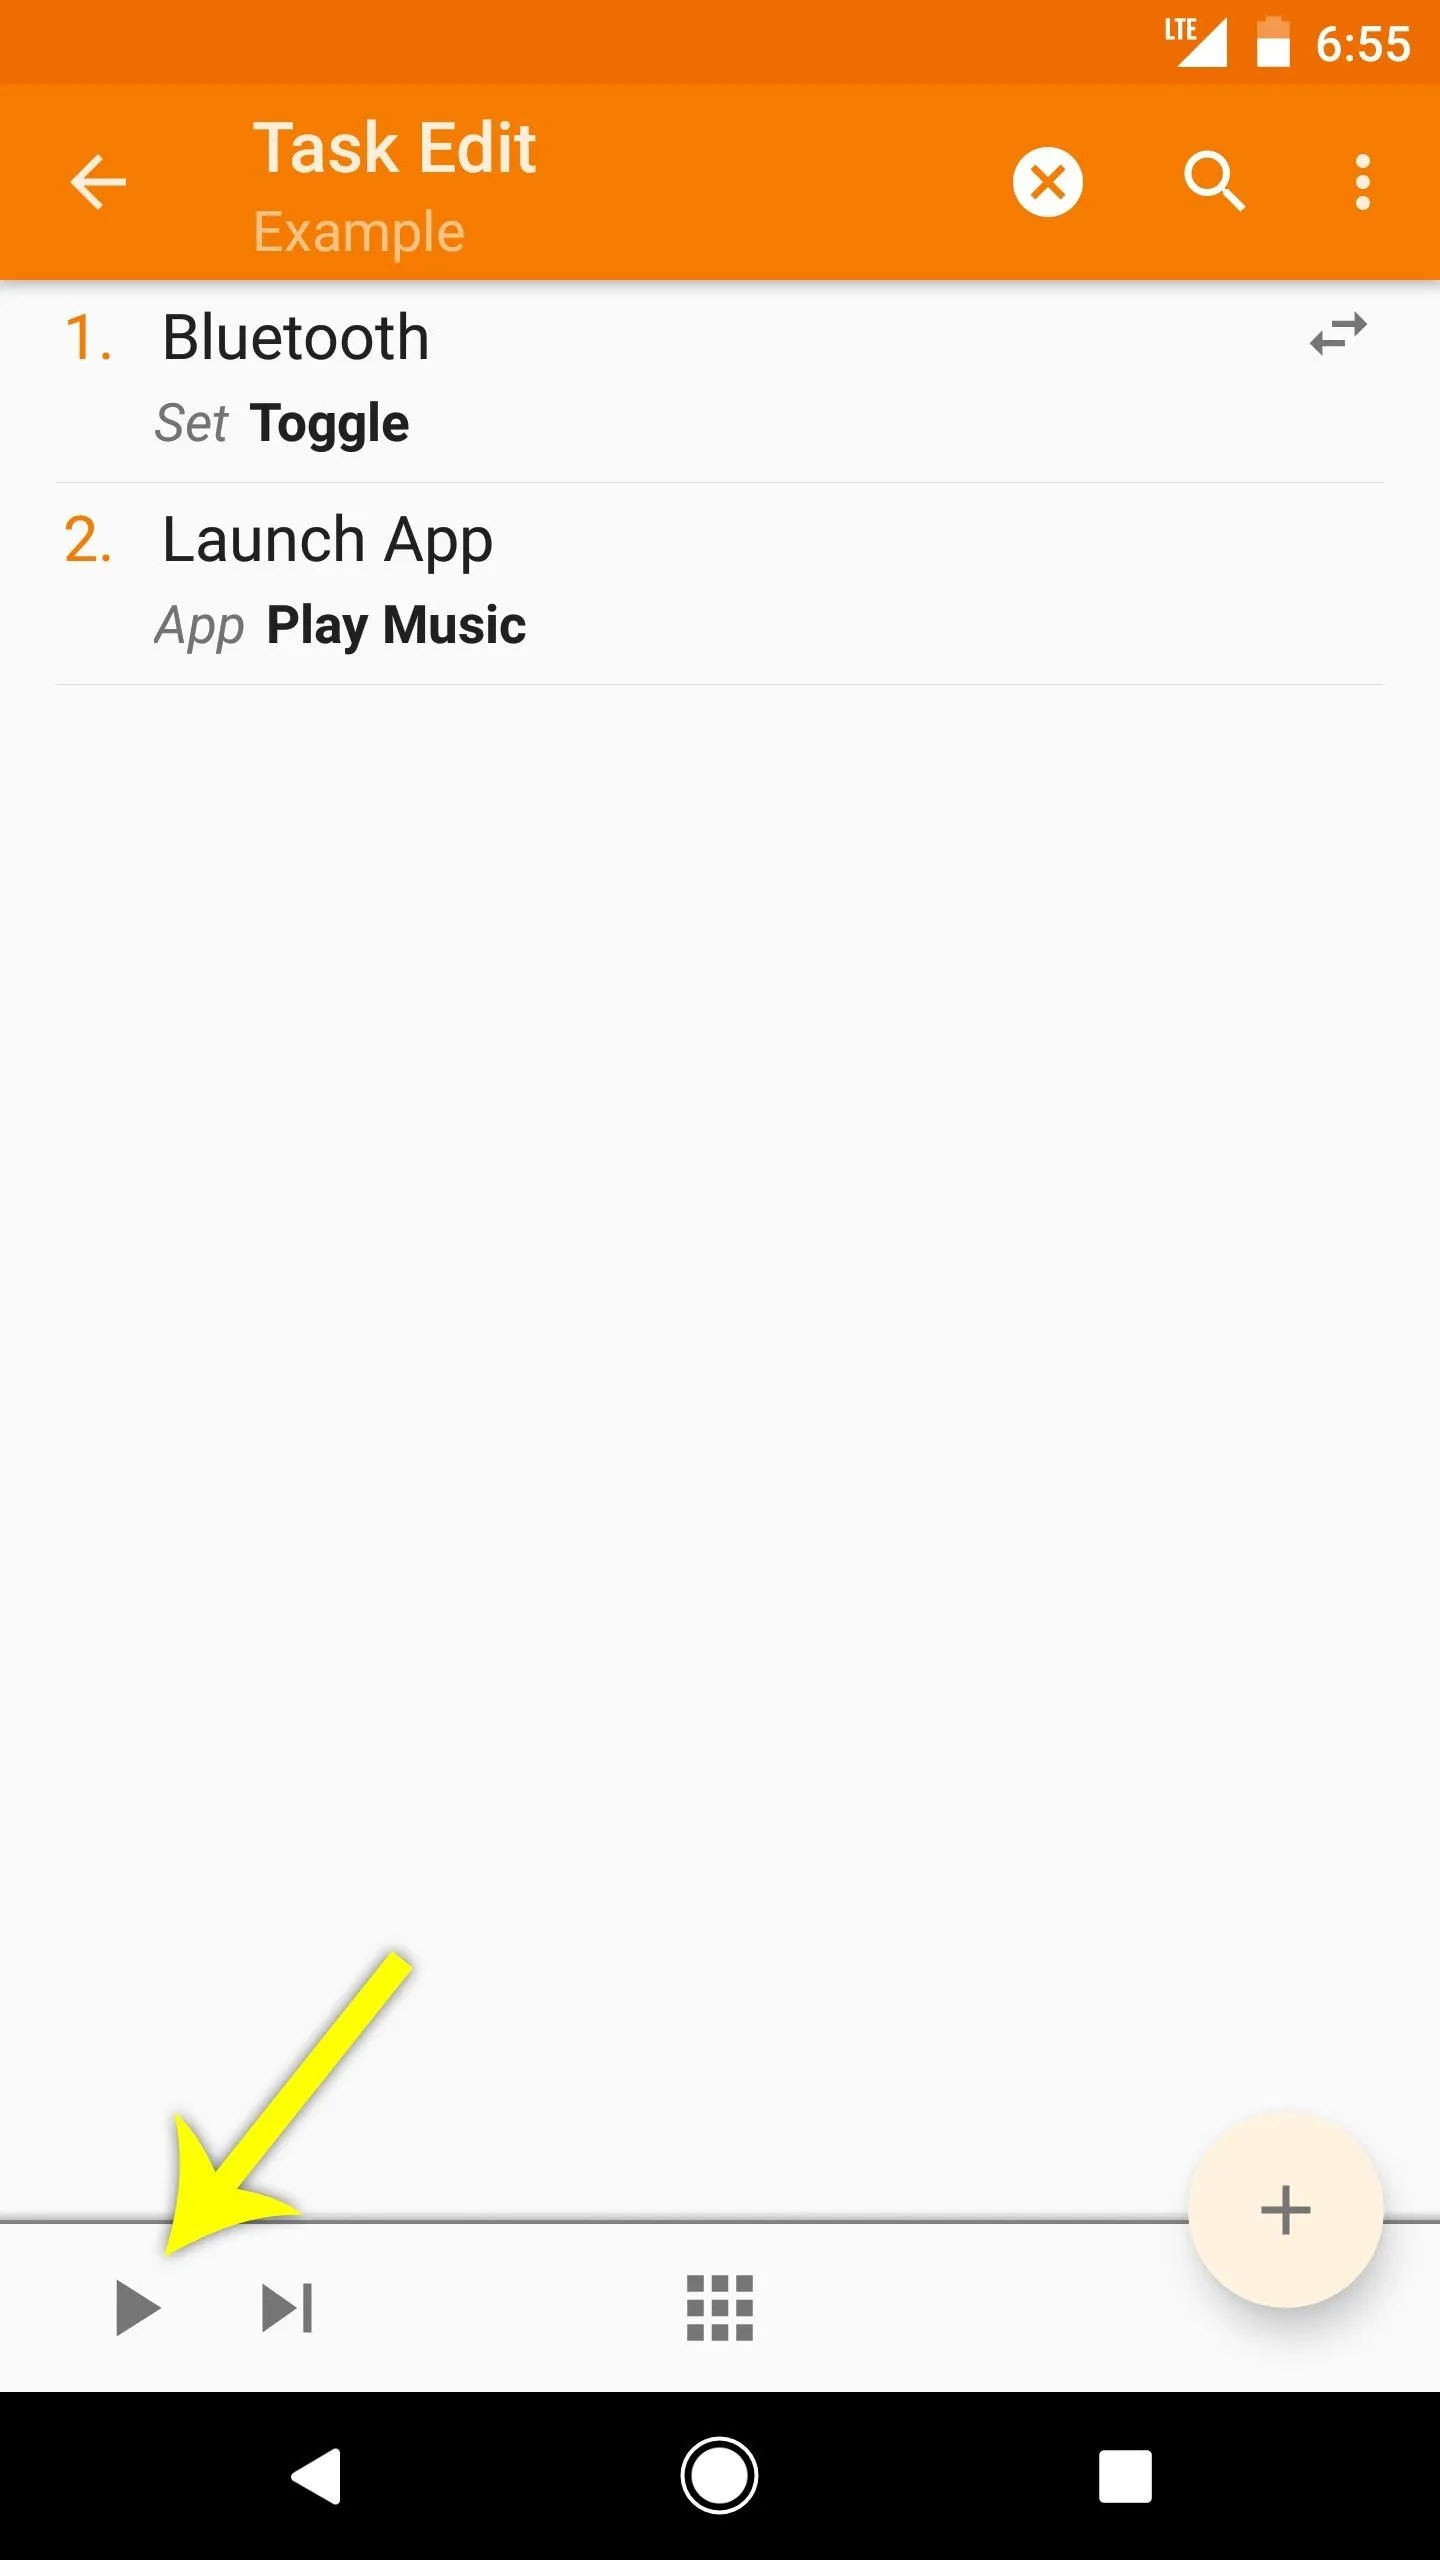
My example task performing as intended: Bluetooth turned on and the Play Music app opened.
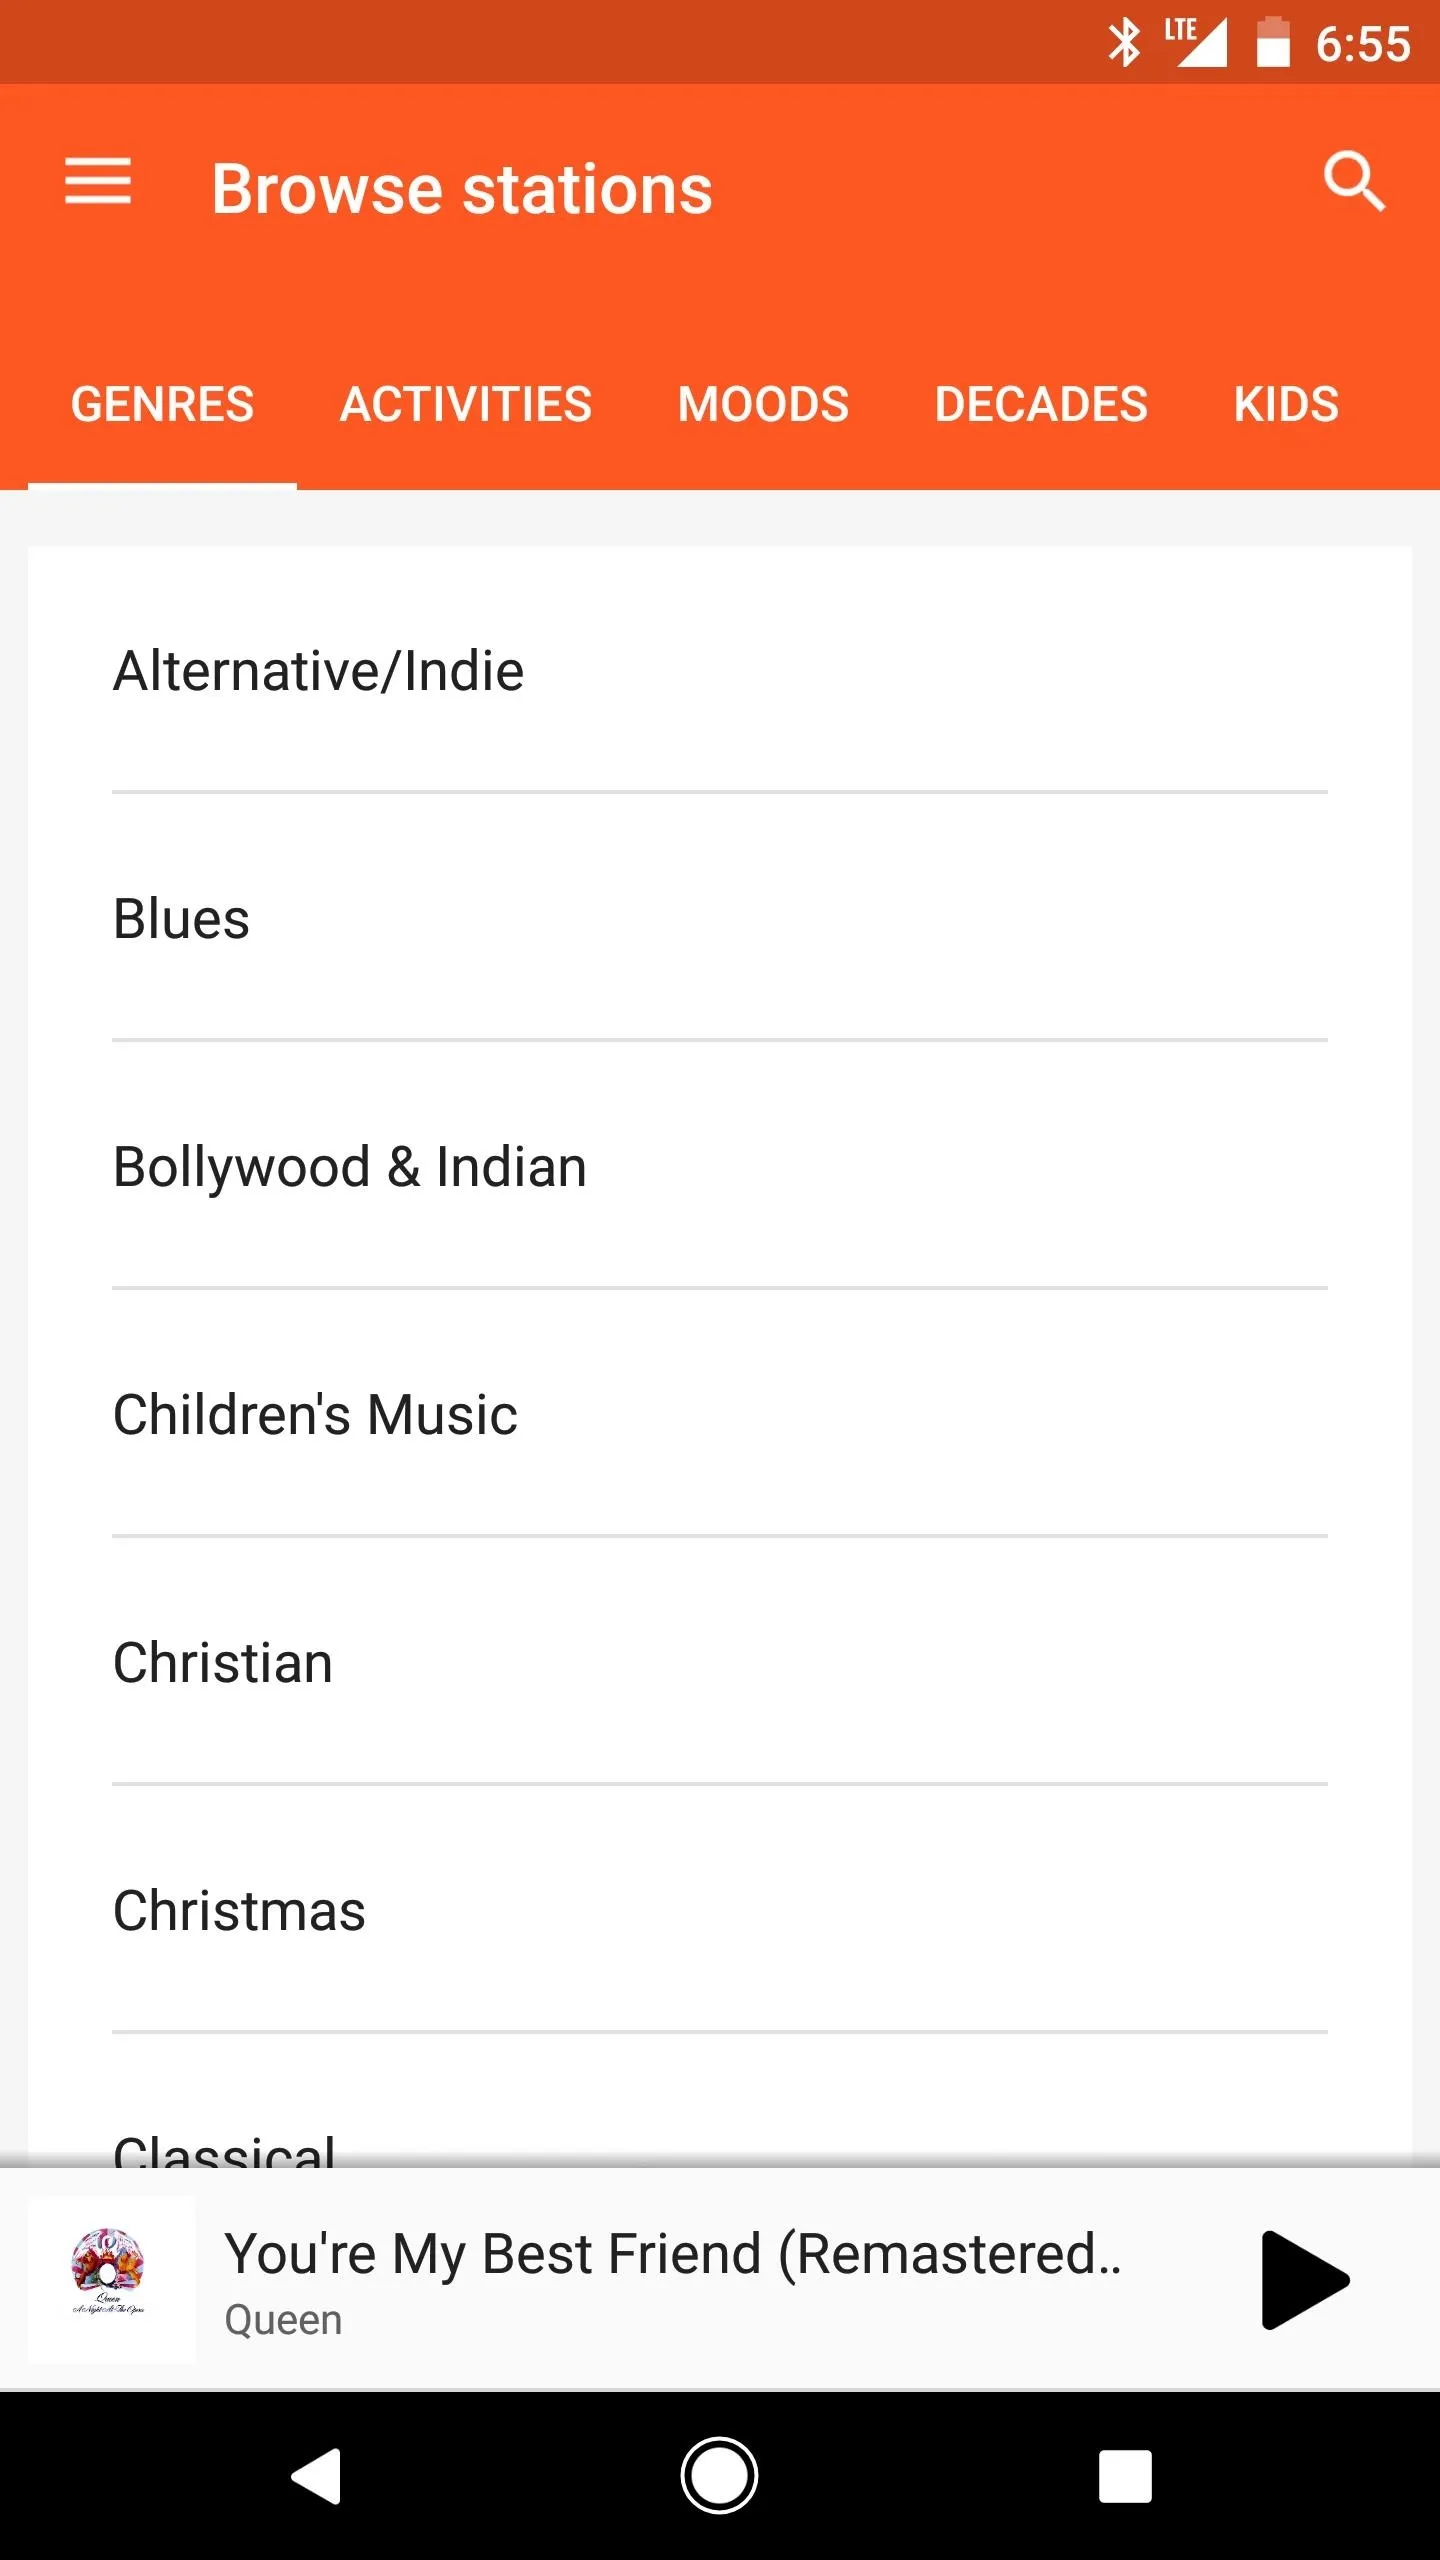

My example task performing as intended: Bluetooth turned on and the Play Music app opened.

Once your task has been tested and shown to work correctly, you're ready to associate it with a profile to fully automate the actions you selected. We'll post a guide on creating profiles soon, but in the meantime, share your thoughts or ask any questions in the comment section below.
- Follow Gadget Hacks on Facebook, Twitter, Google+, YouTube, and Instagram
- Follow WonderHowTo on Facebook, Twitter, Pinterest, and Google+
Cover image and screenshots by Dallas Thomas/Gadget Hacks


Comments
No Comments Exist
Be the first, drop a comment!