Everyone's been talking about Samsung's new Galaxy S8 and S8+, but not all of the chatter is positive. The fingerprint scanner is in an awkward location, the North American variant is simply not as smooth and fluid as the international model, and Samsung Experience is nothing more than TouchWiz with a bow on it. But perhaps worst of all, user reports are starting to roll in that indicate the Galaxy S8 may have a serious problem with premature screen burn-in.
The Galaxy S8's new on-screen navigation bar, which was supposed to be resistant to burn-in thanks to an algorithm put into place by Samsung, has turned out not to be. It started off with a few users who noticed burn-in after only a week but is slowly snowballing and has branched out into a couple hundred reports. However, since the Galaxy S8 and S8+ both have AMOLED screens, the burn-in can be reversed, and we here at Gadget Hacks have also figured out a way to prevent it from reoccurring. Let's take a look at how below.
Step 1: Install AMOLED Burn-in Fixer
To start off, you'll need to undo the burn-in on your phone. It's a fairly simple process which only requires the installation of an app that'll invert your screen, which forces the pixels to unstick from their current burned-in color(s). The app we'll be using is called AMOLED Burn-in Fixer, and will work on all devices with an AMOLED screen.

Once you've got the app installed, open it up and let it run until your pixels look as though they're back to normal. Depending on the severity of the screen burn-in, this could take several hours, so keep a charger handy. We also have a complete guide on installing and using the app below, so check that out if you'd prefer step-by-step instructions.
Step 2: Hide Navigation & Status Bar
After you've fixed the burnt-in pixels, you'll want to make sure the problem doesn't happen again. The easiest way to do this would be to enable always-on Immersive Mode, which will autohide your navigation and status bars to keep them from getting etched into the screen, while still giving you access to these functions by simply swiping in from the edge of your screen.
The process is fairly simple, but it does require a computer with ADB installed. We recommend hiding both the navigation and status bars since those two areas have proven to be problematic. So to ensure that the screen burn-in doesn't come back, check out the complete guide at the link below for the ADB commands to hide those bars.
Step 3: Turn Off Always On Display
This last step will reinforce the anti-burn-in steps taken in Step 2. While Samsung did claim the home button the S8 and S8+ shift a little bit to prevent burn-in, what about Always On Display? Does the home button shift there too, or does it just stay static? Either way, we're going to turn off AOD since it does constantly show the home button (which appears to stay in the same spot).
So head to Settings and tap on "Lock screen and security." Scroll down a little bit to "Always On Display," and tap on the toggle right there or open up the menu and hit the toggle on top. Either way, AOD will have successfully turned off.
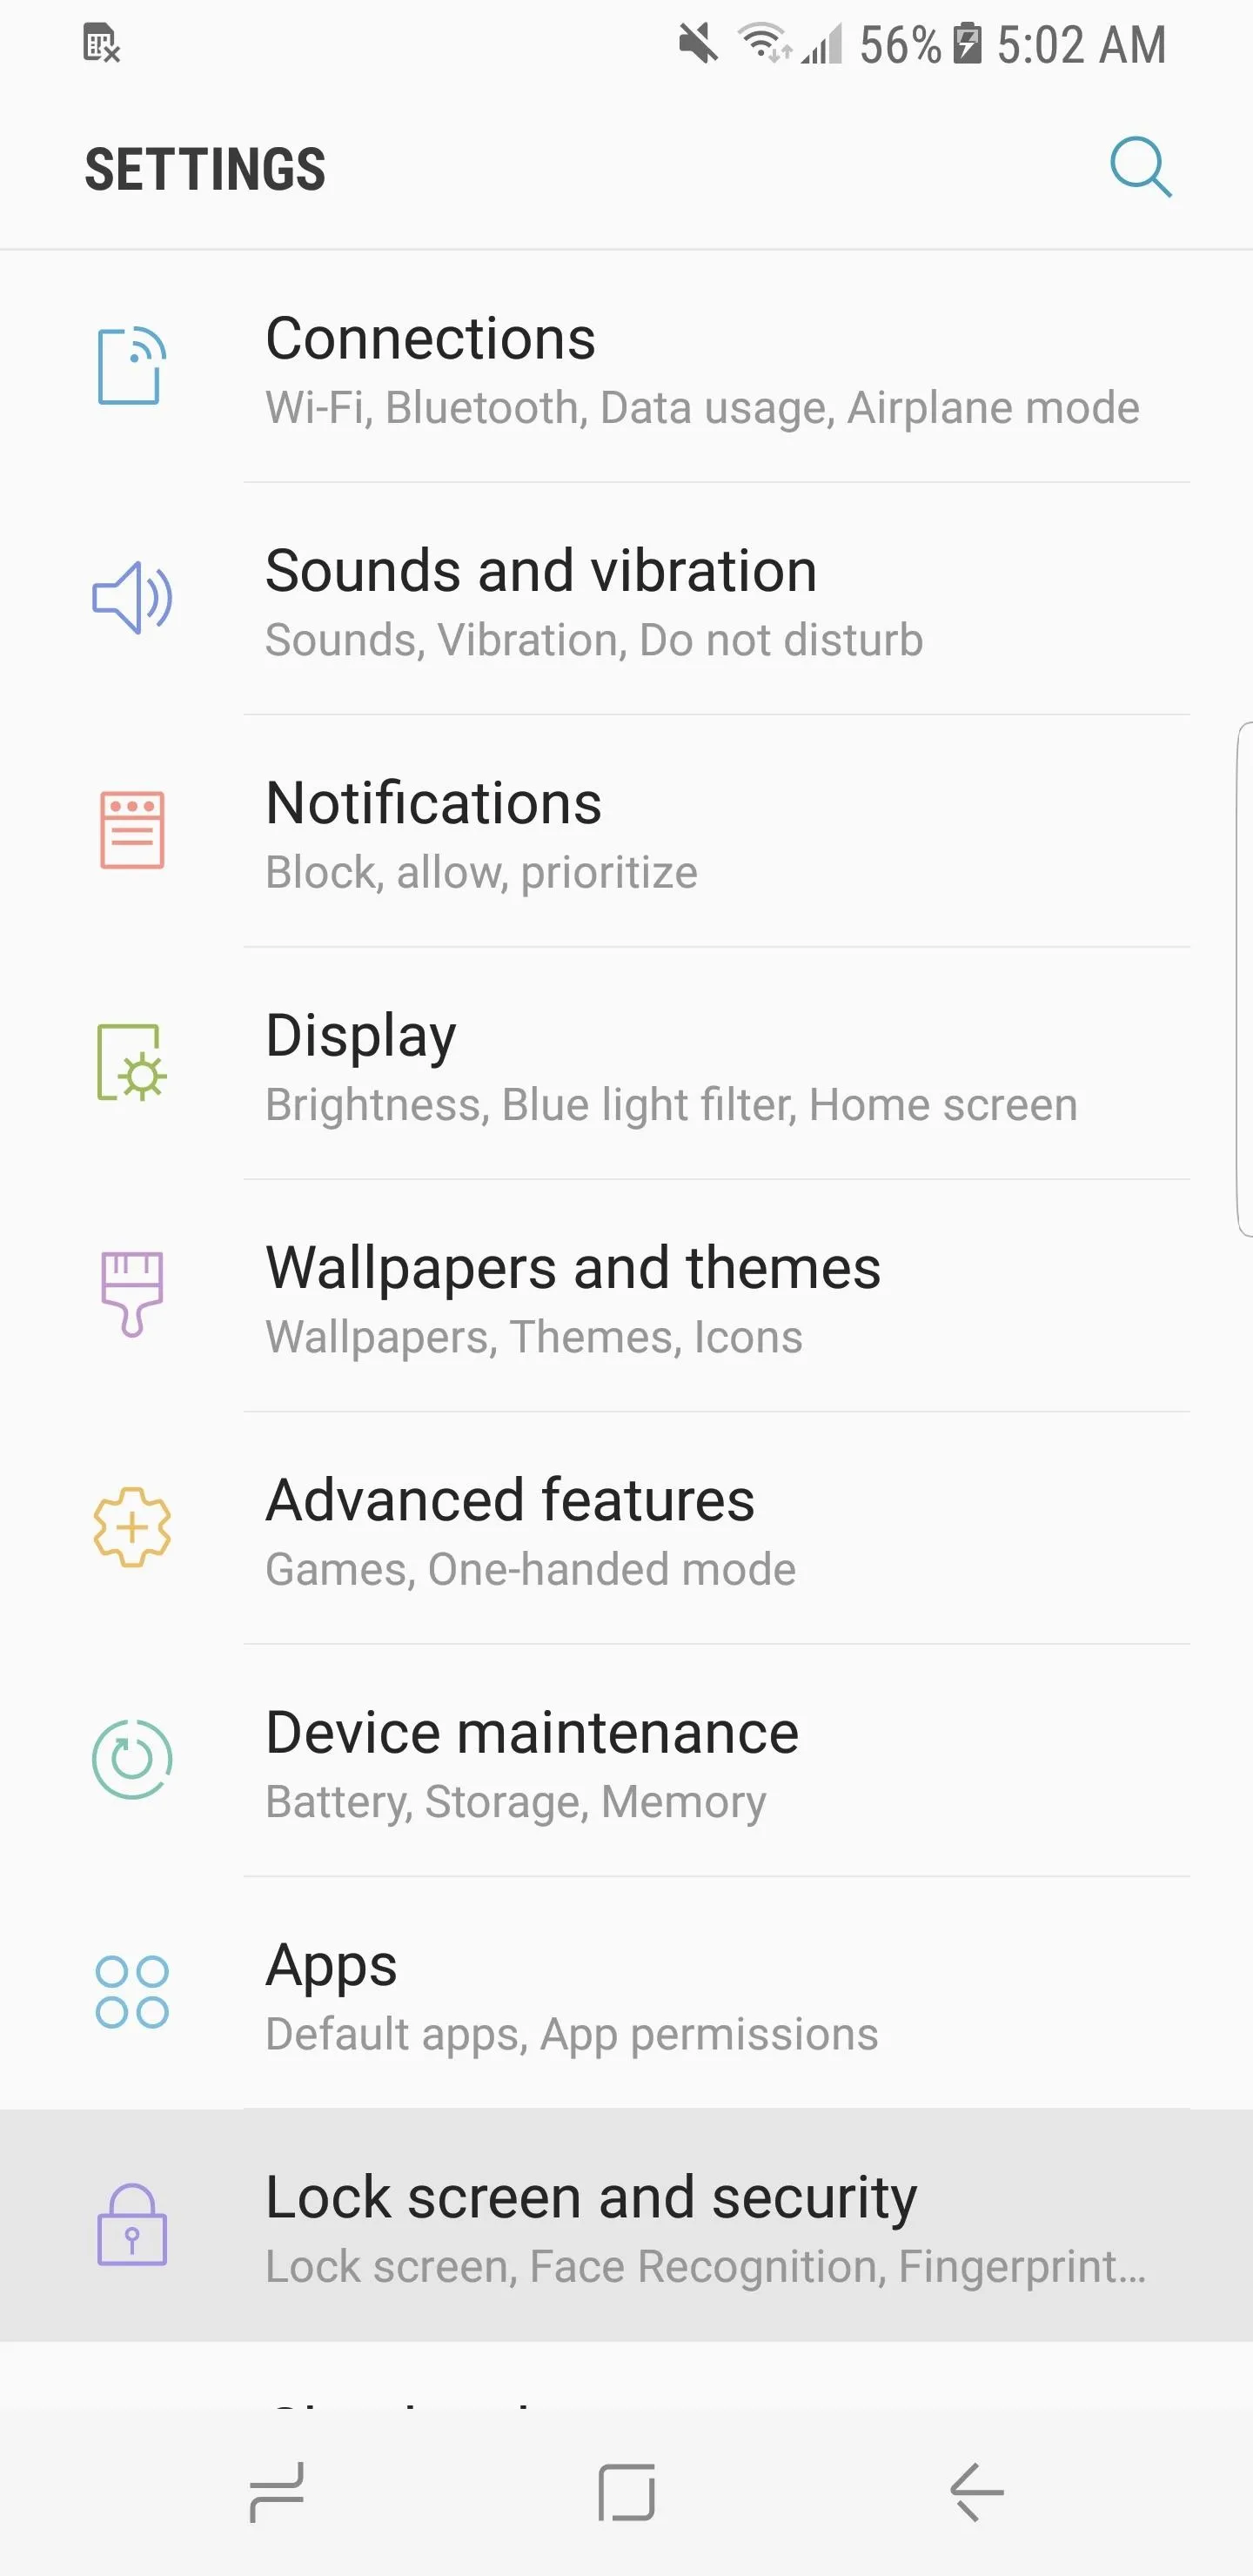
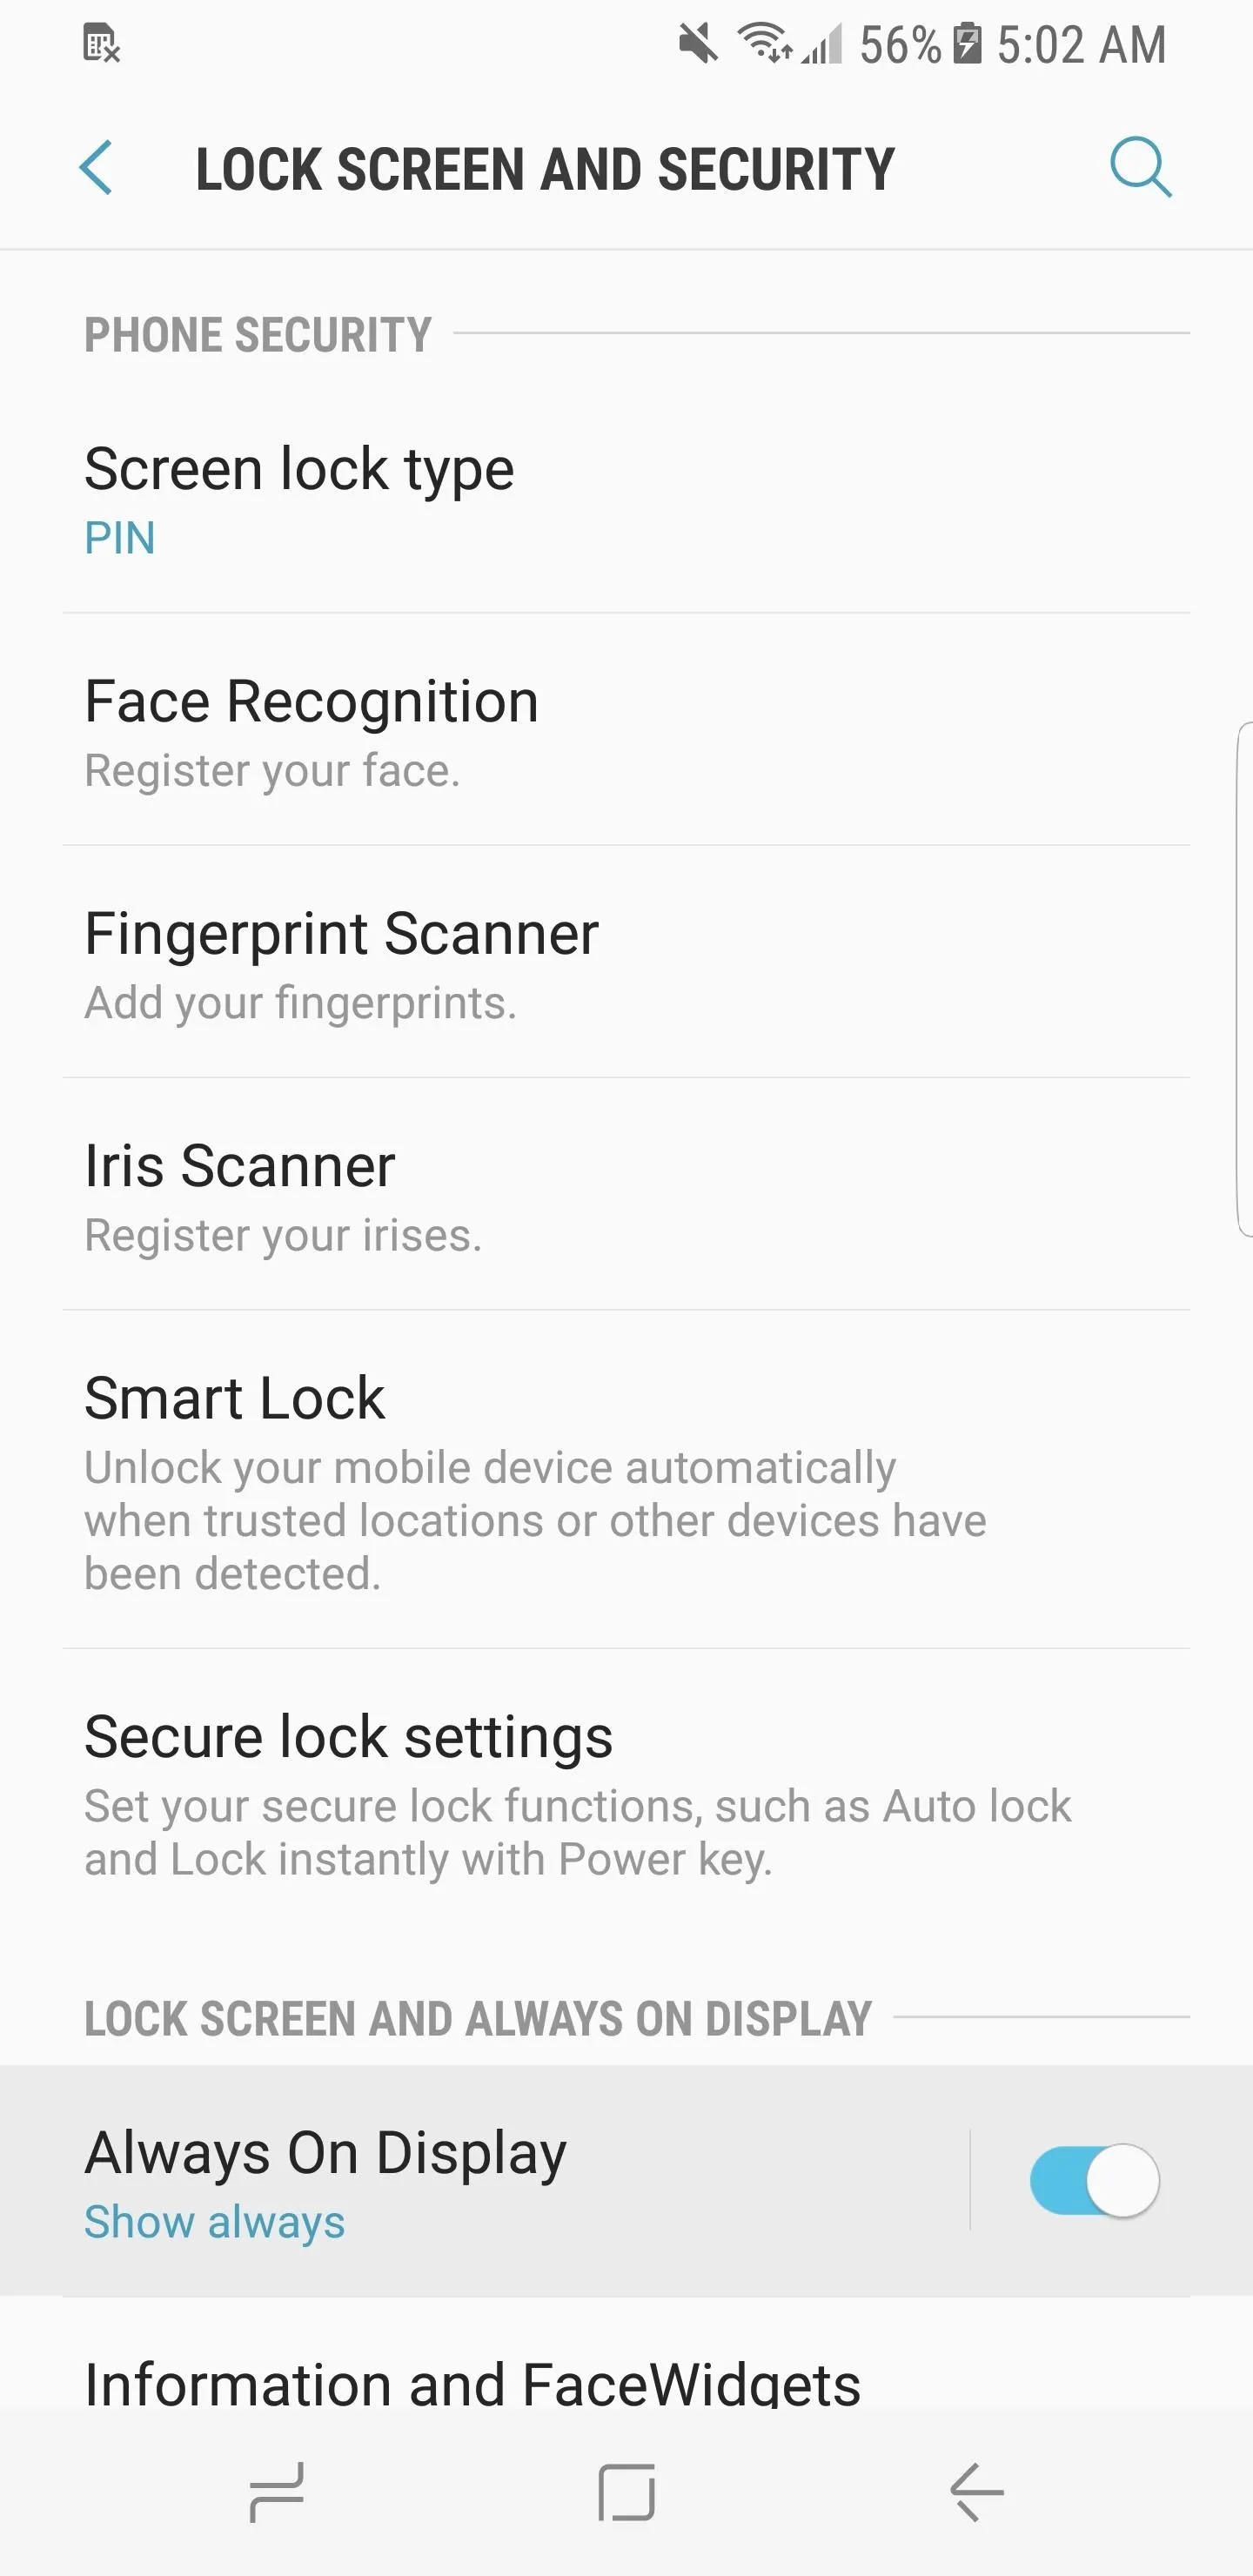
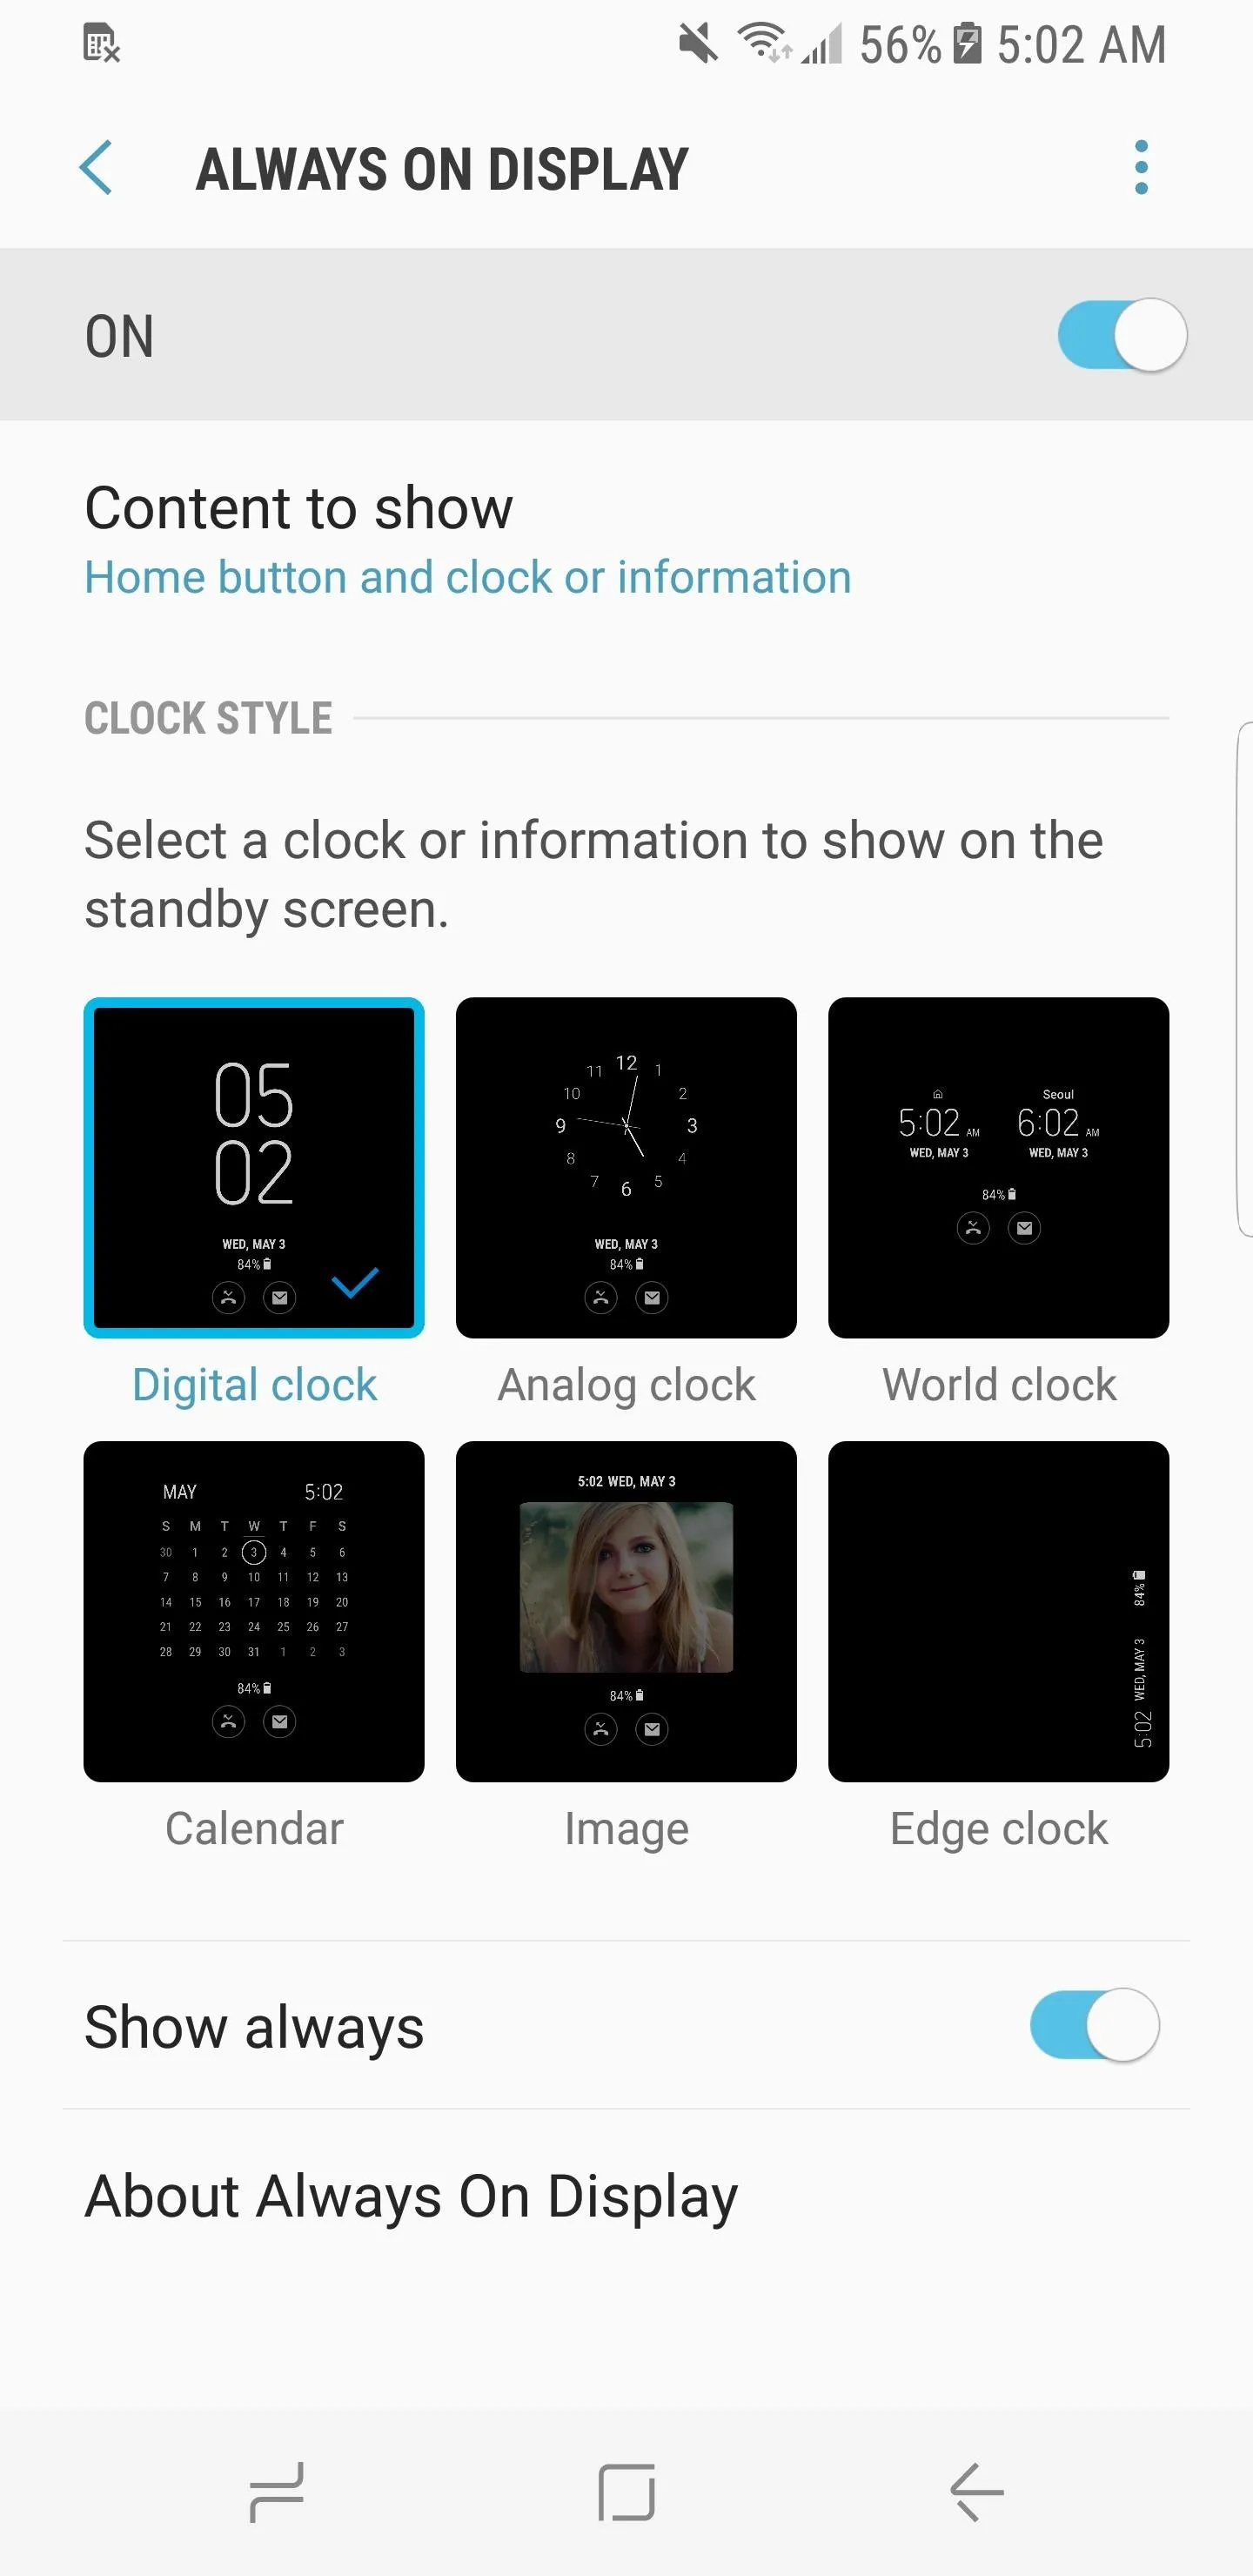


Now that you've hidden or turned off everything that could possibly be causing the navigation and status bar burn-in, let's find out whether or not it worked. Given that the initial burn-in reports began coming in about a week after the S8 was officially released, that should be a decent timeframe for trying out your phone with the bars hidden and AOD turned off.
If you have a theory on why the S8 or S8+ burned in so quickly, be sure to share it with us in the comment section below. Also, let us know if you were able to restore your phone to its former glory by following this tutorial.
- Follow Gadget Hacks on Facebook, Twitter, Google+, and YouTube
- Follow Android Hacks on Facebook, Twitter, and Pinterest
- Follow WonderHowTo on Facebook, Twitter, Pinterest, and Google+
Cover image and screenshots by Kevin M./Gadget Hacks


Comments
No Comments Exist
Be the first, drop a comment!