Since its debut in 2004, Gmail has become the go-to email service for the internet at large. Over 1.2 billion people use it, so Google has wisely continued to add features that address the needs and wants of its diverse user base. For US and UK users, one of these new features is the ability to transfer money.
Gmail lets you send or request money using Google Wallet. The desktop version has had this feature for a while, and the Android app recently added this functionality. With a few touches, you can send money to anyone along as they are located within the United States (if you are located in the US) or in the UK (if you located in the UK). There are no fees whatsoever, so there's no excuse not to try it!
Step 1: Set Up Google Wallet
In order to send money, you need to have a Google Wallet account. Fortunately, Google automates this process whenever you add a debit or bank account to your account to purchase apps. Therefore, if you've already purchased an Android app or added a payment source to your Android account, you can skip this step.
If you haven't added a card, download the Google Wallet app on your Android device. Once installed, select the hamburger menu in the upper-left-hand corner of your display and choose "Payment methods."
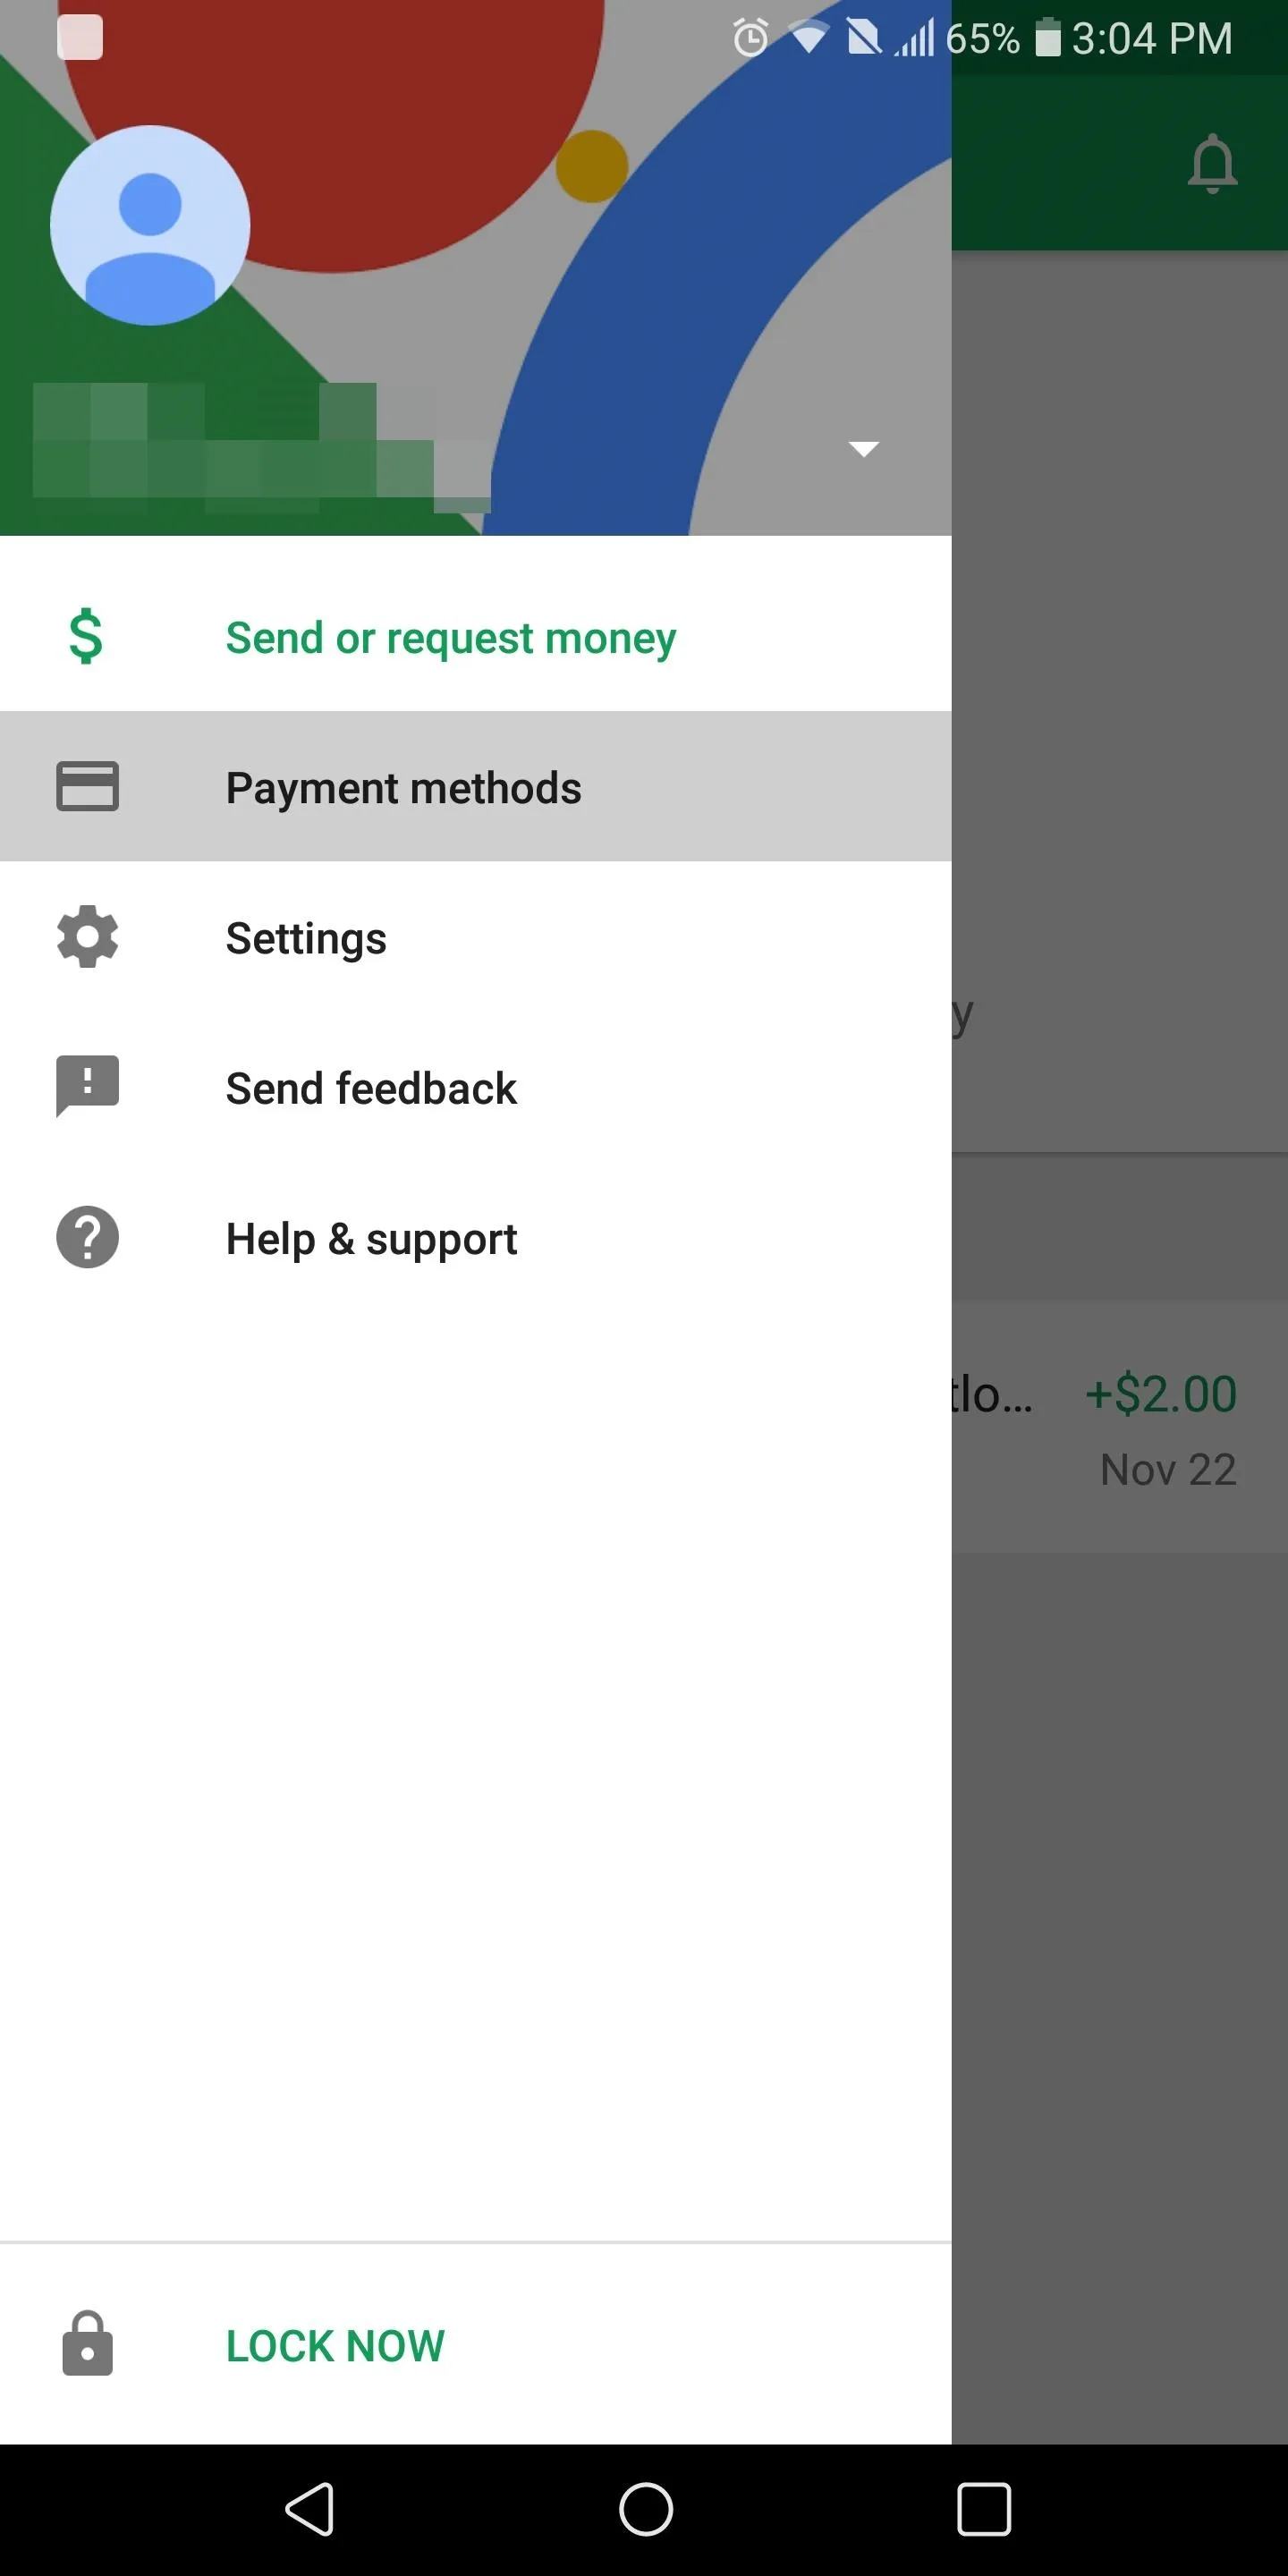
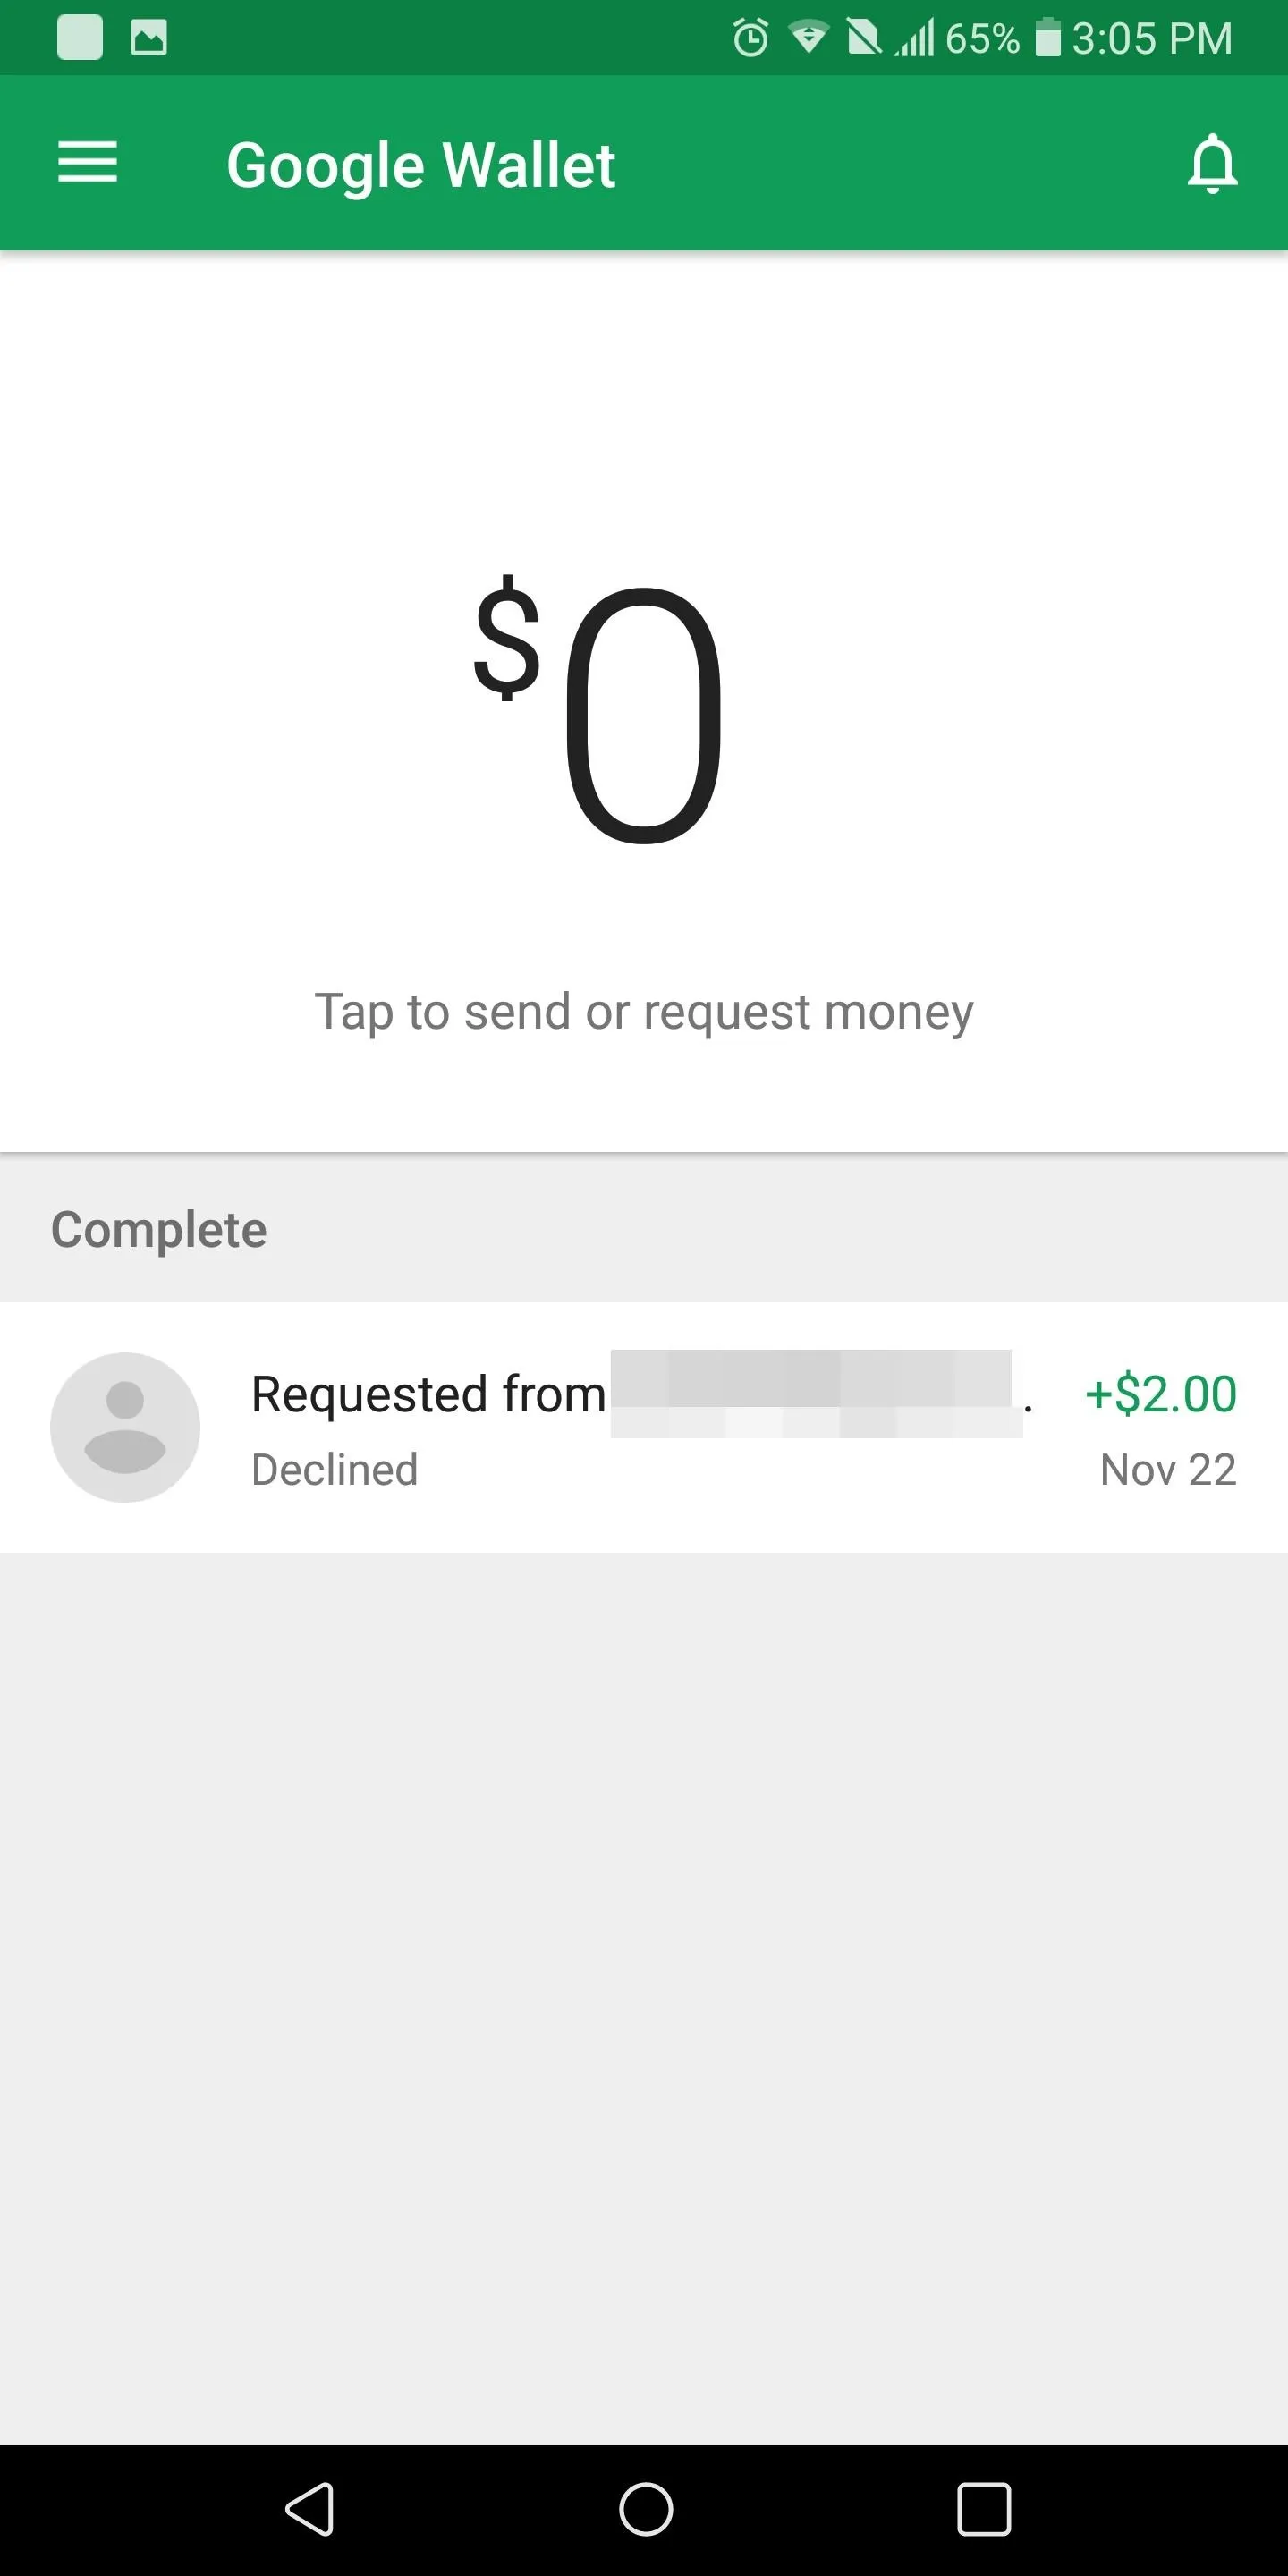


Select "Add Payment Method" found along the bottom portion of your screen. By default, Google Wallet will present you the form to set up a debit card. However, if you wish to add a bank account instead, tap the "Add debit card" text to open a drop-down menu with the additional options for bank accounts.
Although credit cards, prepaid cards, and PayPal accounts can be added to your Google account to purchase apps, these methods cannot be used to send or receive money. If you've already added that type of account, it will be listed as a payment method in Google Wallet, but won't be available for you to send money.
Fill out the form and choose "save" at the bottom of the screen. When you've successfully entered your card, you'll be returned to the previous menu with your card listed as a payment option.
Step 2: Compose an Email
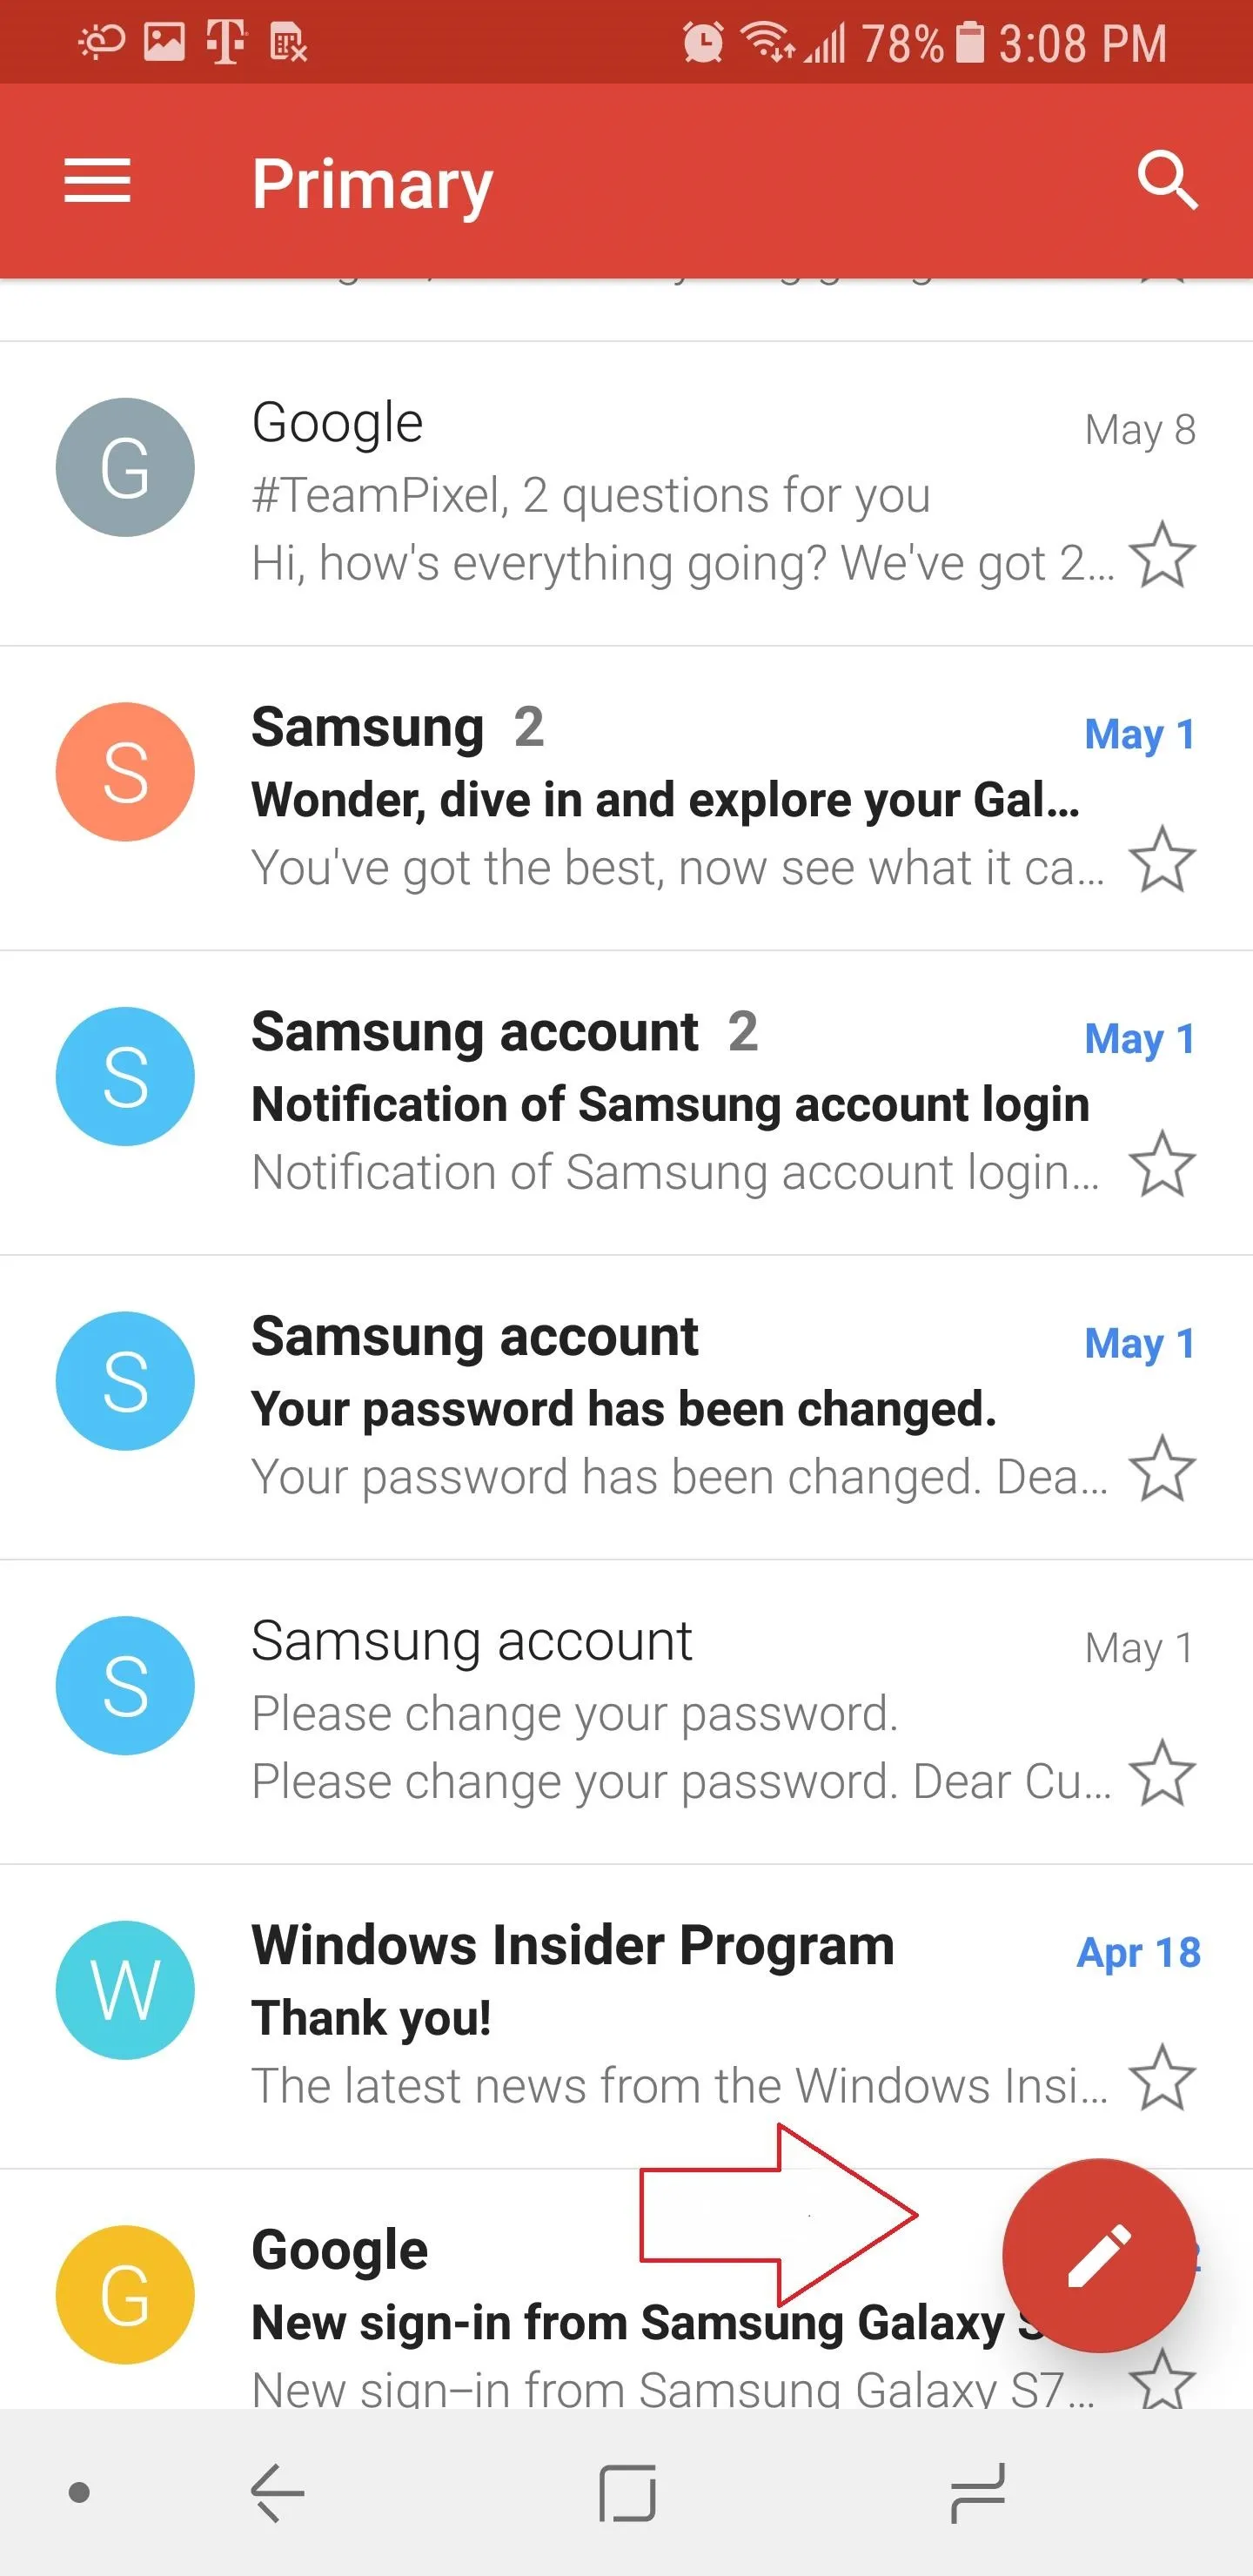
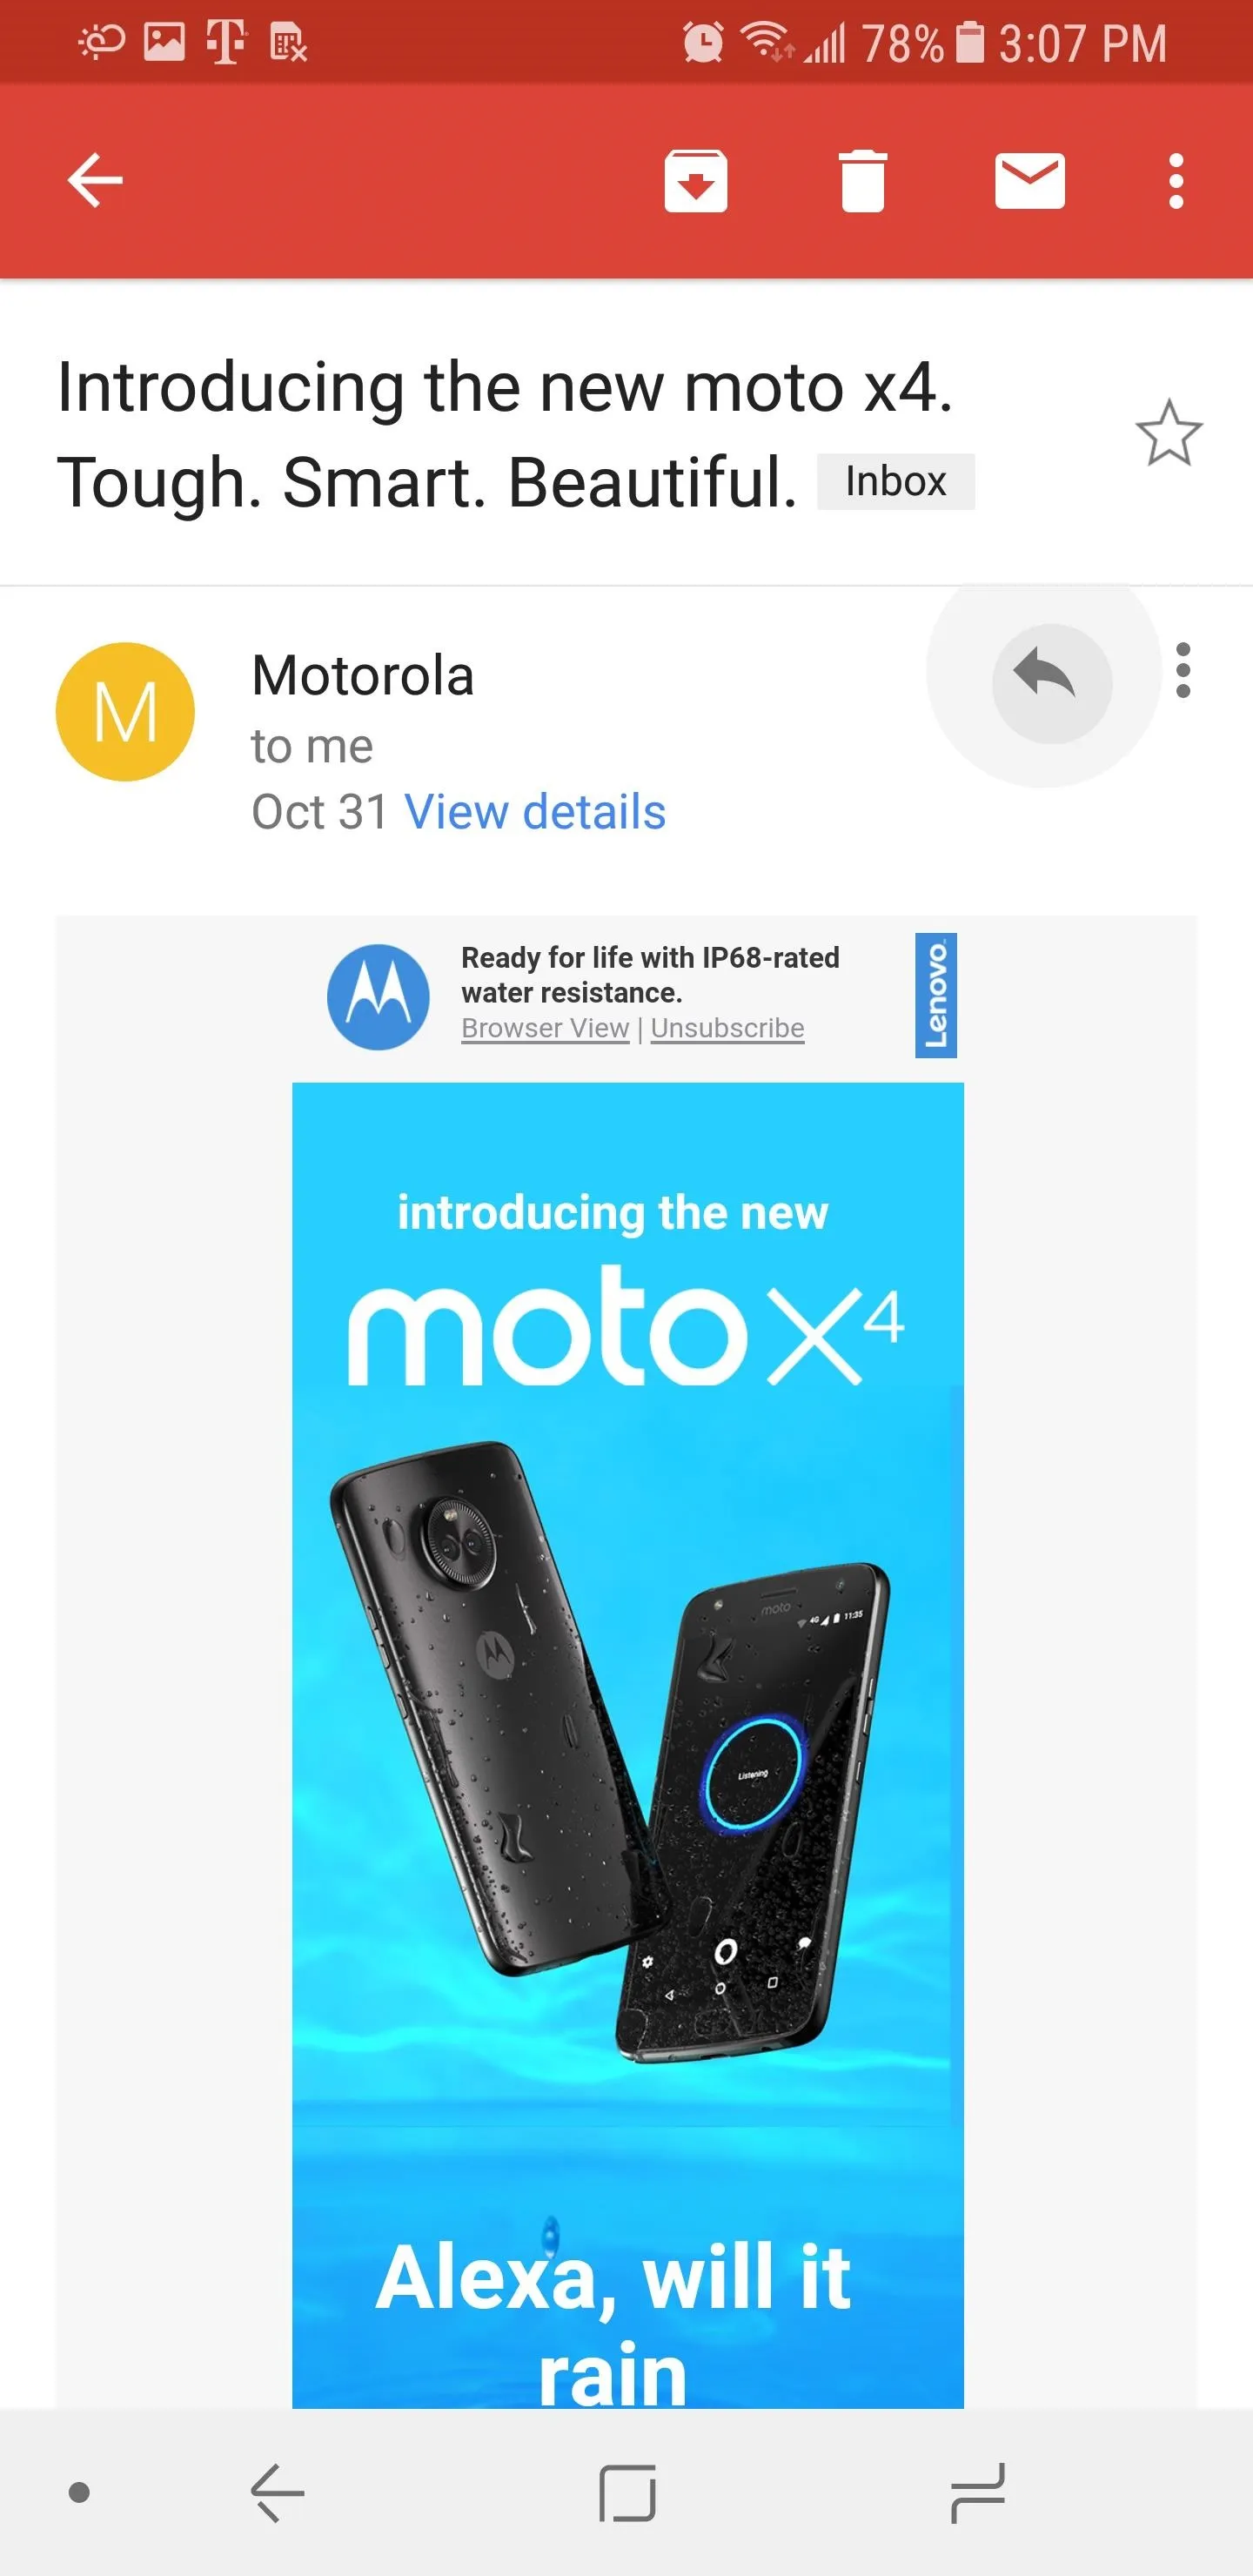
Next, open the Gmail app and use the pencil button in the bottom-right corner of the display to create a new email. If you wish to reply to an email, select the left-facing arrow next to the sender's name while within the email.


Step 3: Send Money
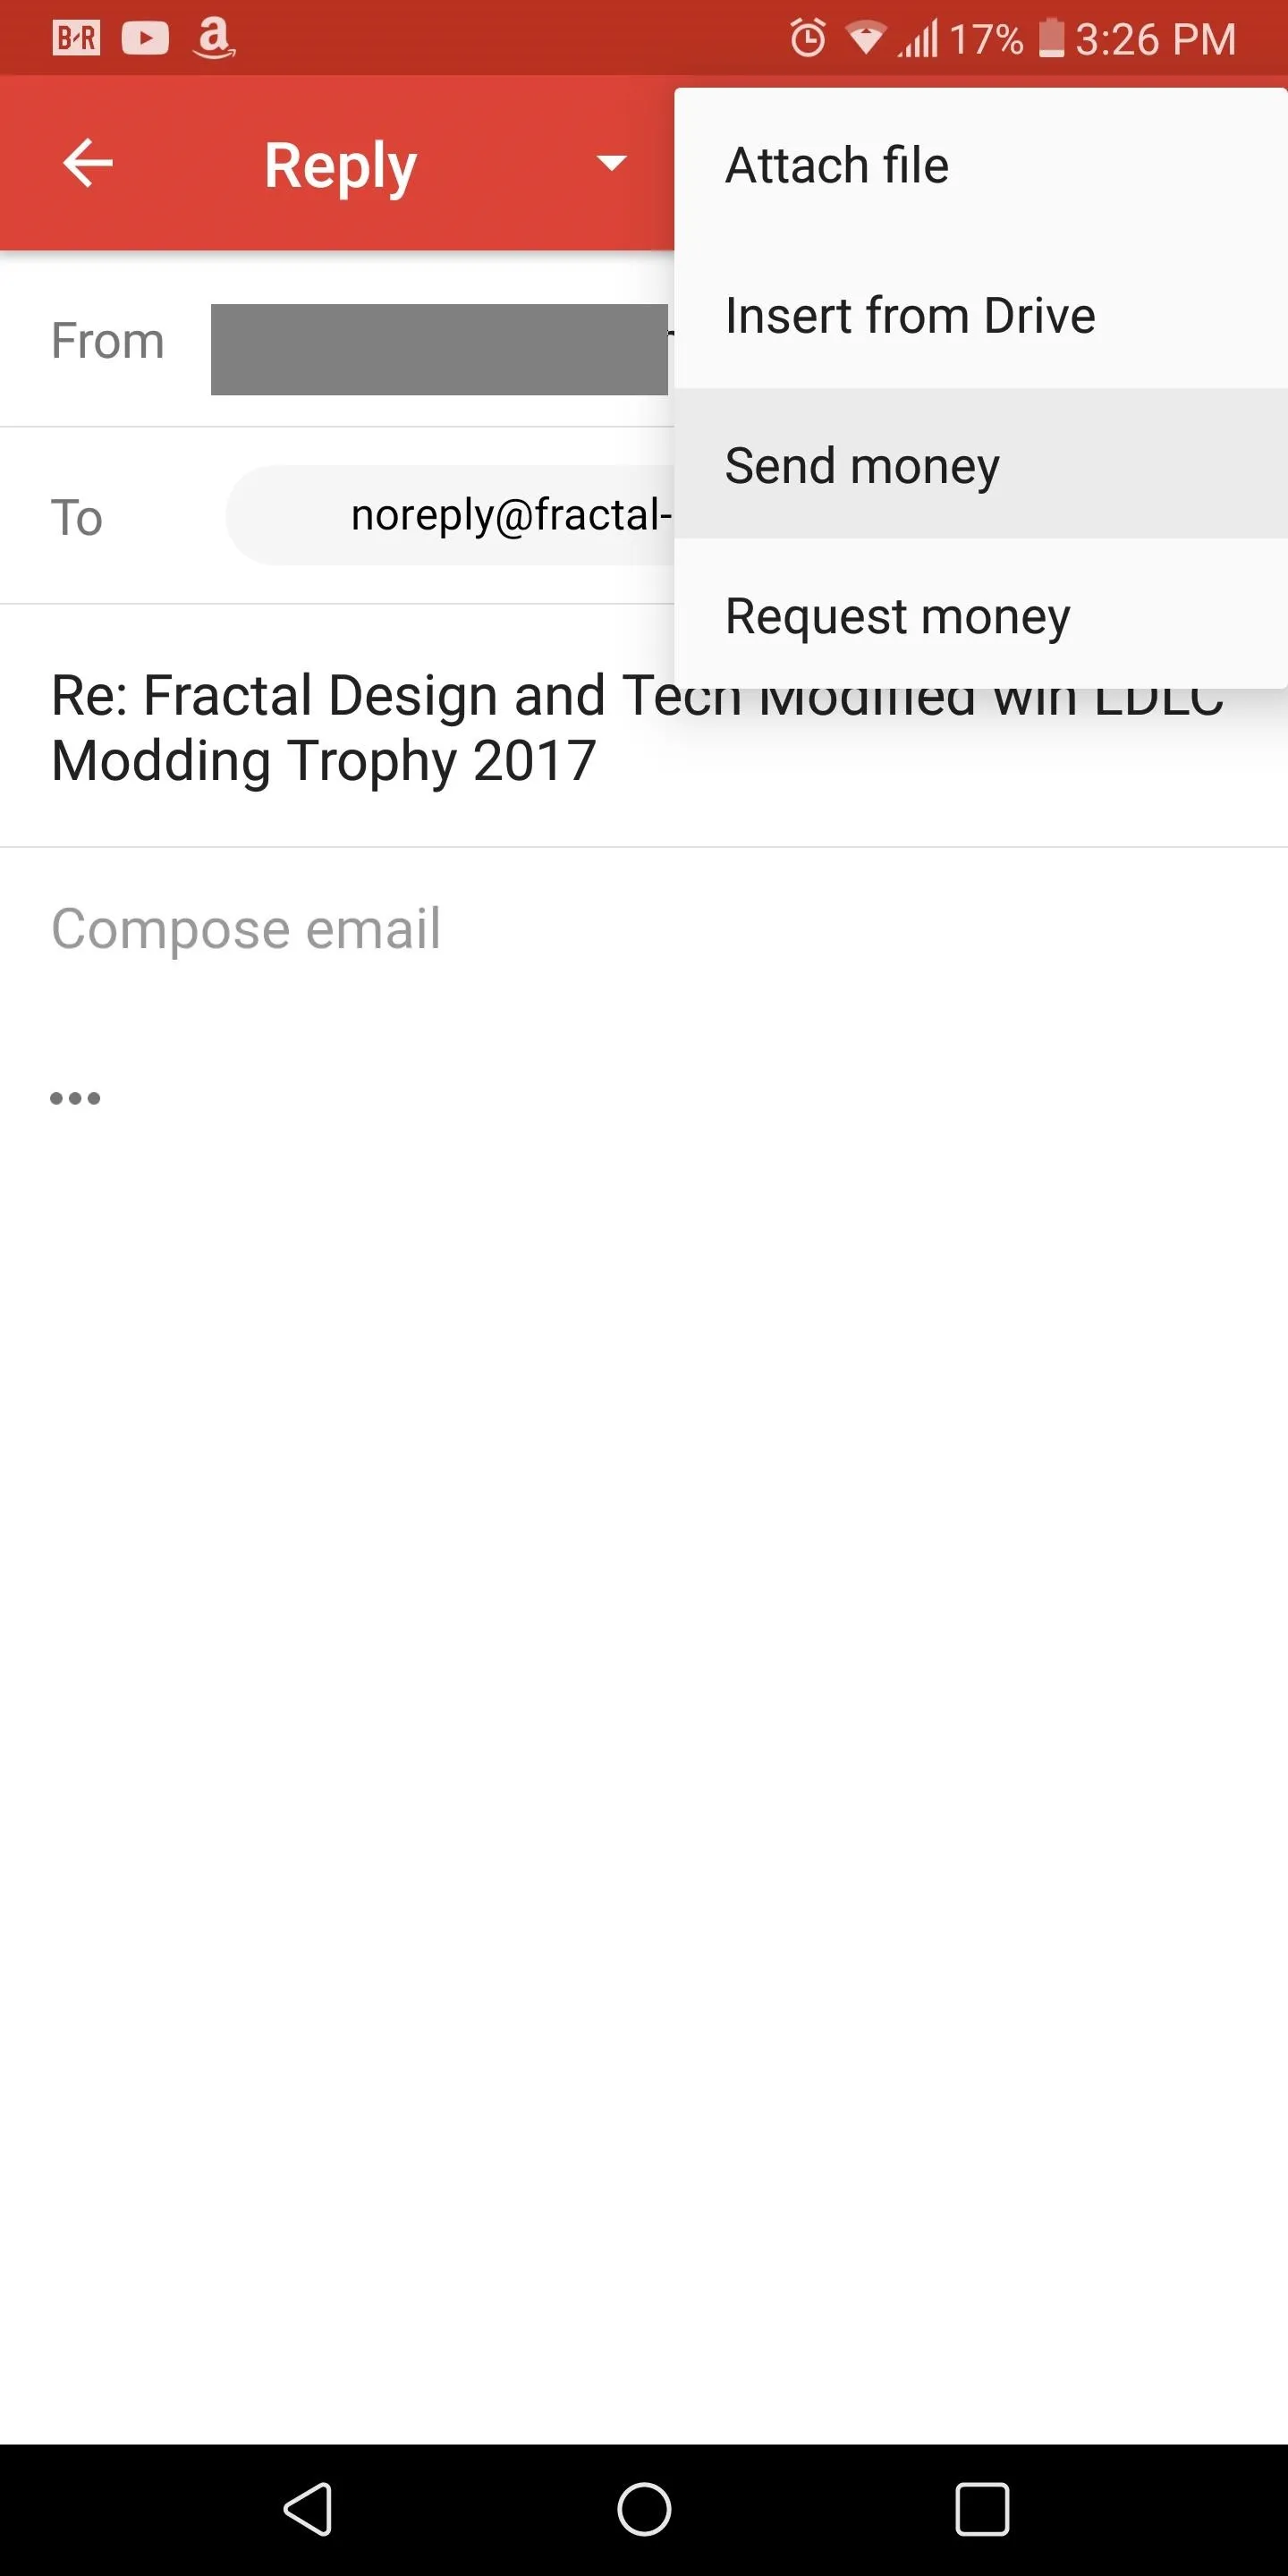
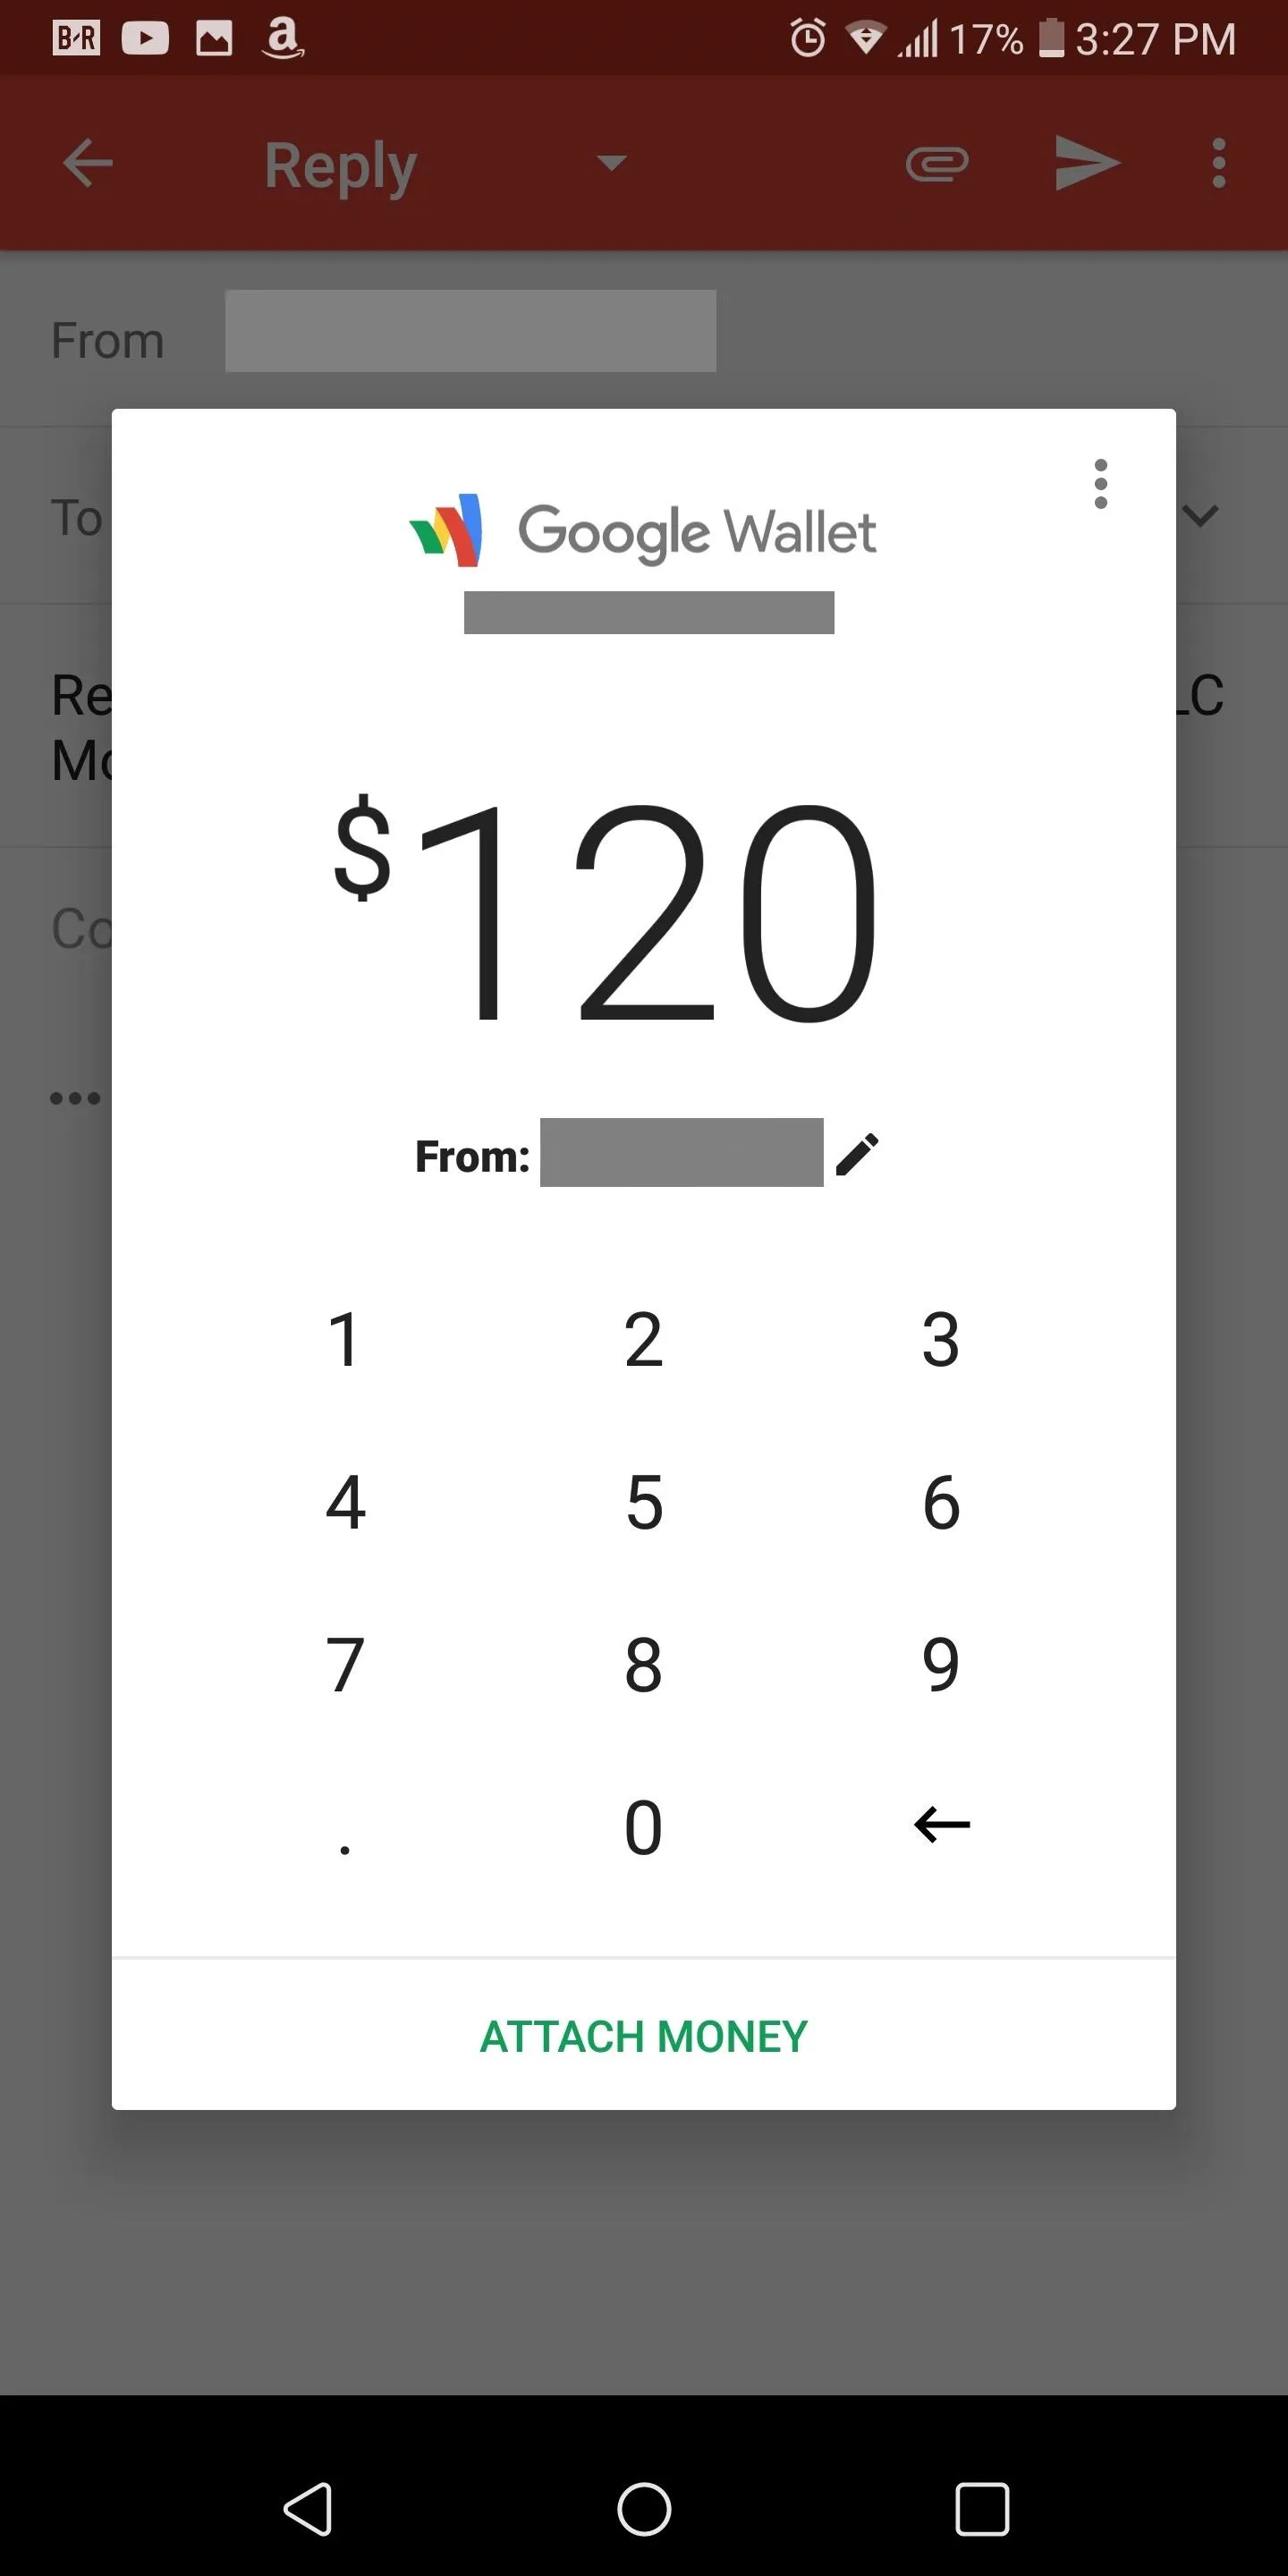
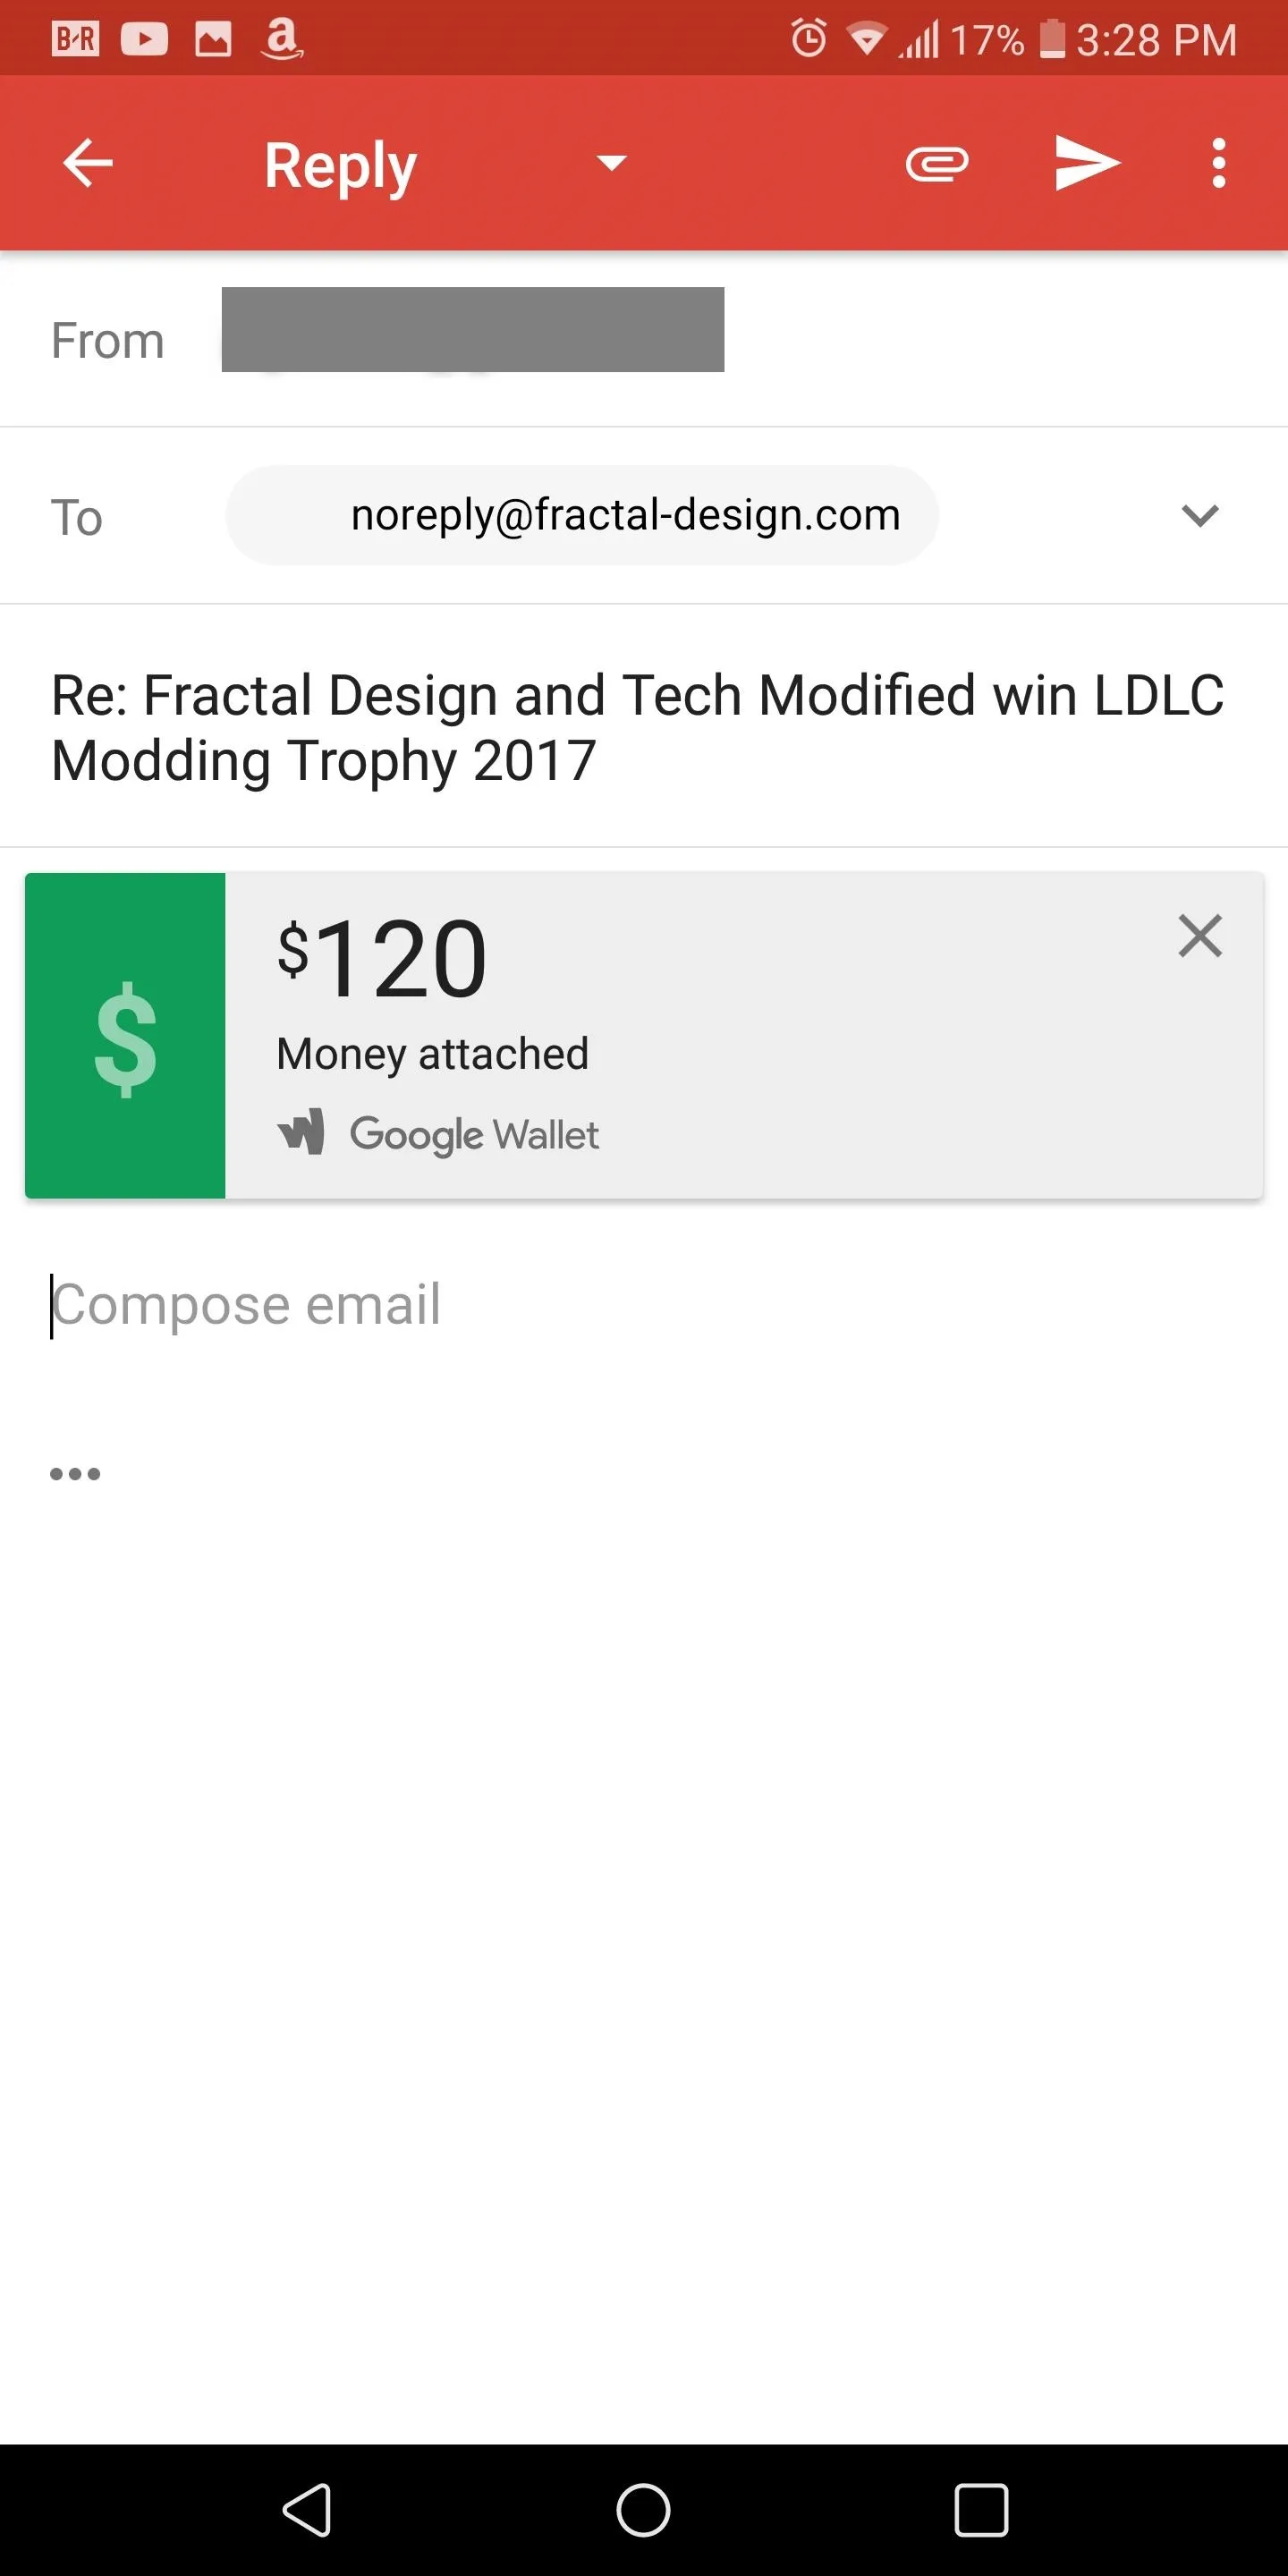
Next, select the paper clip icon near the top-right corner of the screen and choose "Send Money." A popup menu will emerge asking you to enter the amount you wish to send. Input the amount and select "Attach Money." Another popup will display asking if you wish to add a note. Select "Done," and now within the body of the email will be a notification indicating the money is attached.


Step 4: Request Money (Optional)
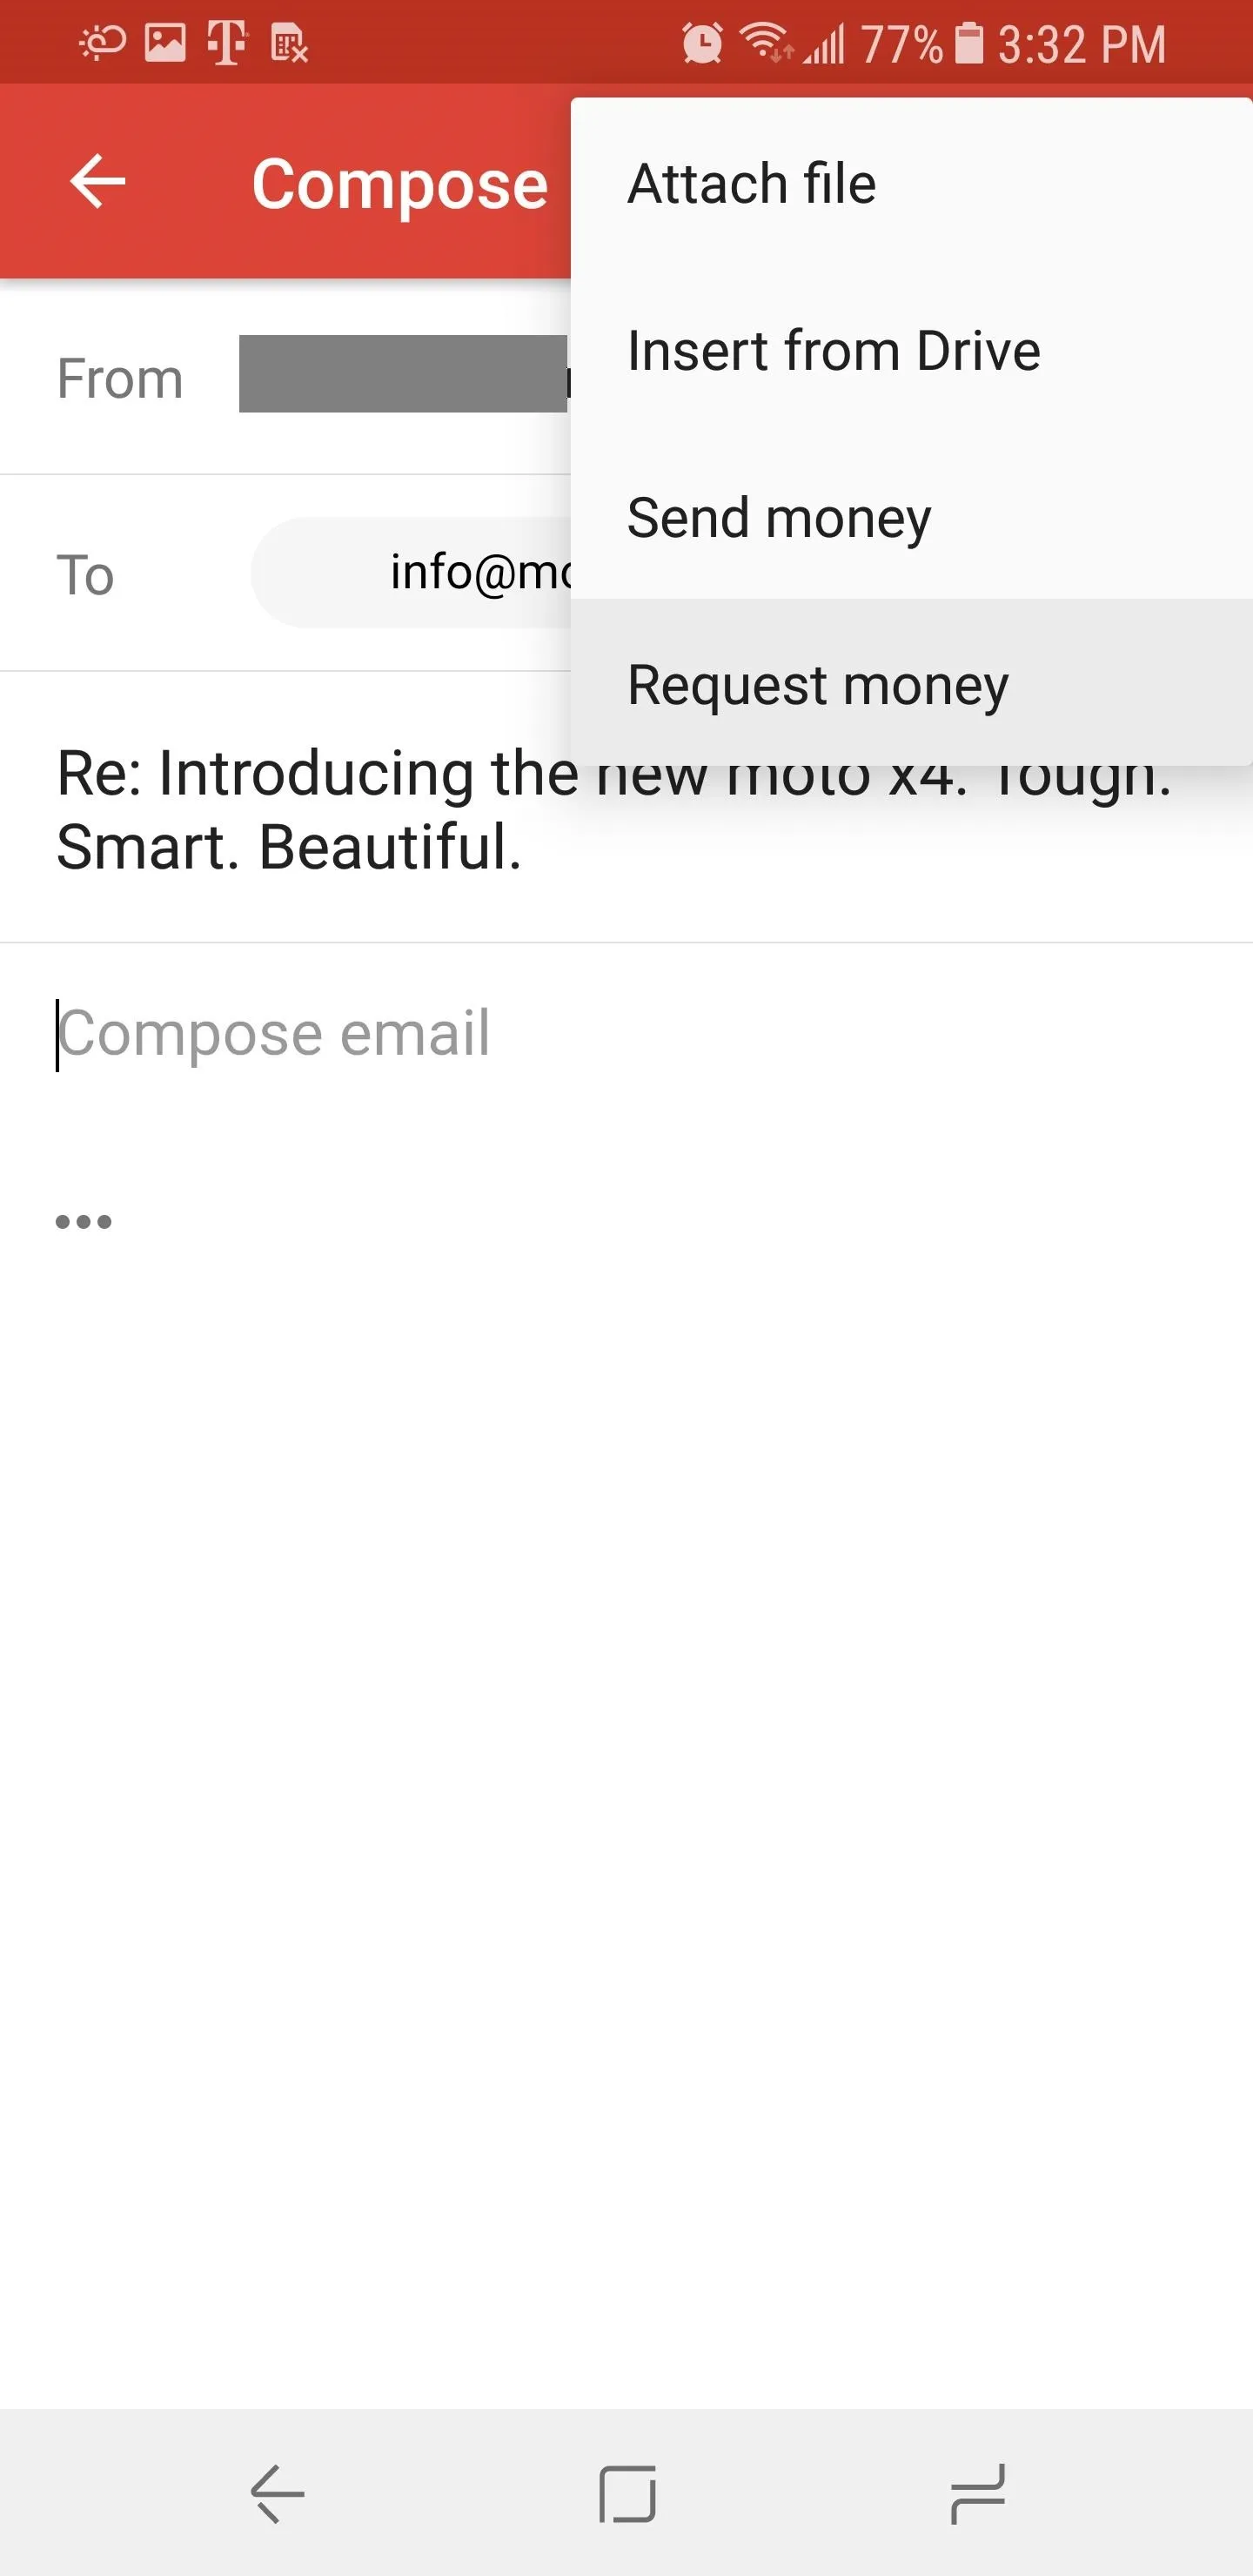
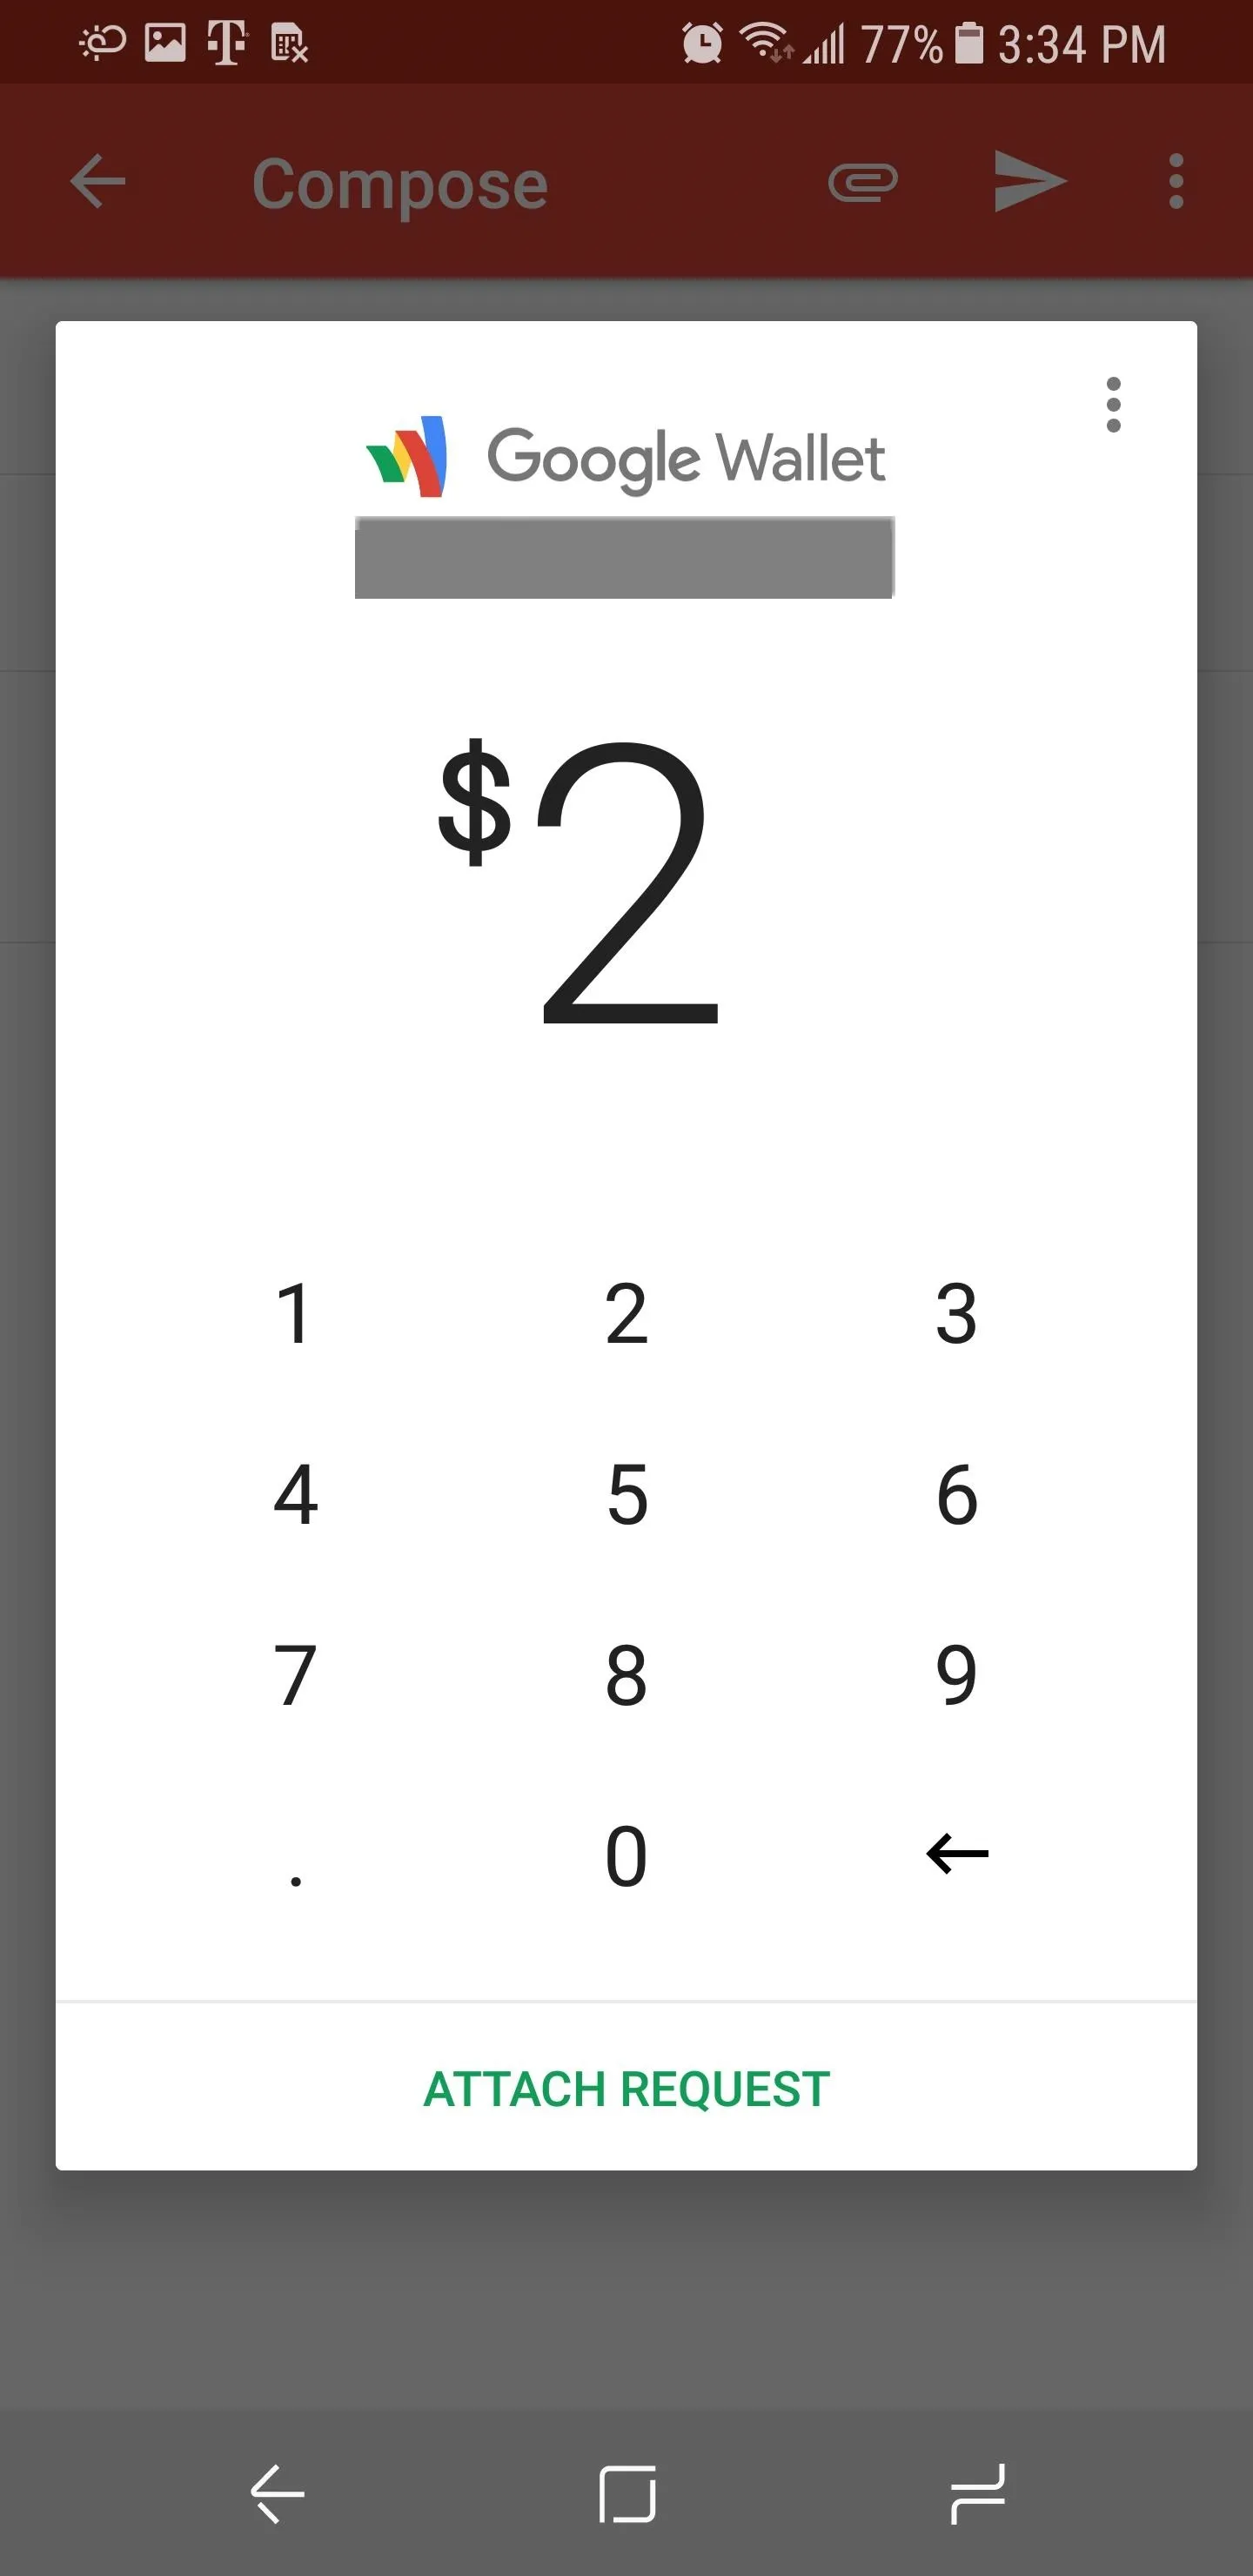
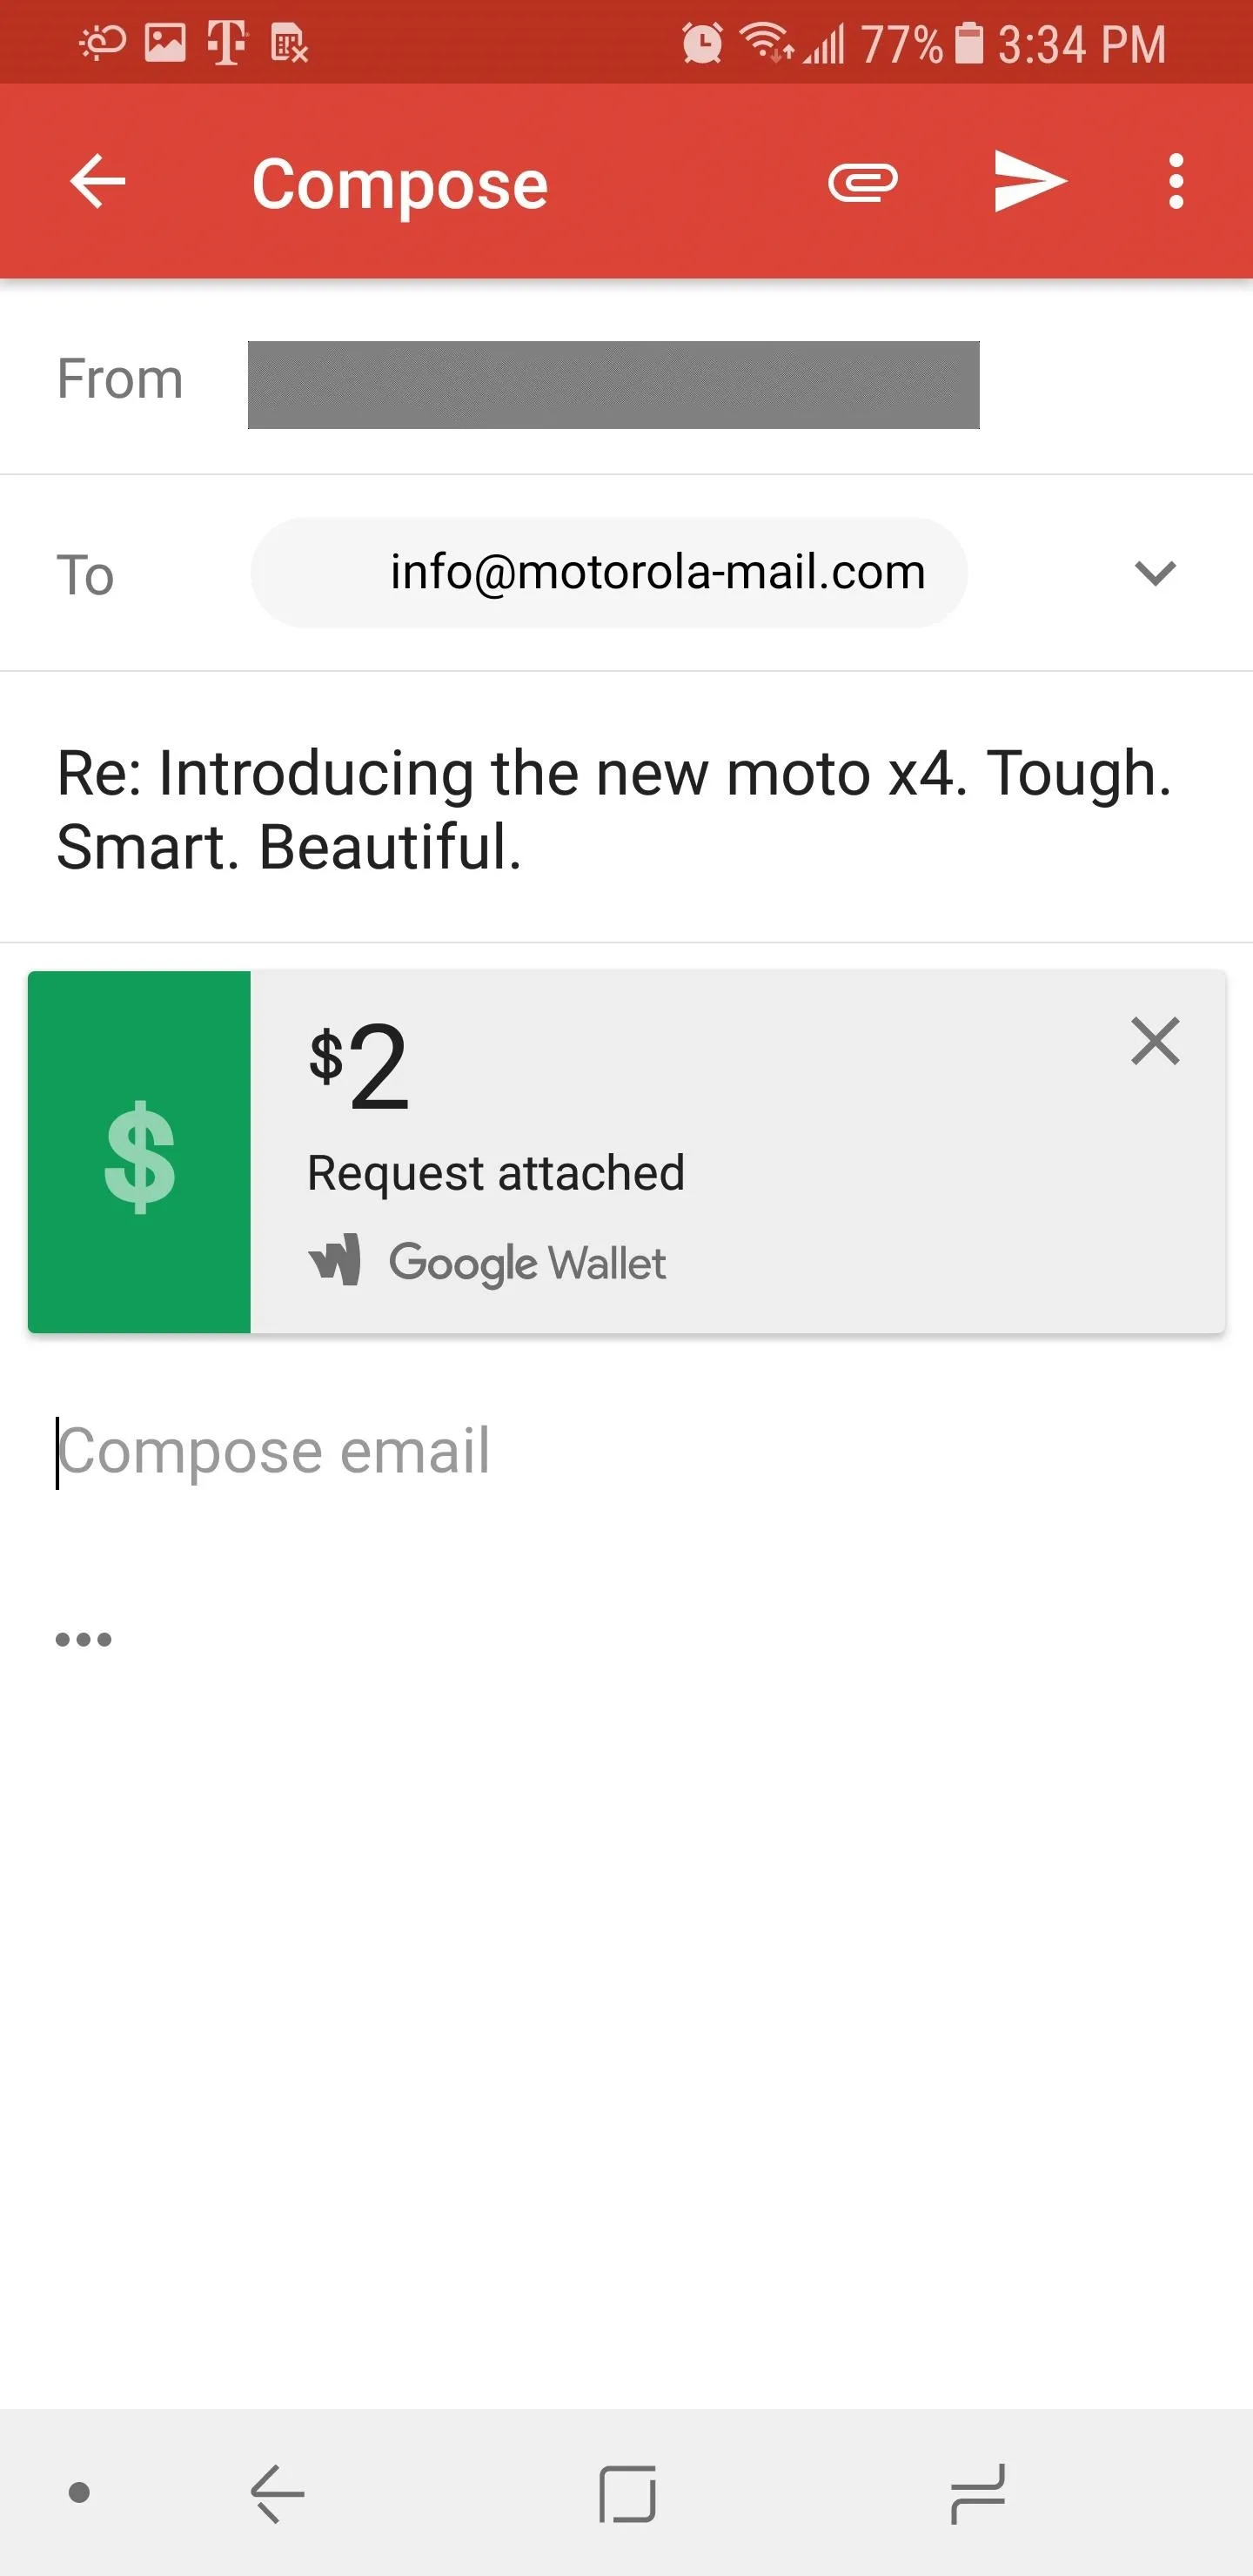
If you wish to request money, select the same paper clip icon as mentioned in Step 3, but choose "Request money." Input the amount you wish to receive and select "Attach Request." Gmail will ask if you'd like to add a memo to your request. Select "Done" when you are finished and your request will appear in the body of the email.


Step 5: Complete the Transaction
Once you either attach a payment (or request for one), complete the email and send it as you normally would. The recipient will receive an email similar to the screenshot below (depending on if you sent money or requested money). If you are sending to a non-Gmail email address, the recipient will get a link to Google Wallet to complete the same signup process depicted in Step 1.
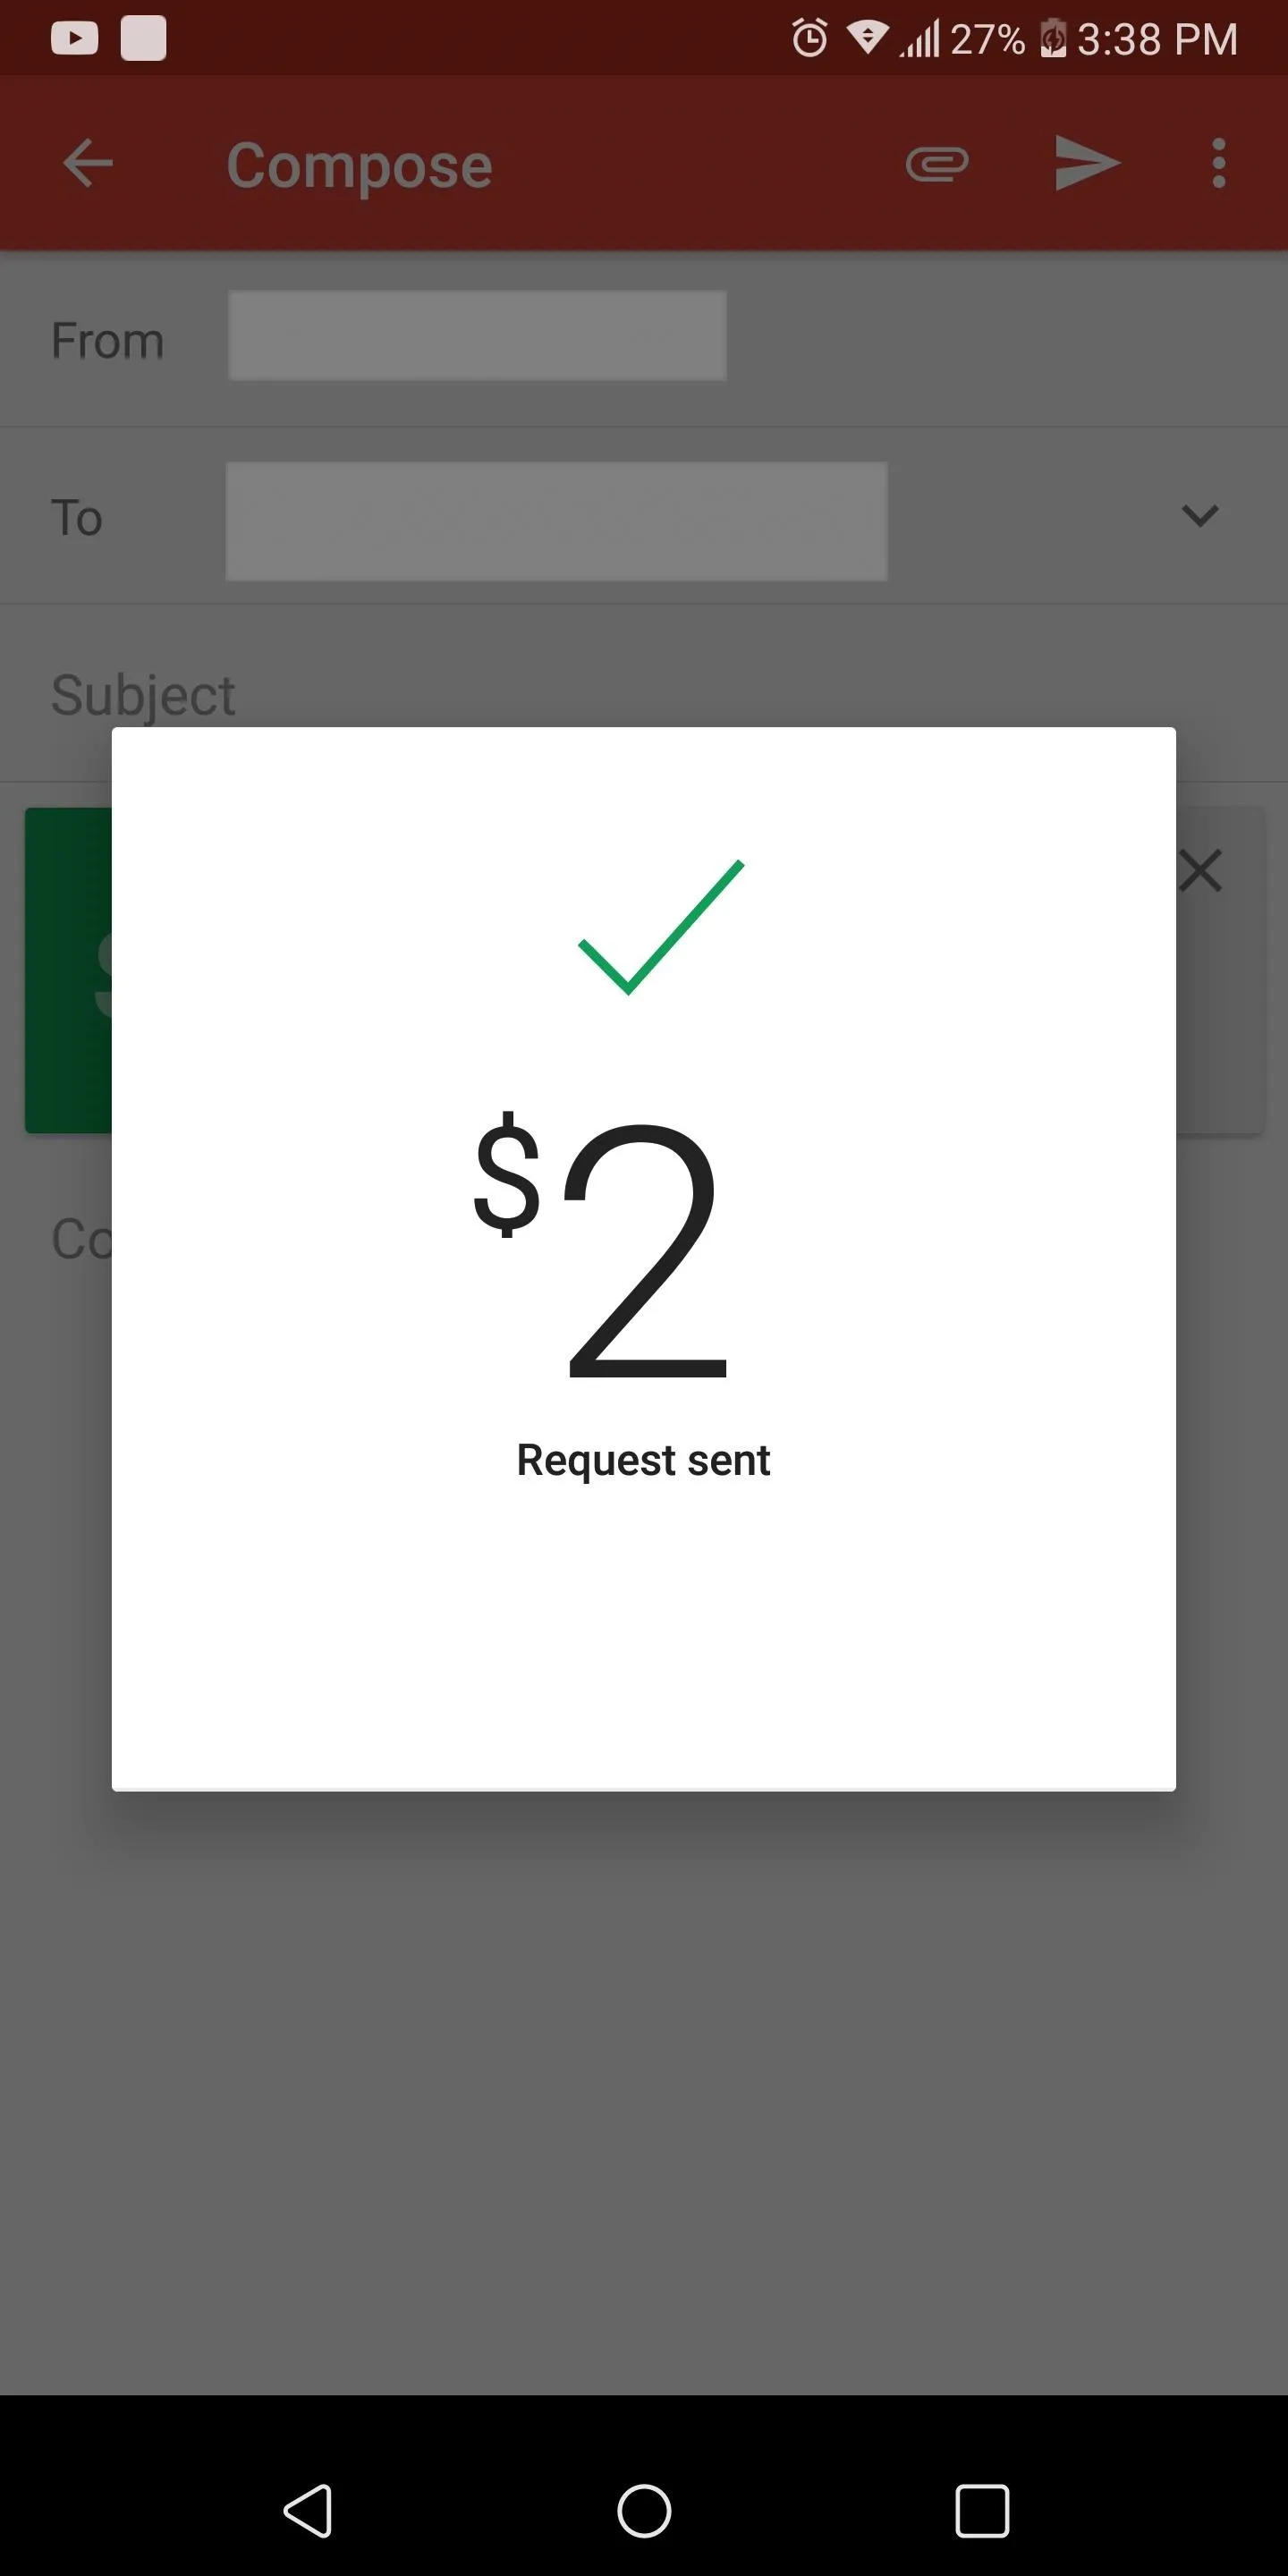
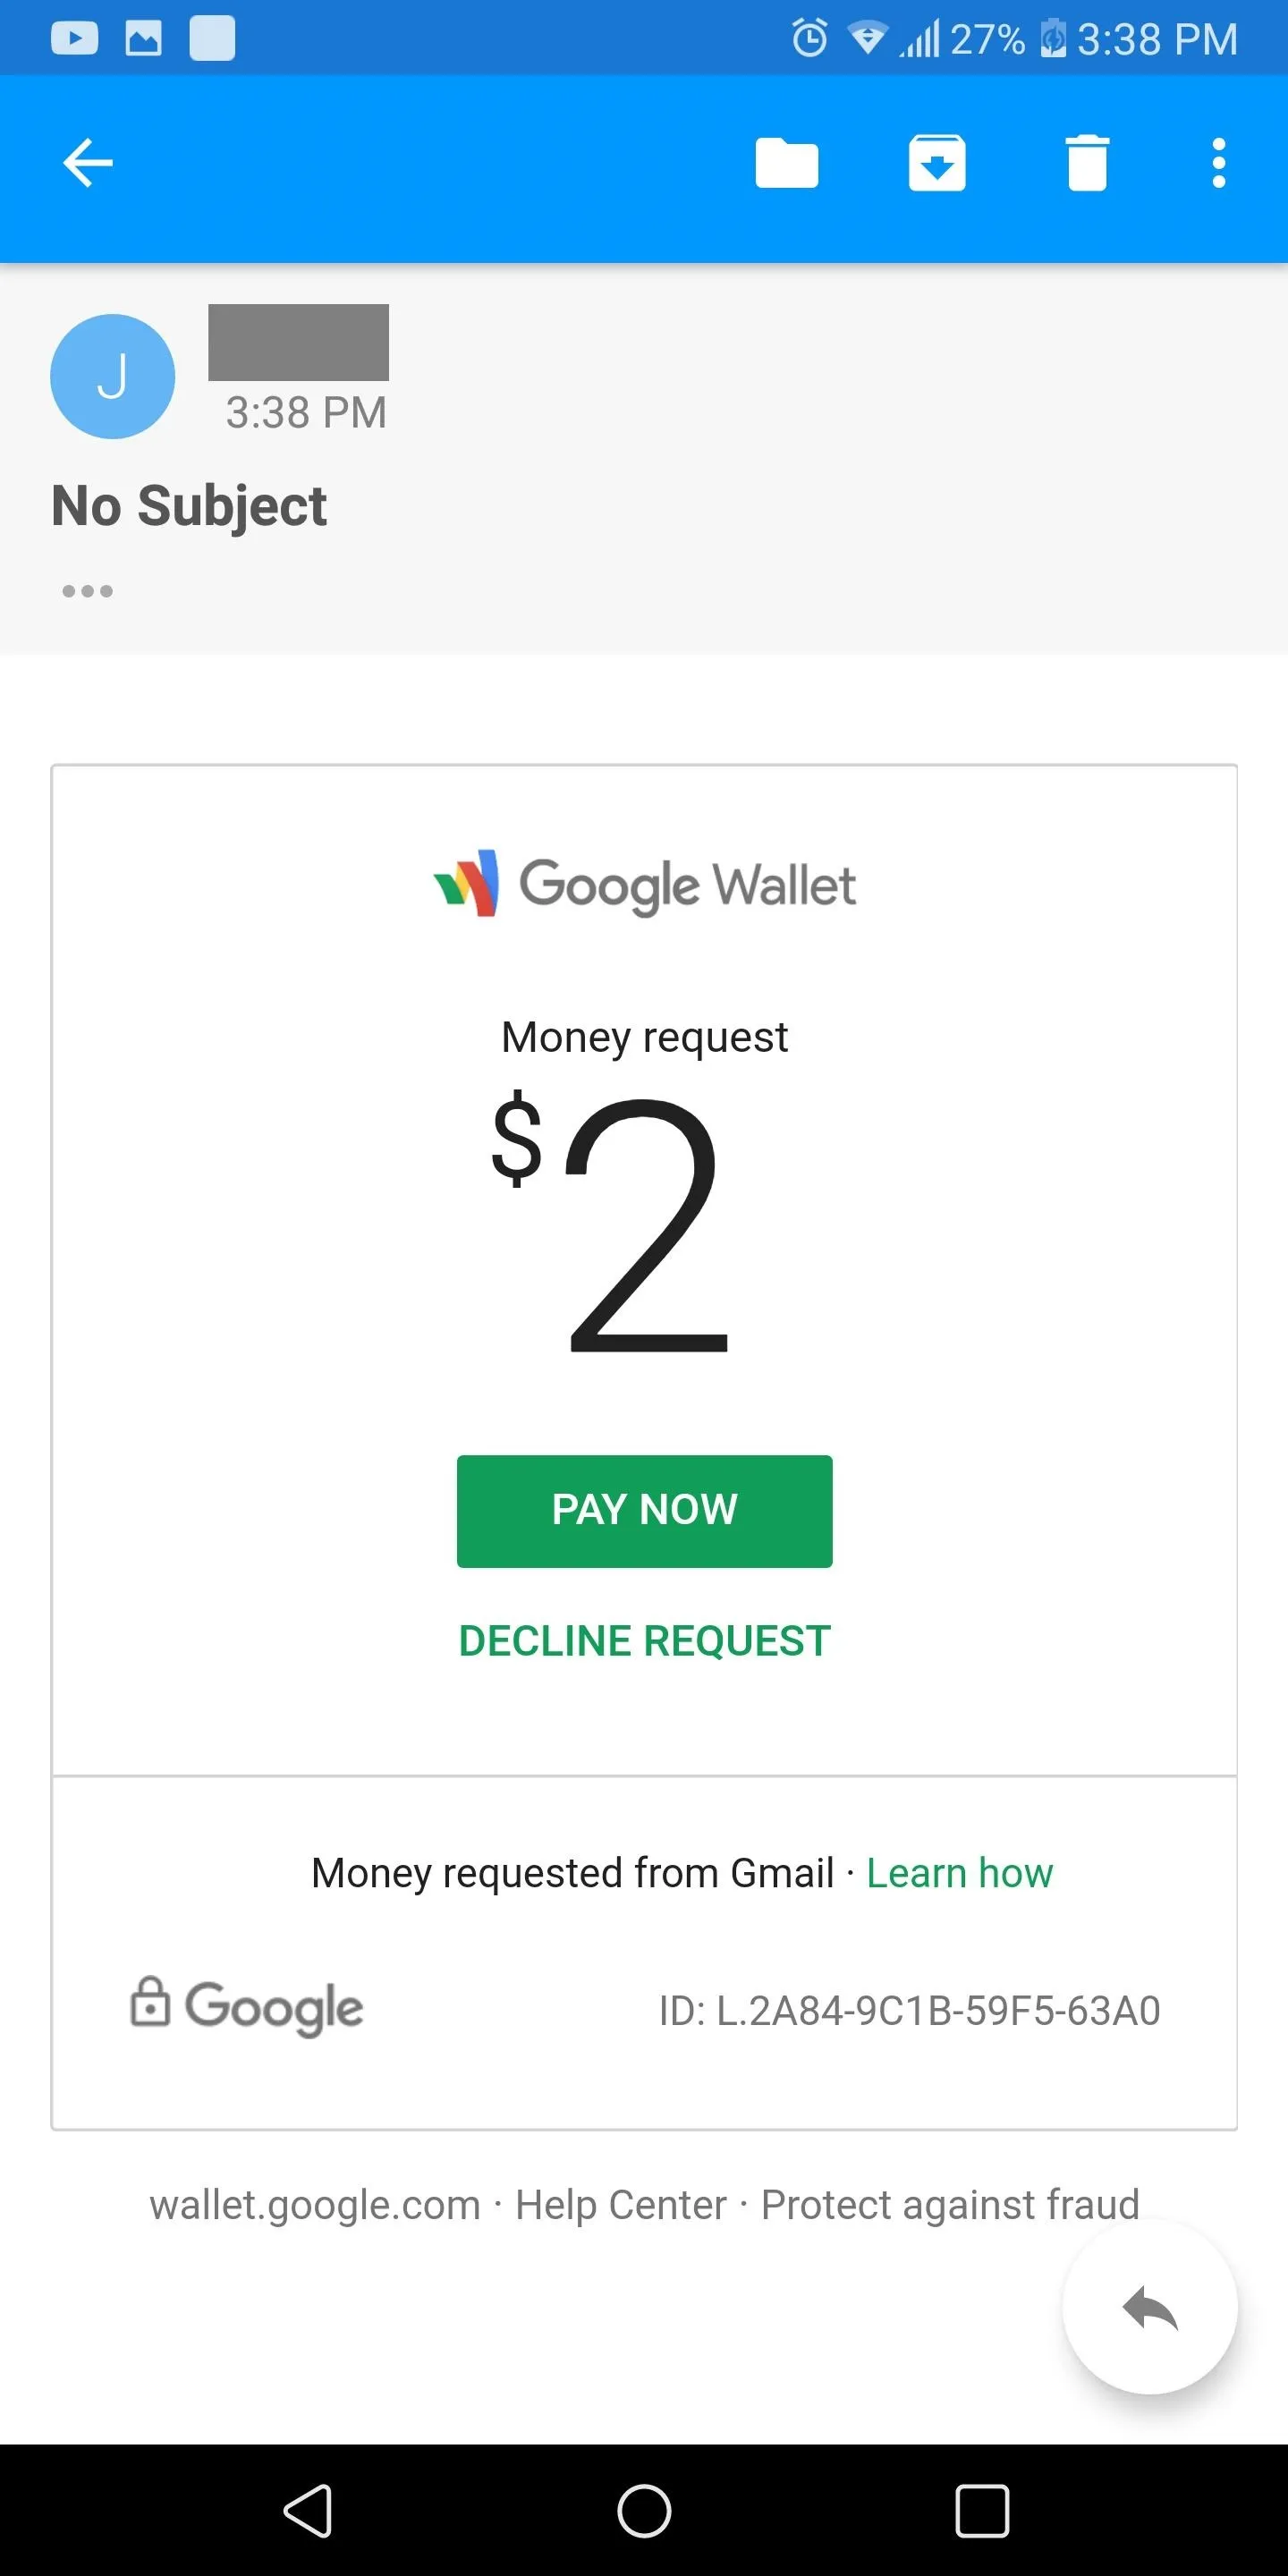


However, if you sent money to another Gmail user, they'll see a popup when they open the email with the option to "Transfer to bank" (if they're receiving money) or "Pay Now" (if they're sending money). If the recipient doesn't have a payment method linked to their Gmail account, they'll be asked to add either a debit card or a bank account to complete the transaction. If they already have a Google Wallet account with a compatible payment method, they can simply select their linked card or account to complete the transaction.
When receiving money, the amount of time it takes for the money to be deposited into your bank account will depend on two factors: Which payment method you chose and your bank. If you are using a debit card, the payment can post in a matter of minutes, with some banks taking up to 24 hours to show the incoming payment. However, when using a bank account, financial institutions can take up to 72 hours before posting the transaction.
Gmail continues to evolve as a platform, allowing it to capture 21% of the market, which makes it the second most popular email client. How do you like Gmail's ability to transfer money? Are you using the feature? Let us know in the comments below.
- Follow Gadget Hacks on Facebook, Twitter, Google+, YouTube, and Instagram
- Follow WonderHowTo on Facebook, Twitter, Pinterest, and Google+
Cover image and screenshots by Jon Knight/Gadget Hacks



Comments
No Comments Exist
Be the first, drop a comment!