It's been little over a month since the official release of LG's latest flagship phone, the LG V20. Despite a few minorhiccups, the V20 has been attracting attention from all over for being an amazing phone. But like with most Android phones, there's no better feeling than rooting and taking complete ownership of it.
Unfortunately, unlike most LG phones, the V20 can't be rooted using the traditional method of flashing a stock TOT or KDZ file via LGUP, which means we'll have to use alternative means to achieve Superuser status.
Luckily, though, a new method revolving around the Dirty COW exploit can be used to root the T-Mobile (H918) variant of the LG V20. It'll take a lot of work, and you'll need to make sure to follow every step carefully, but we've got the process covered in detail below.
Requirements
- T-Mobile LG V20 model H918 (method won't work for other variants)
- Windows, Mac, or Linux computer
- USB data cable
Before We Begin
First up, make sure to back up your phone's data before using this method, as it will wipe all data on your device. Most of your apps will be restored when you log back in with your Google account after rooting, but personal files like your photos and MP3 library should be transferred to an external storage drive before you begin.
This method utilizes ADB and Fastboot commands, so we'd recommend that you have at least a basic knowledge of these two tools before proceeding. If not, at least make sure to follow the steps perfectly, otherwise you might risk bricking your device.
Finally, we have to give a big thanks to XDA Recognized Developer James Addunono for modifying the Dirty COW exploit script to work with the LG V20, and for compiling TWRP, which makes rooting the V20 possible.
Step 1: Install Needed LG Drivers
To start, install the LG drivers for Windows or Mac, as this will allow your phone and computer to communicate with one another. When you're done with that, restart your computer to make sure the drivers are active.
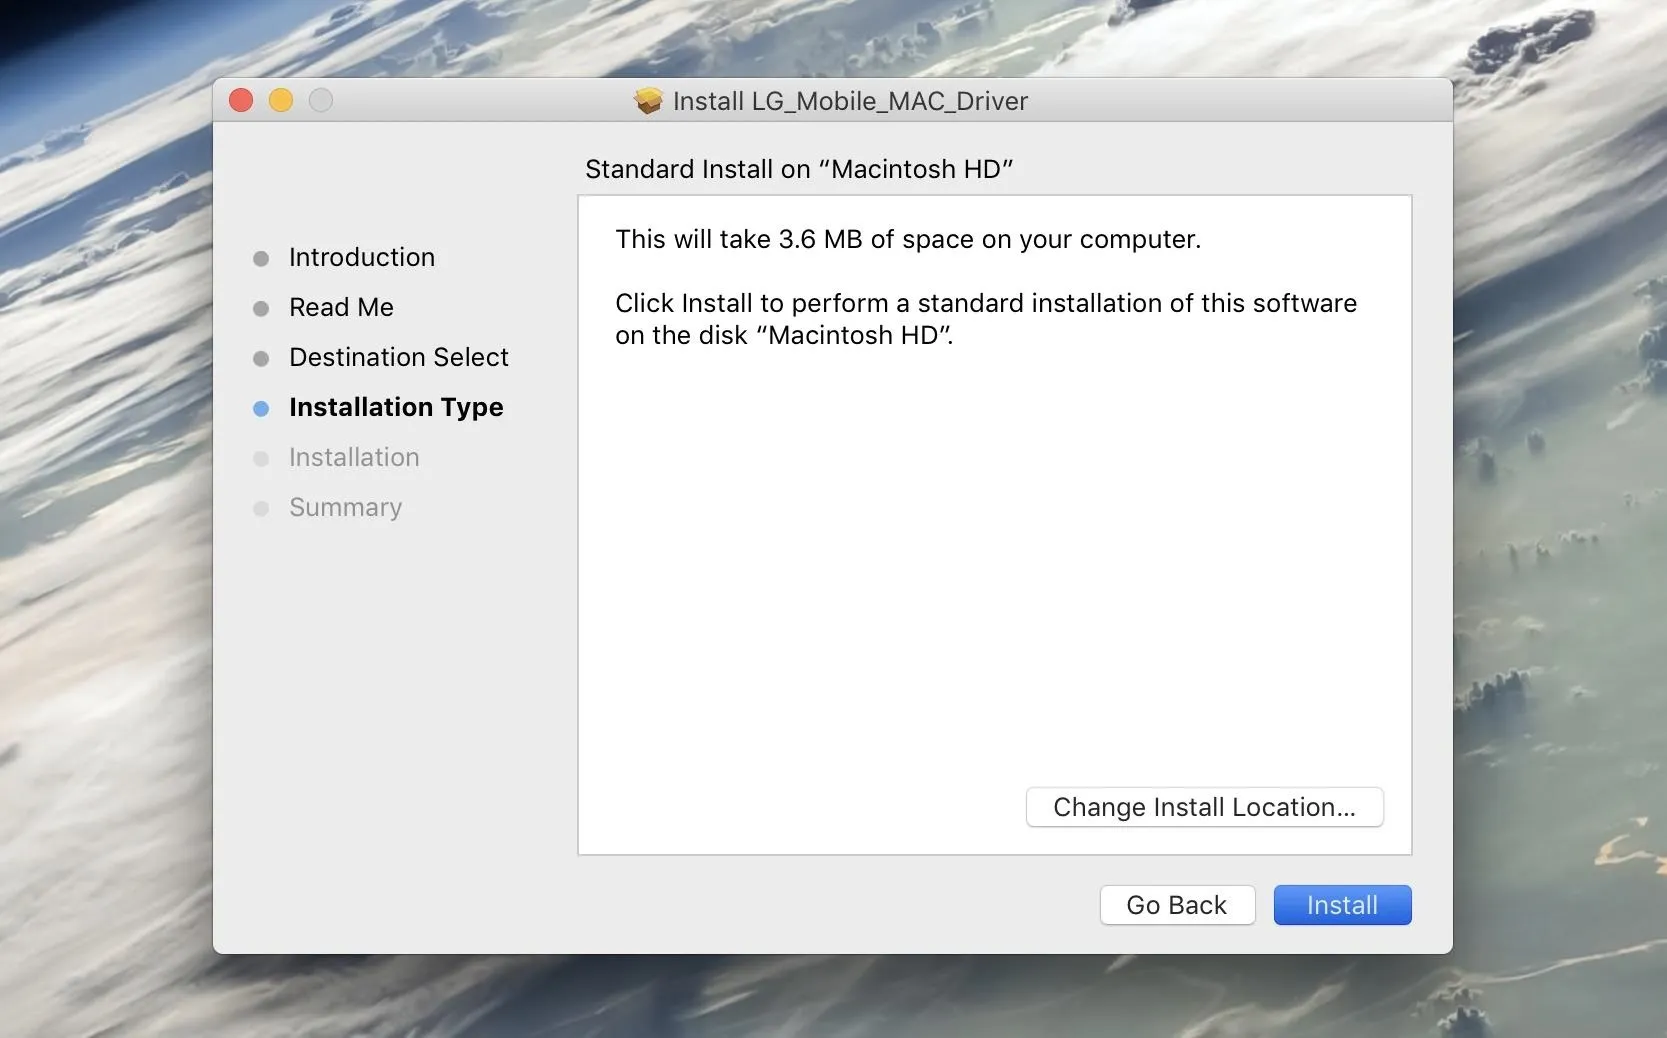
Installing the LG drivers on a Mac.
Step 2: Install ADB & Fastboot
Next up, you'll need to install ADB and Fastboot on your computer. We recommend downloading the official version from Google, and we've outlined that process in Method 1 at the following link:
Step 3: Enable Developer Settings
After that, you'll have to enable the hidden "Developer options" menu on your phone. To do that, navigate to Settings -> About phone -> Software info, then tap the Build number entry seven times in rapid succession.
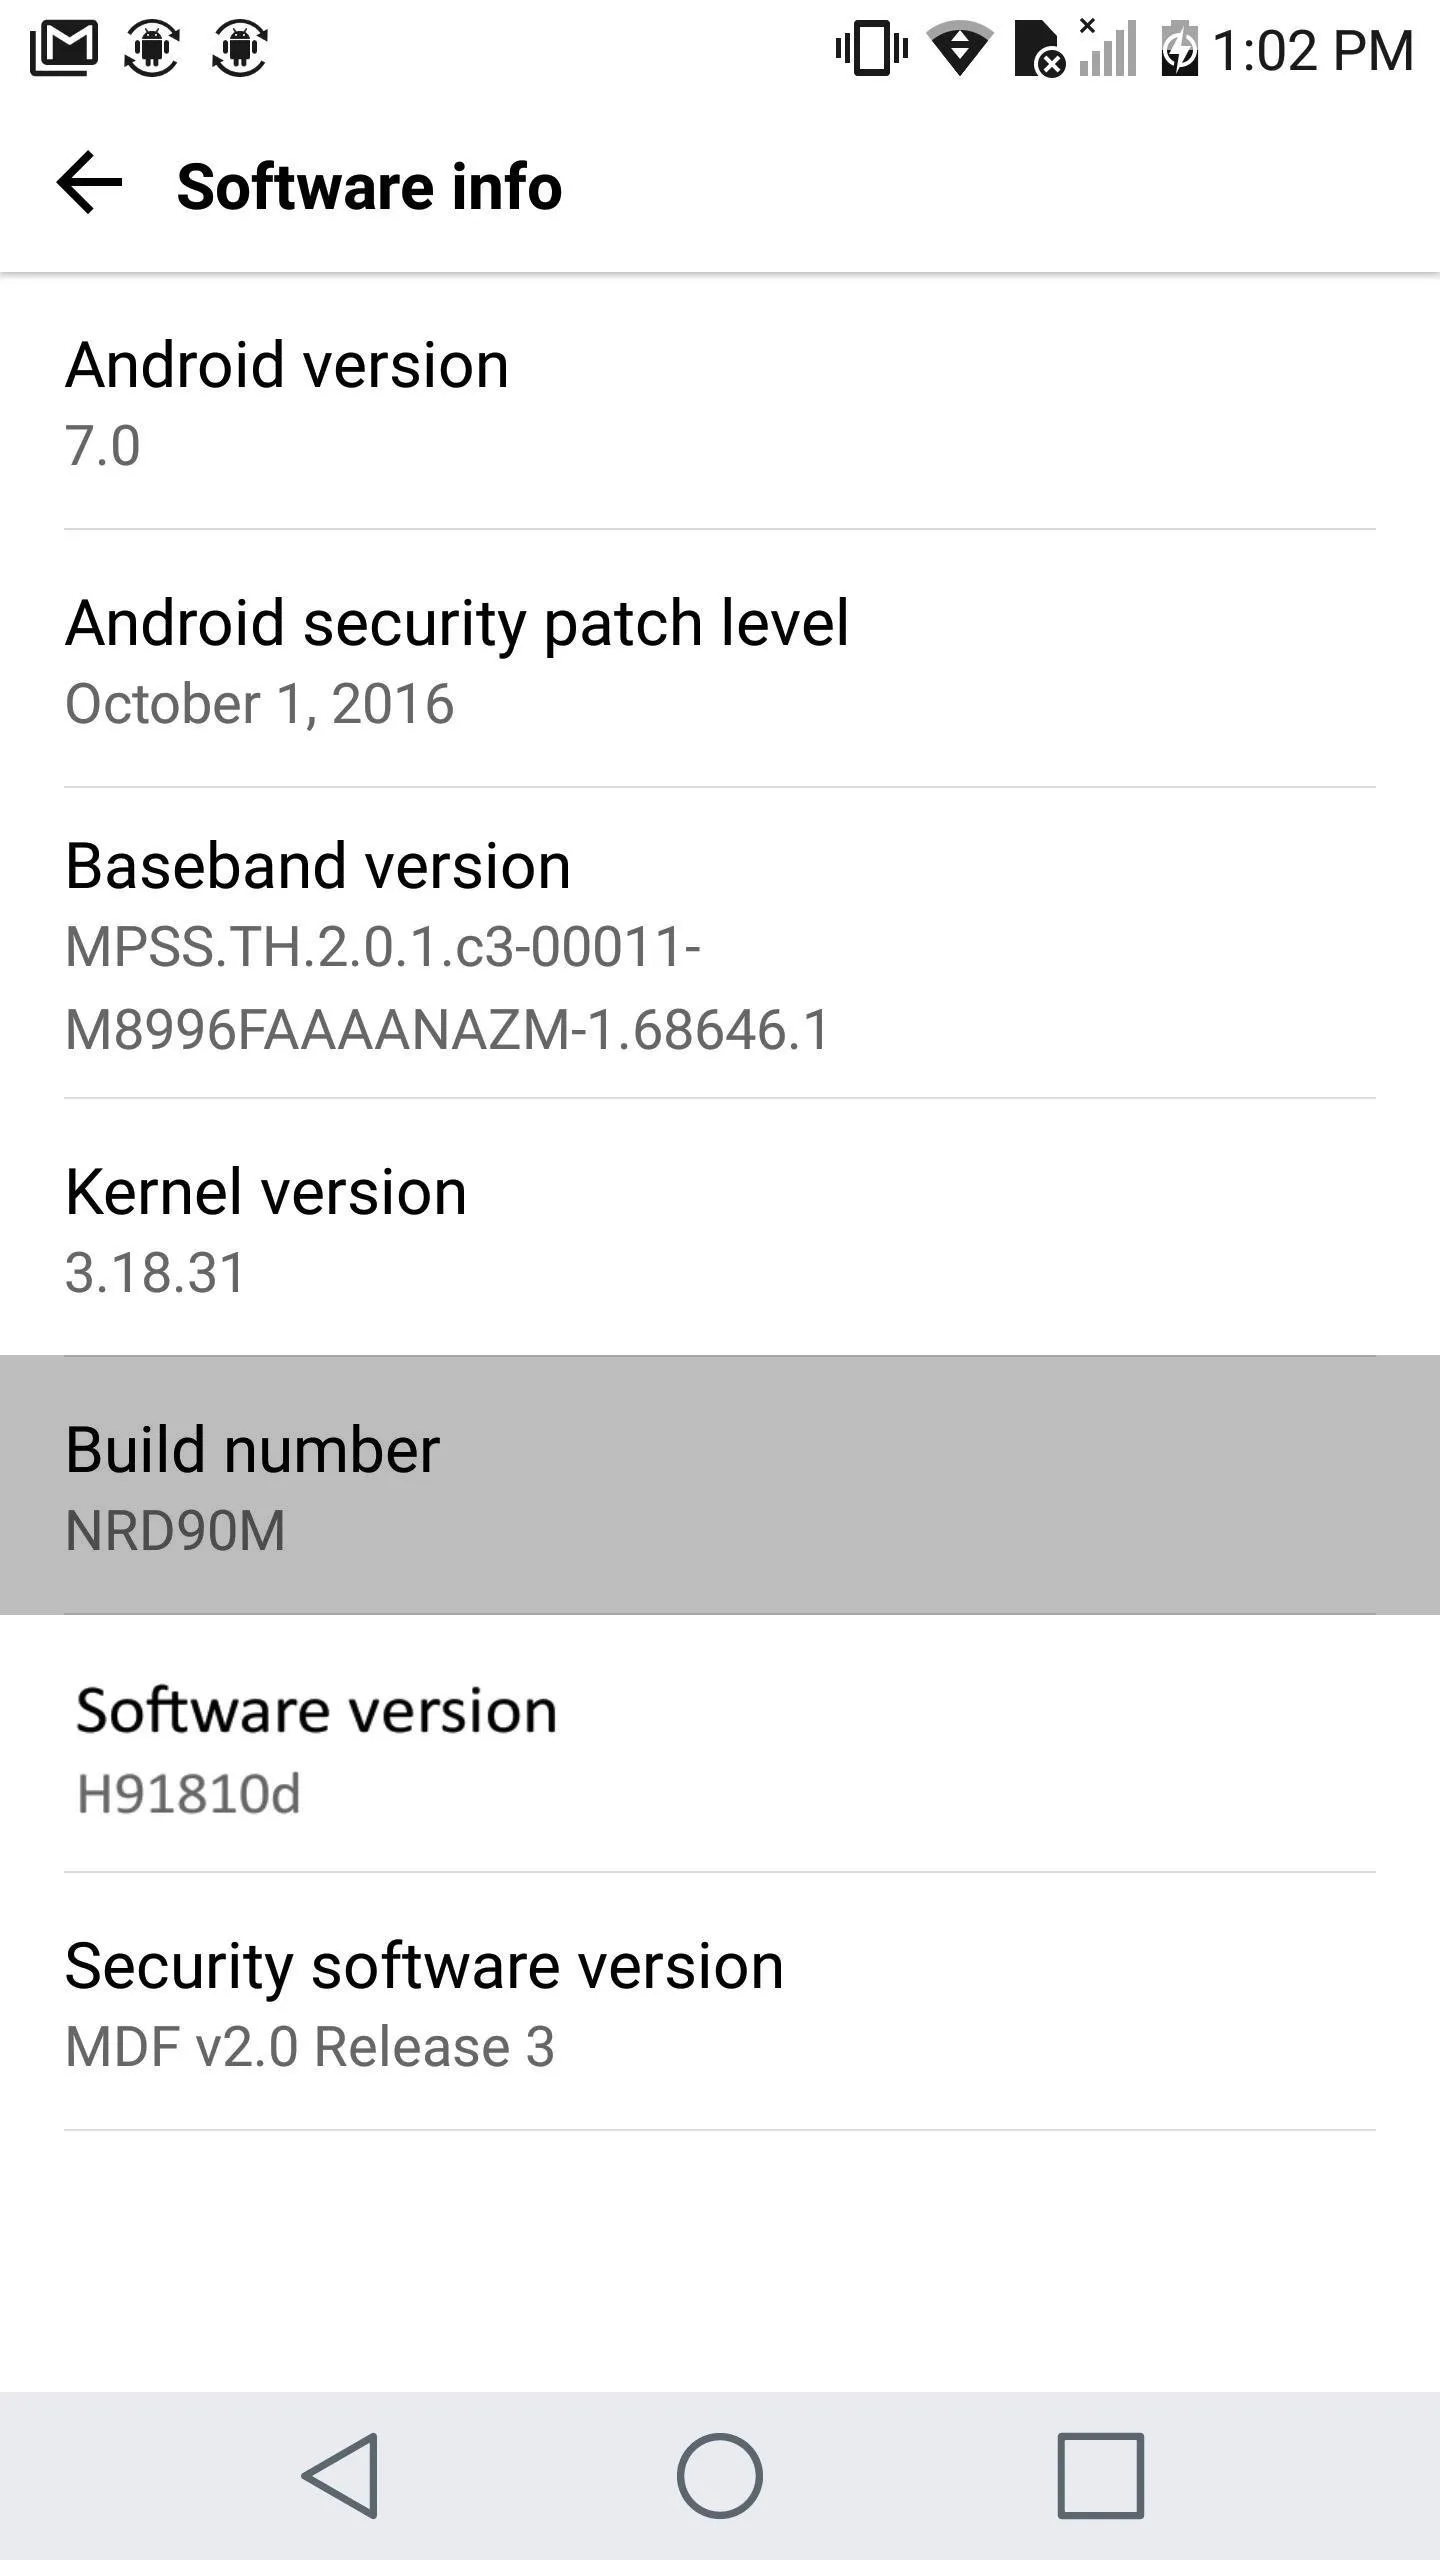
Enabling Developer options.
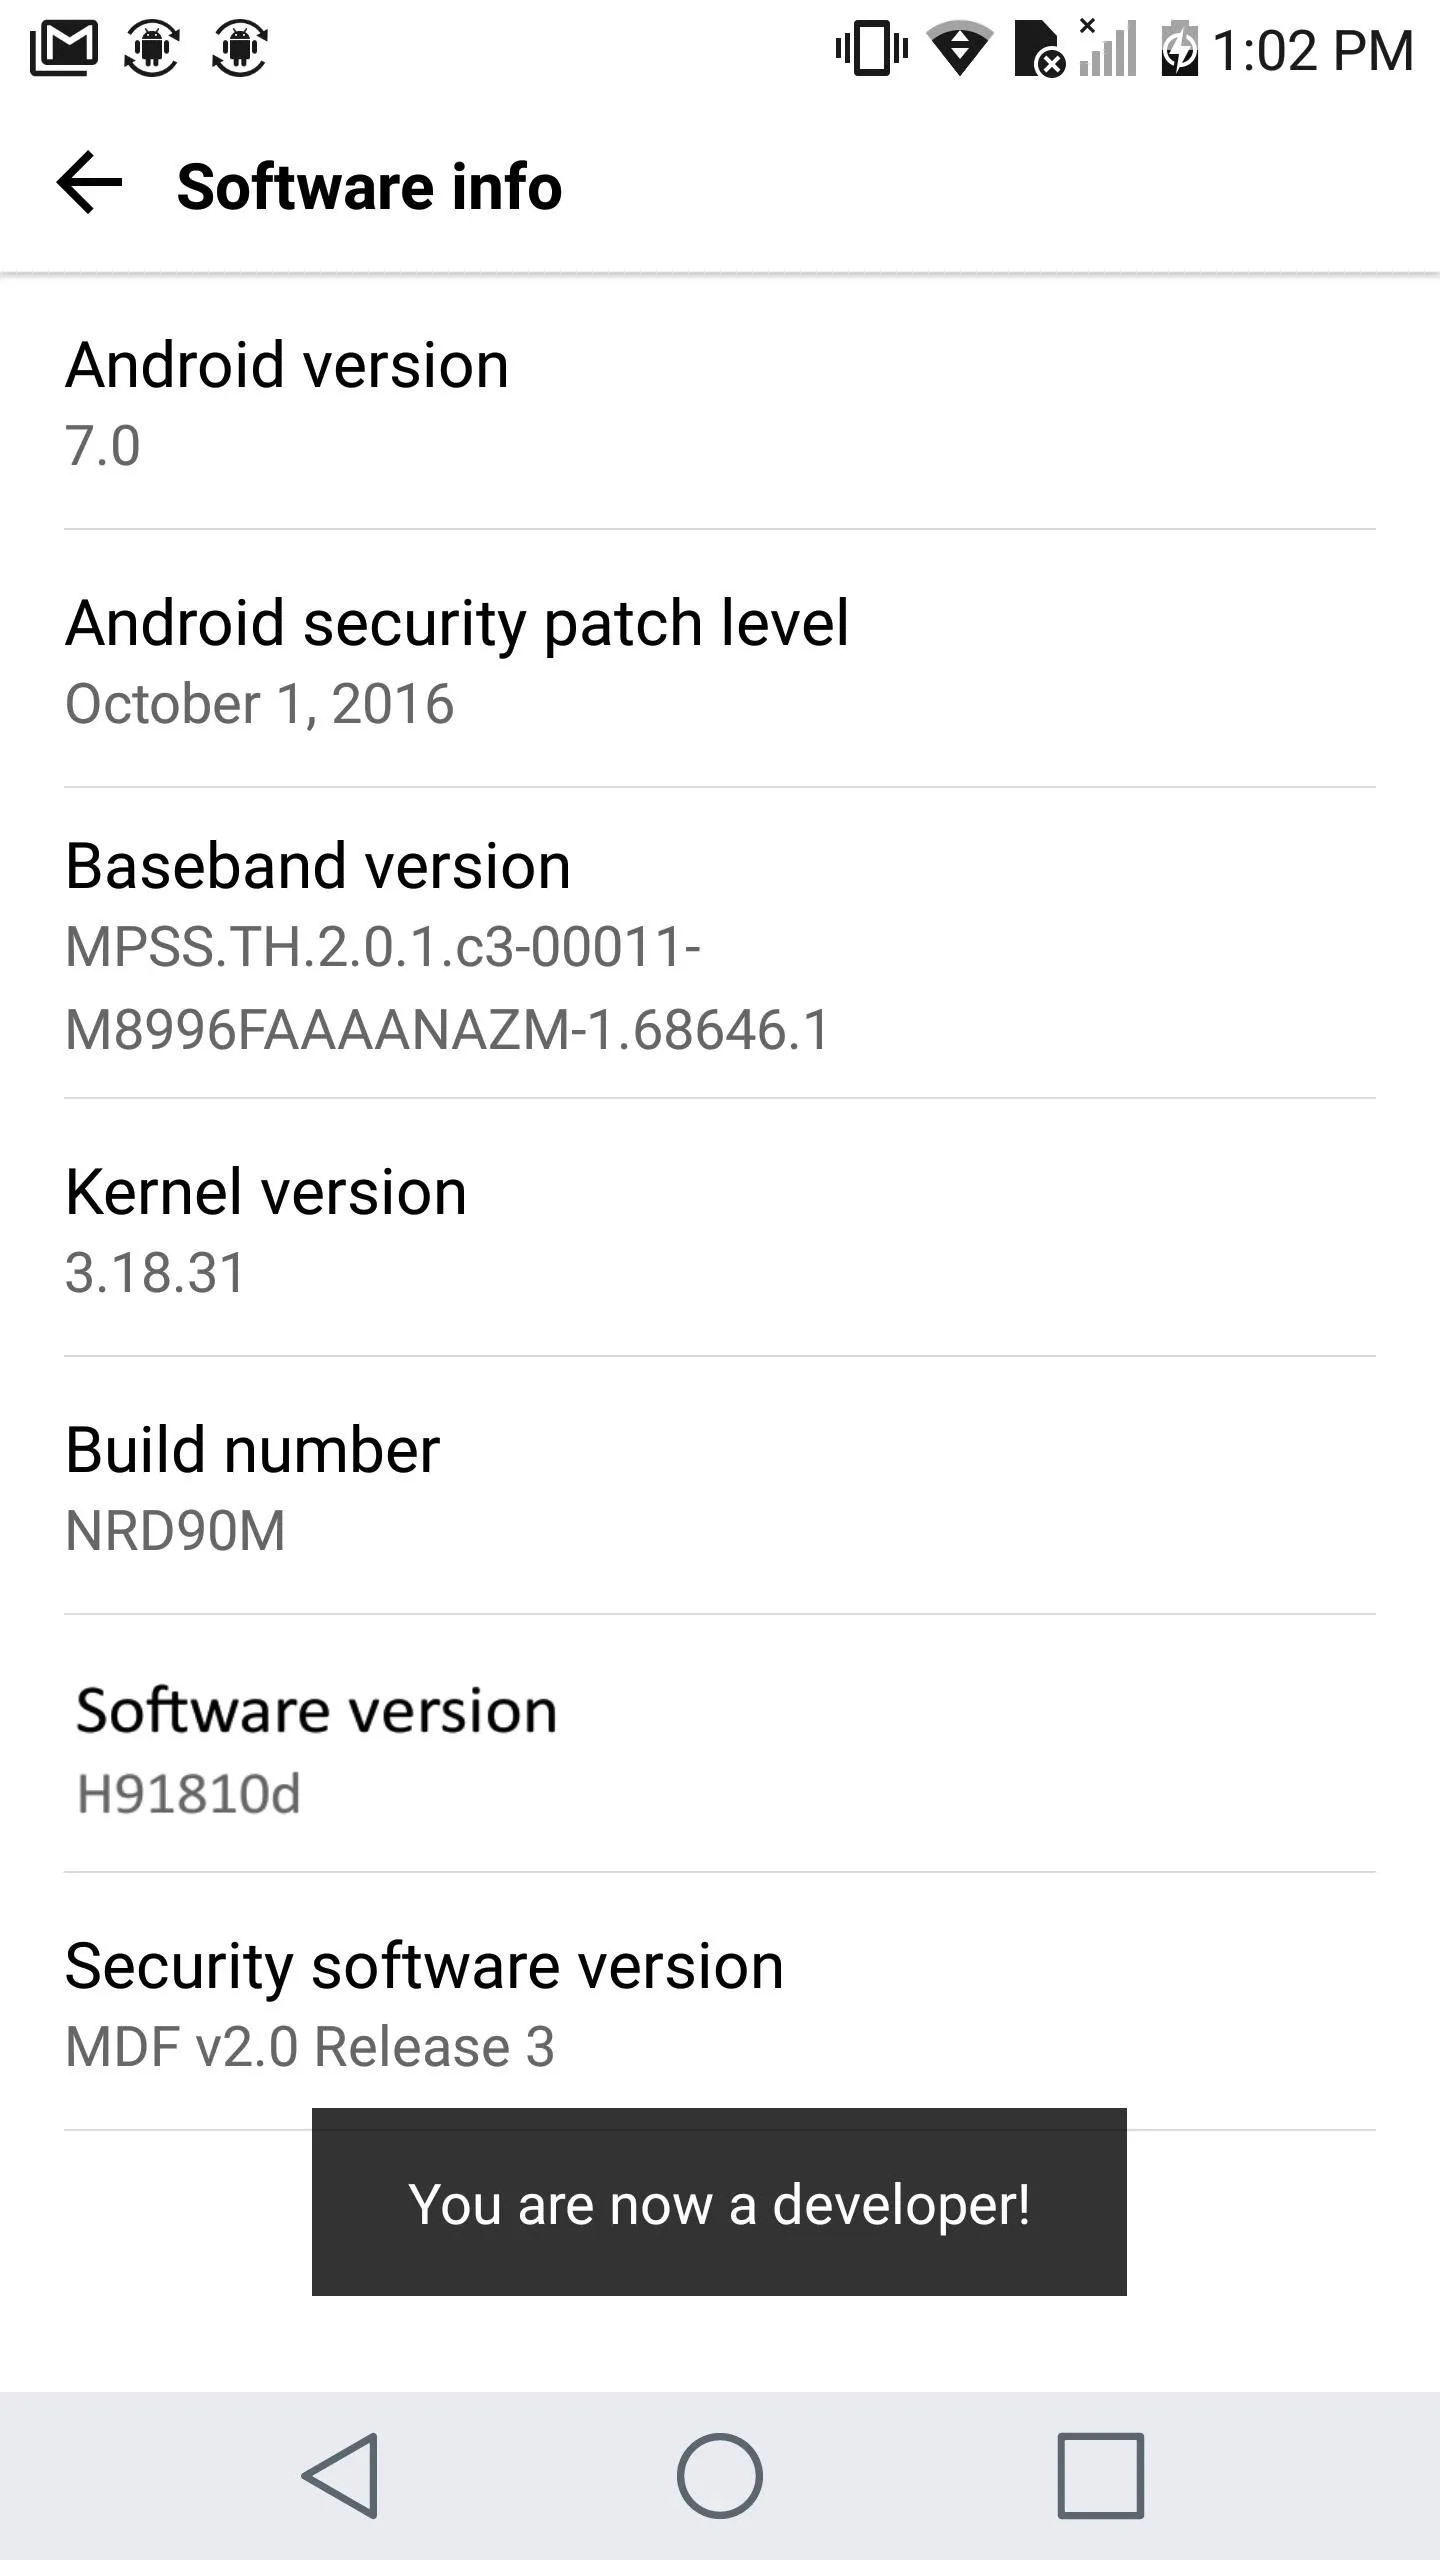

Enabling Developer options.

Step 4: Enable OEM Unlocking
Now go to Settings -> Developer options, then turn on the "OEM unlocking" option, and press "Enable" when prompted. Do not turn this off while using a custom ROM or a custom recovery, as it will result in a loss of your data.
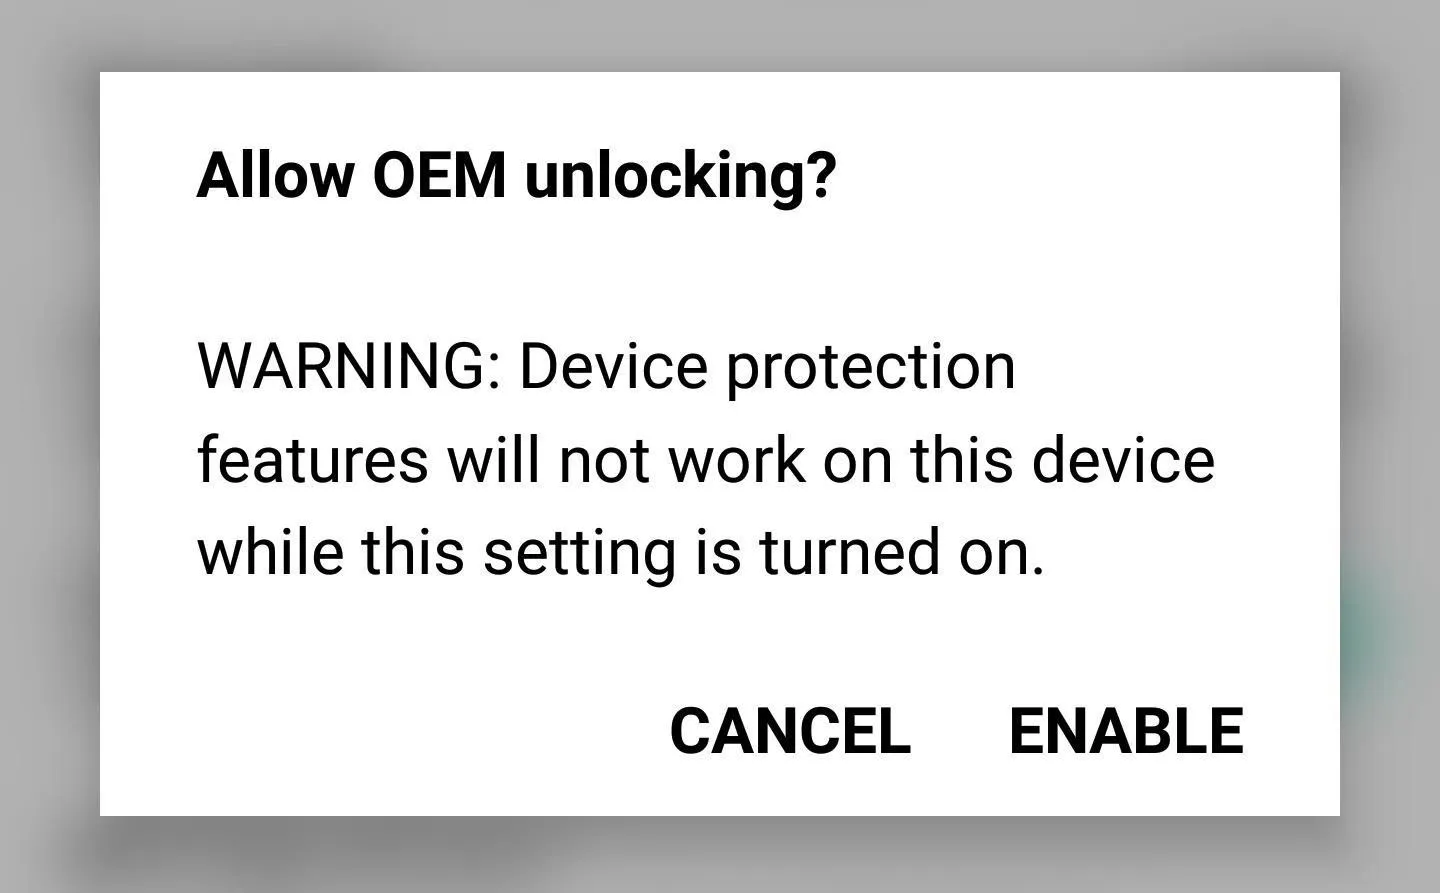
Enabling the "OEM Unlocking" setting in the Developer options menu.
Step 5: Enable USB Debugging
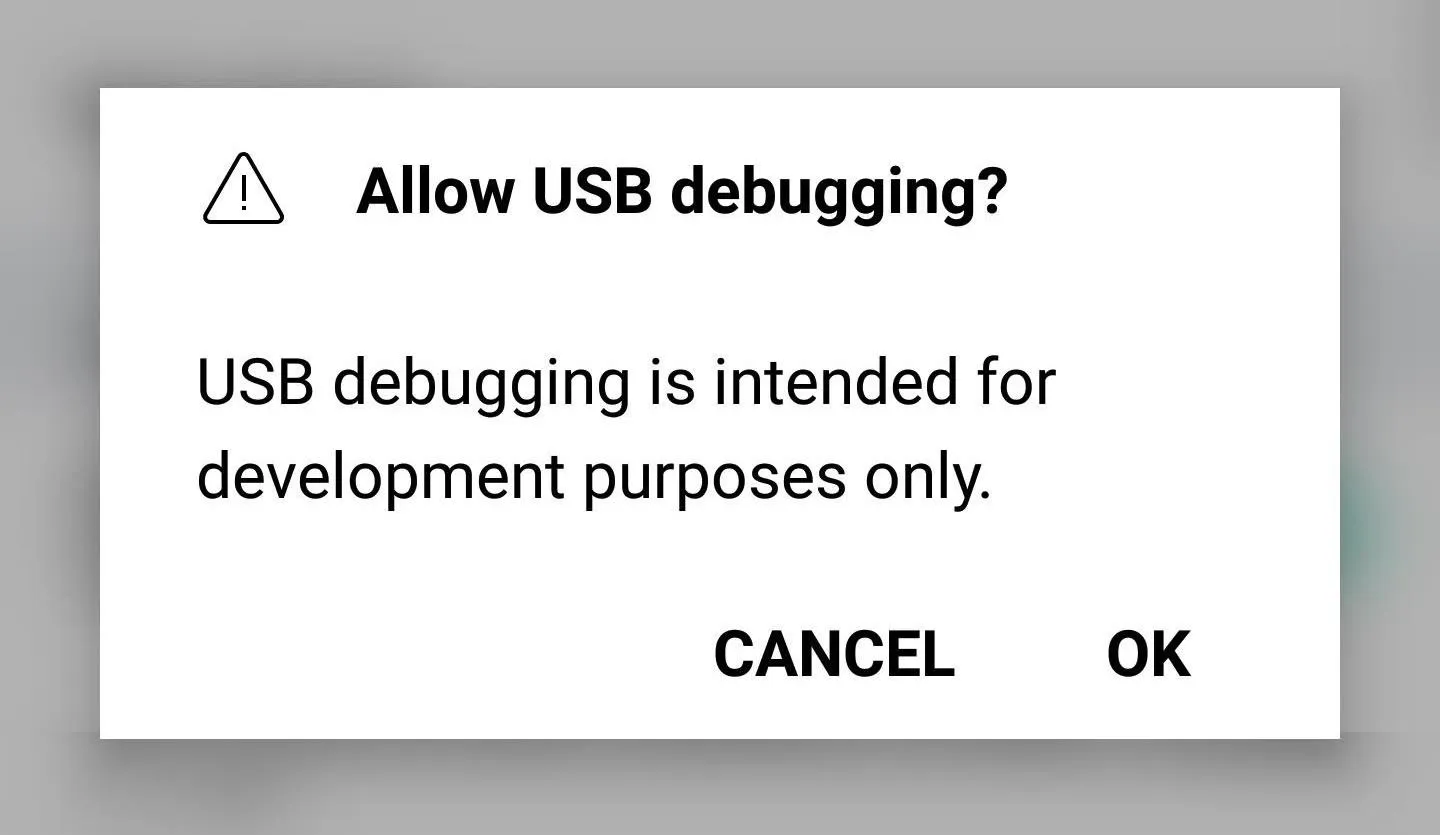
When you're done there, scroll down just a little bit and enable the "USB debugging" setting in the same menu.
Step 6: Connect Your Phone to Your Computer
Next up, connect your phone to your computer with a USB data cable. You might need to put the phone into PTP mode (for transferring images), as LG seems to have messed up their driver configurations. To do that, tap the USB Computer Connection notification that appears after plugging in your phone, then select "Photo transfer" from the popup.

Step 7: Open an ADB Shell on Your Computer
Now open the ADB and Fastboot installation directory on your computer. For most Windows users, this can be found at C:\Program Files (x86)\Android\android-sdk\platform-tools. For Mac and Linux users, it depends on where you extracted your ADB folder when you installed the utility, so search your hard drive for the platform-tools folder if you've forgotten.
From there, if you're using a Windows PC, hold down the shift button on your keyboard, then right-click any empty space and choose "Open command window here." For Mac and Linux users, simply open a Terminal window, then change directories to the platform-tools folder inside of your ADB installation directory.
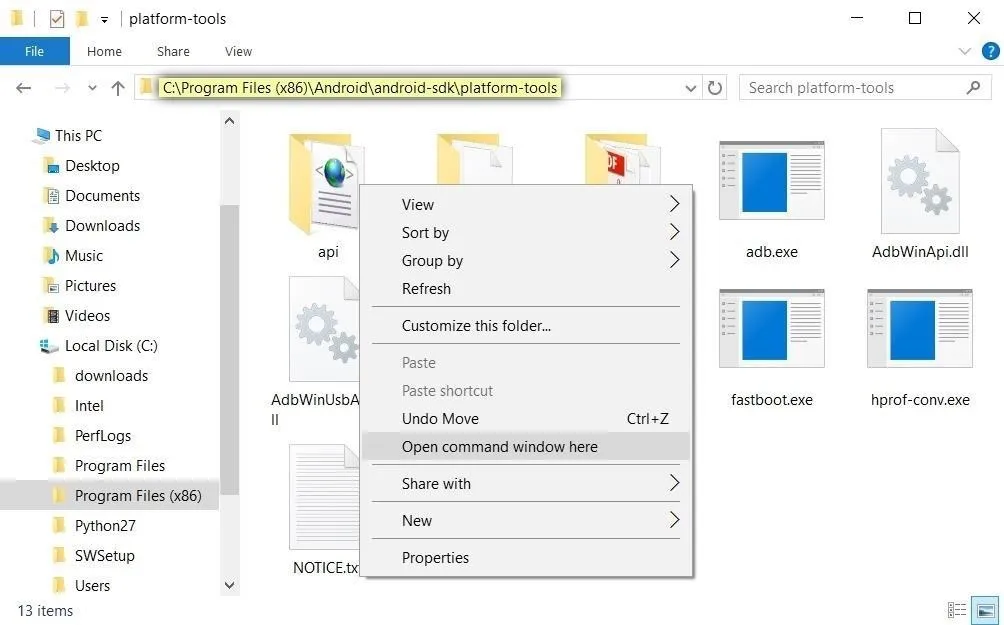
Opening an ADB shell on Windows.
Step 8: Start ADB
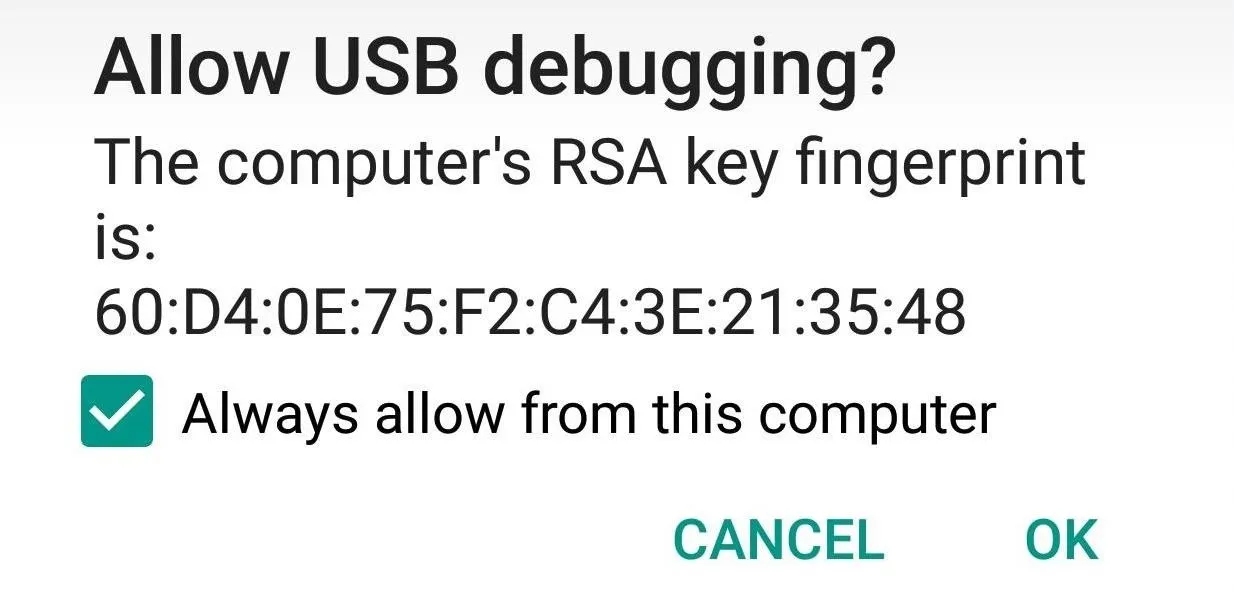
Next, type adb start-server in the command prompt. Once you've done that, make sure to check the notification on your phone to accept the debugging notification.
Step 9: Unlock Your Bootloader
NOTE: The following this step will wipe all your data and factory reset your phone.
Reboot into Fastboot mode by typing adb reboot bootloader into the ADB shell. Once your phone is in Bootloader mode, also known as Fastboot mode, type in fastboot oem unlock. At this point, you should see a message on your phone confirming if you'd like to unlock your bootloader and warning you that, so press your power button to confirm your choice.
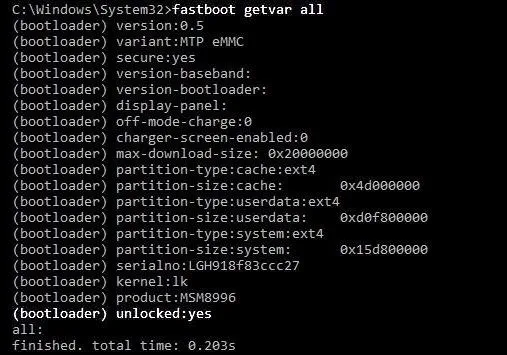
Once you're done with that, check the status of your bootloader lock with the command fastboot getvar all. Make sure it says your bootloader is unlocked, and then boot back into your phone by typing, fastboot reboot.
Step 10: Re-Enable USB Debugging
Upon rebooting, you will hit the initial welcome and set-up screen. Skip past as much of it as possible as our goal is to simply gain access to ADB. Then, once you make it to the home screen, repeat Steps 3-8 above to enable USB debugging on your phone again.
Step 11: Download Required Exploitation Files
Now download the four required binaries, custom TWRP, and SuperSU onto your computer using the links below.
When you're done there, move all of the downloaded files over to the platform-tools folder inside of your ADB and Fastboot installation directory. If you're unsure about the location of this folder, check Step 7 above.
NOTE: XDA Senior Member bezeek has put together a one-click utility that will automate steps eleven and twelve. However, I recommend doing it manually as the one-click utility has caused users to bootloop and even brick their devices.
Step 12: Place the Dirty COW Files on Your Phone
Back in the command prompt or terminal window on your computer, copy and paste the commands below one at a time. After each command or group of commands, I'll quickly explain what we just did or when it's important to be patient.
- adb push dirtycow /data/local/tmp
- adb push recowvery-applypatch /data/local/tmp
- adb push recowvery-app_process64 /data/local/tmp
- adb push recowvery-run-as /data/local/tmp
The four commands above will place the Dirty COW files on your phone so that we can use them later.
- adb shell
- cd /data/local/tmp
- chmod 0777 *
Here, we navigated to the directory with the Dirty COW files and allowed read and write permissions.

Step 13: Execute the DIRTY COW Files
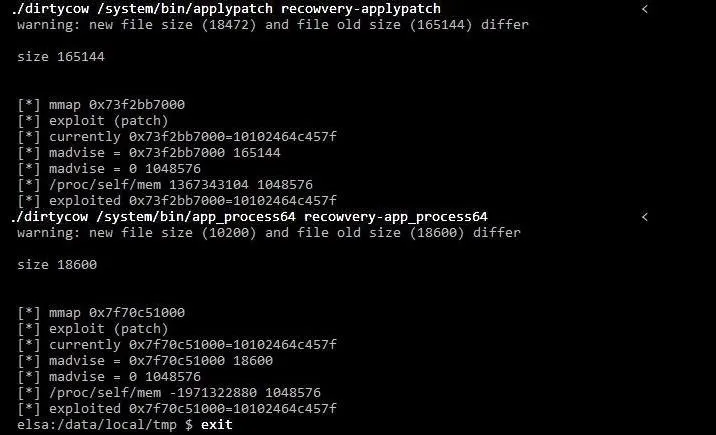
Next up, type the following commands, which will execute the Dirty COW exploit on your phone.
- ./dirtycow /system/bin/applypatch recowvery-applypatch
With the above command, we have begun the exploitation process. Wait for completion before proceeding.
- ./dirtycow /system/bin/app_process64 recowvery-app_process64
After the above command, your phone will look like it's crashing. Wait for completion before proceeding.
- exit
- adb logcat -s recowvery
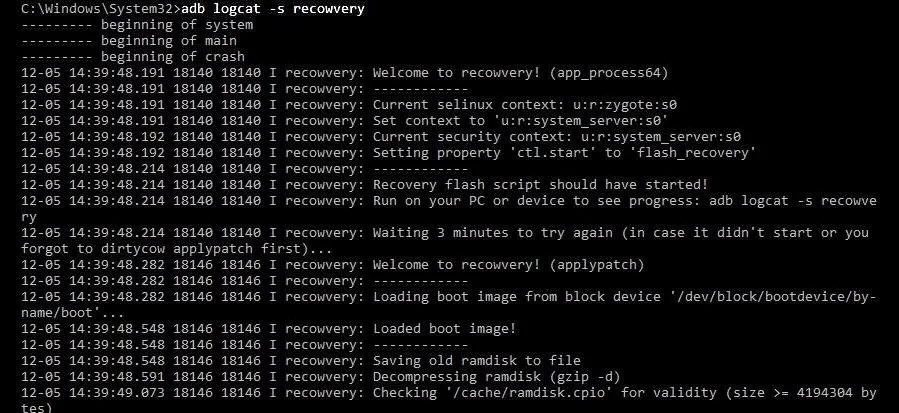
Now wait for it to tell you the exploiting was successfully executed. We want to make sure the exploit worked before moving to the next step.
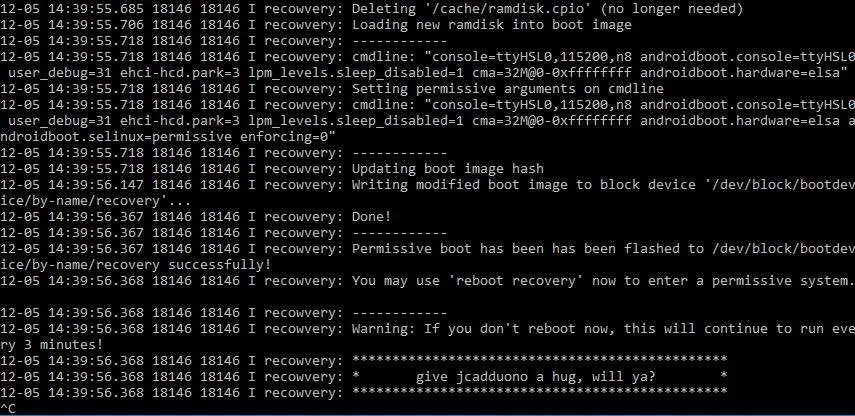
Now, before continuing with the following commands, make sure to press CTRL+C on your keyboard. In other programs it used as a copy function, but here, it will end the current process and start a new one.
- adb shell reboot recovery
Wait for phone to boot up again. Your recovery will be reverted to stock.
- adb shell
- getenforce
It should say "Permissive" on the screen. If it does, we're done with this step!
Step 14: Install TWRP
After that, we'll install TWRP custom recovery, which will allow us to make root permanent in a future step.
- cd /data/local/tmp
- ./dirtycow /system/bin/run-as recowvery-run-as
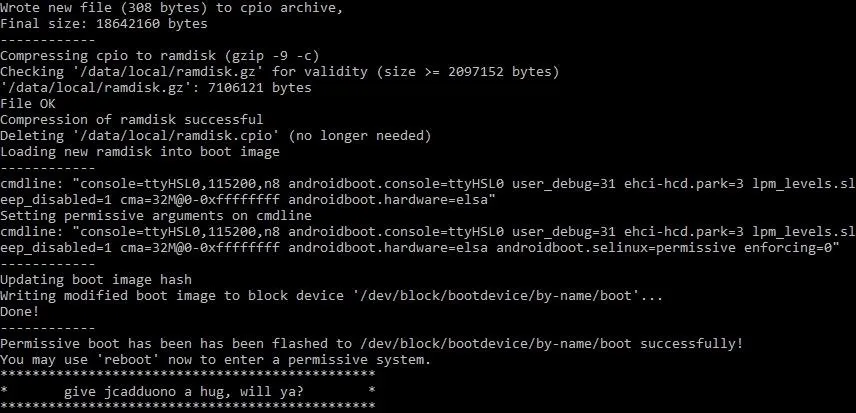
- run-as exec ./recowvery-applypatch boot
Wait for it to flash your boot image this time.
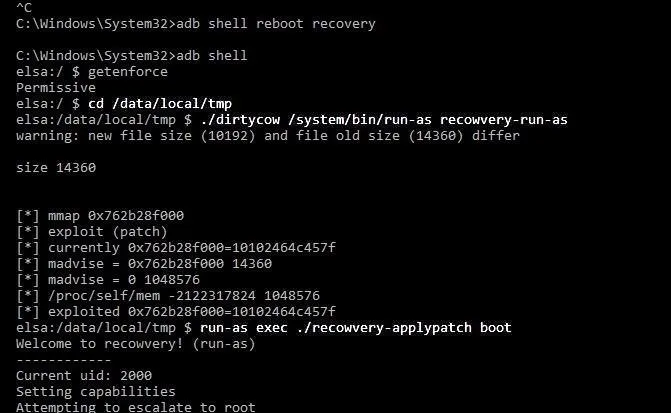
This is flashing a modified boot image with some security features disabled so that we can boot into TWRP after installing it.
- run-as su
- exit
- exit
- adb push twrp-3.0.2-1-h918.img /sdcard/twrp.img
- adb shell
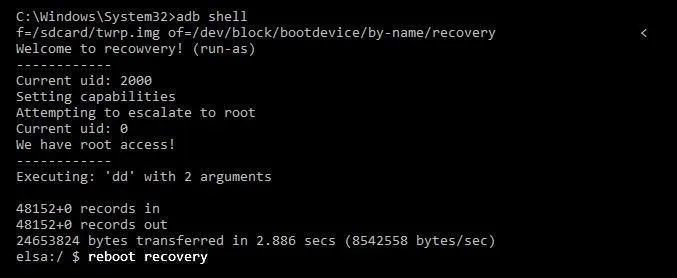
- run-as exec dd if=/sdcard/twrp.img of=/dev/block/bootdevice/by-name/recovery
Here, we just replaced the stock Android recovery with TWRP.
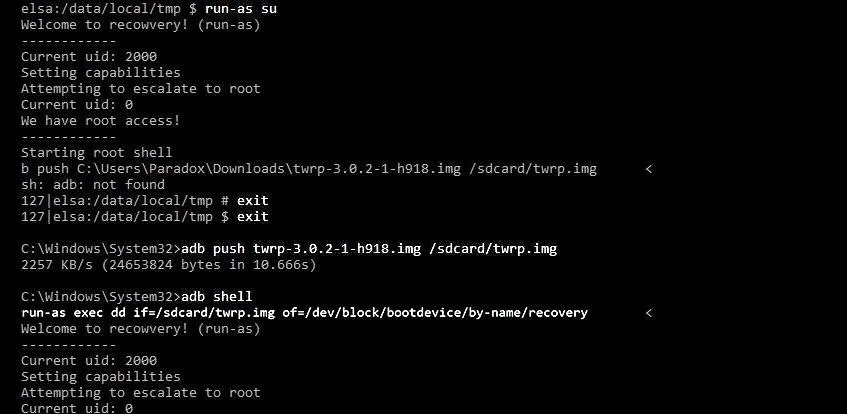
Wait for it to complete, then:
- reboot recovery
Step 15: Make TWRP Your Permanent Recovery
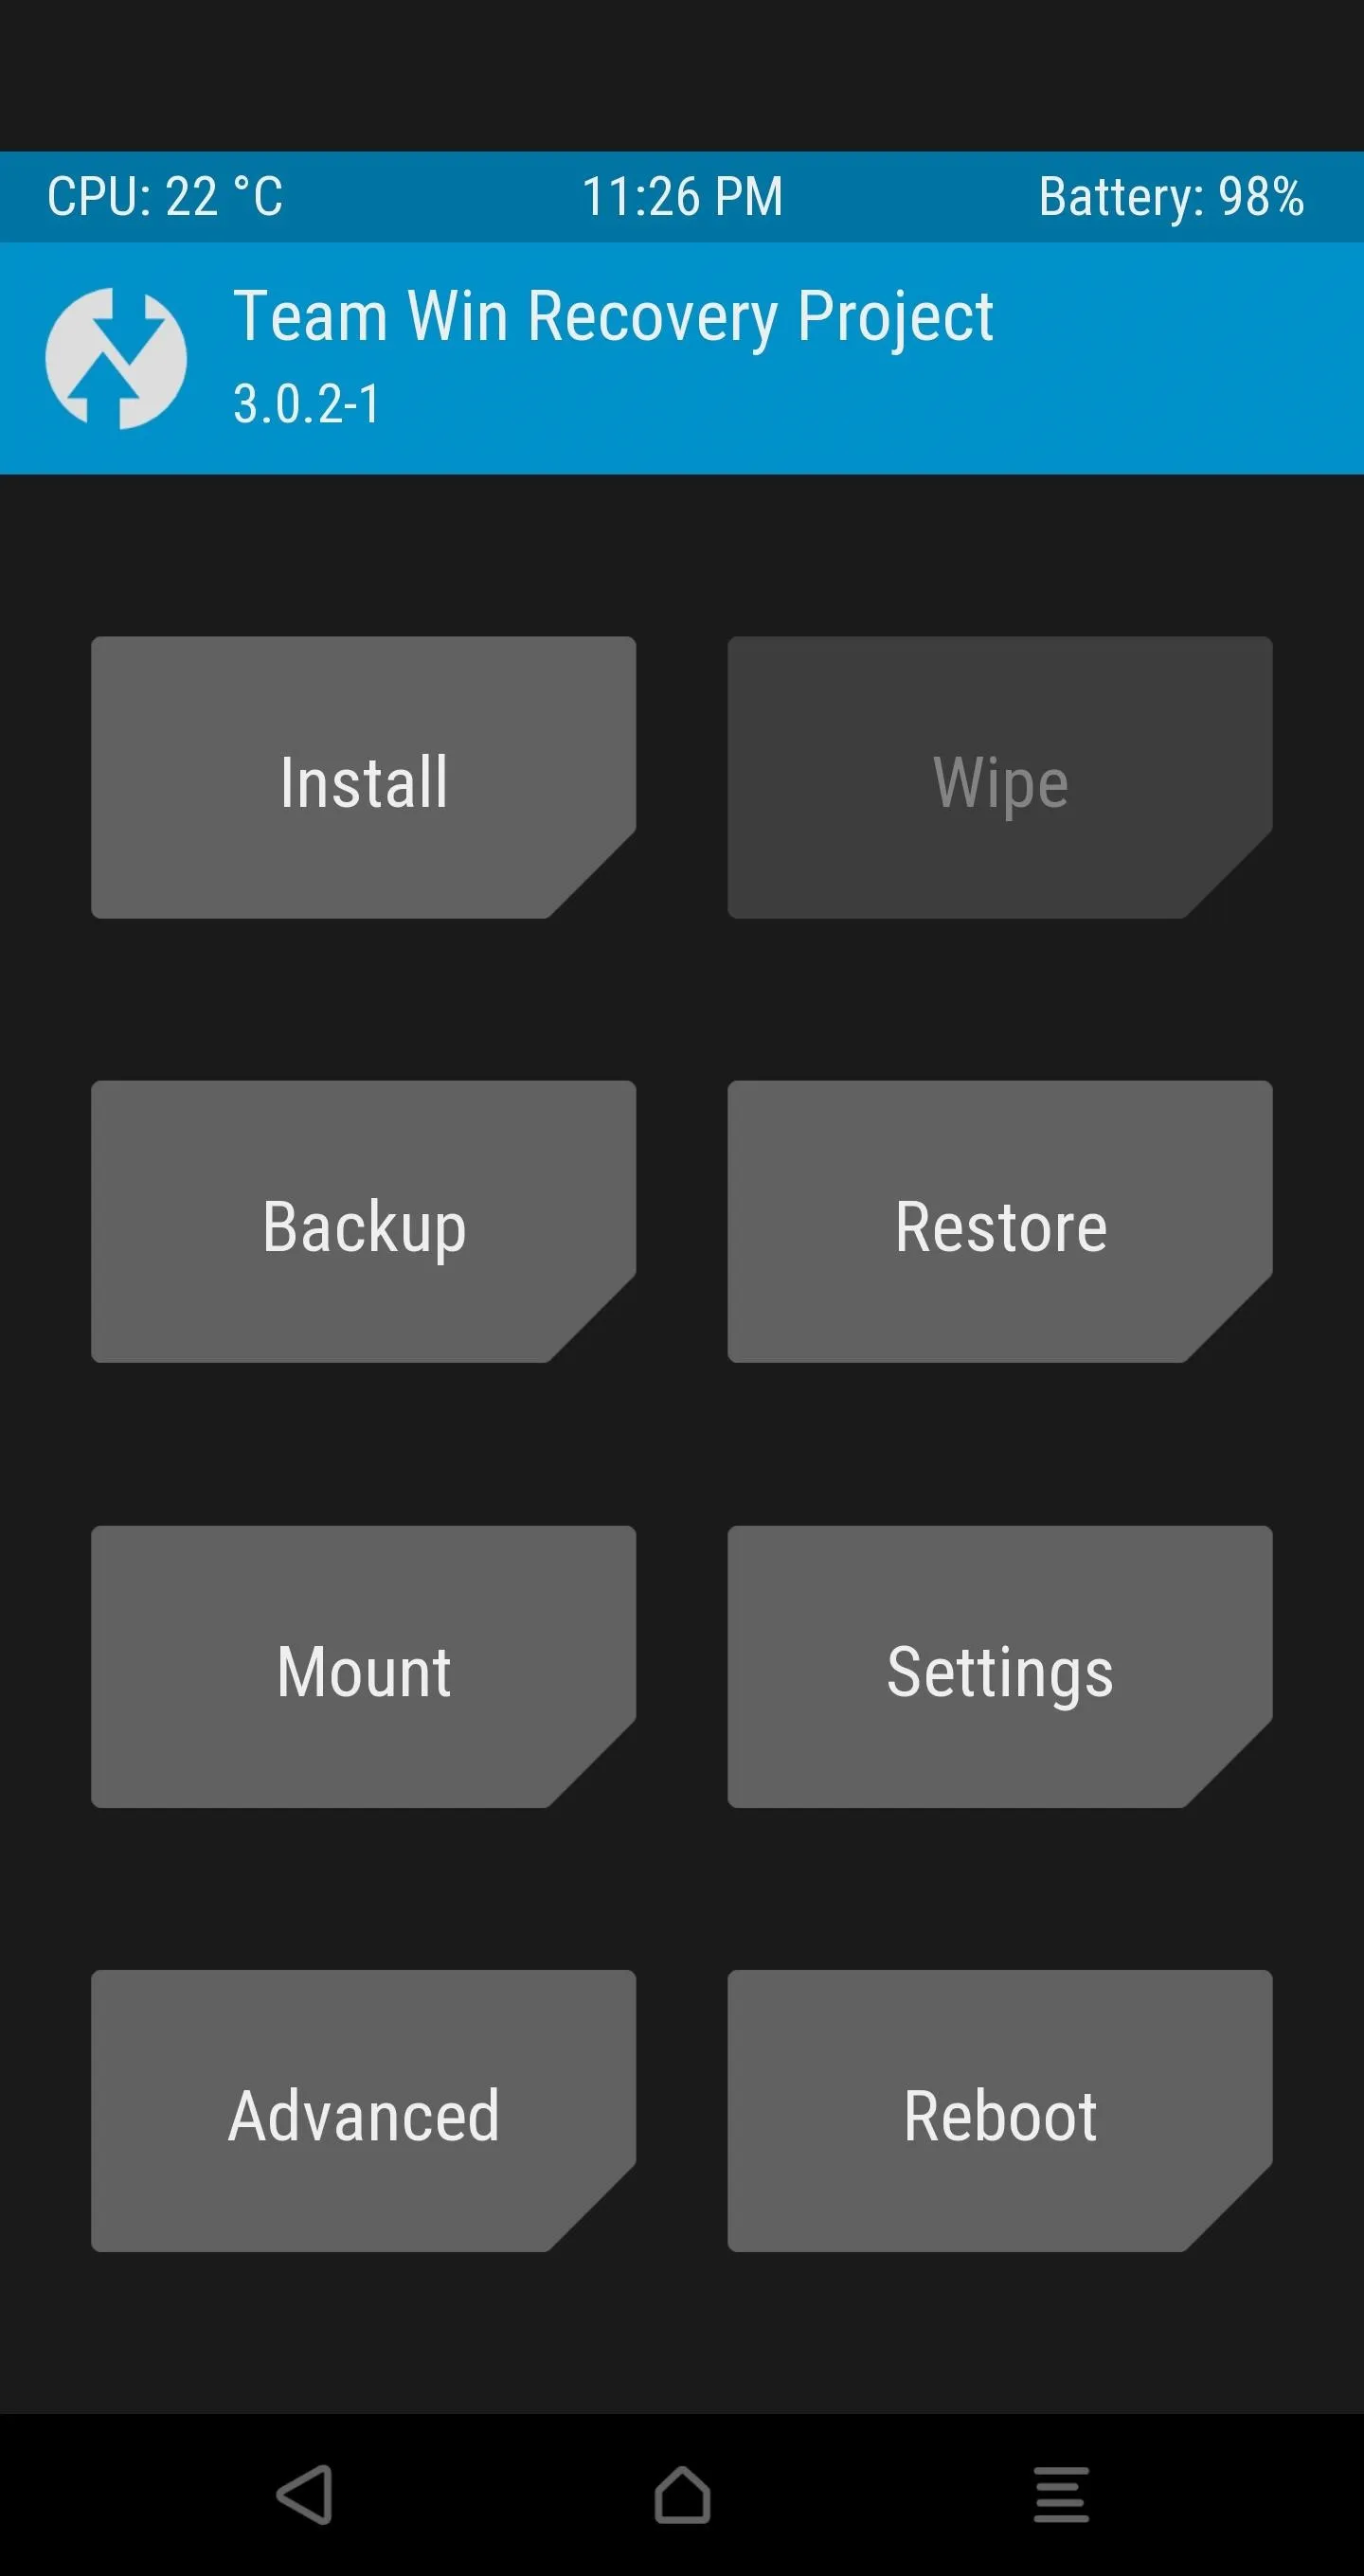
If you've made it this far, that means you have successfully booted into TWRP. At this point, TWRP will ask you if you want to enable system modifications. Make sure to swipe to allow modifications, otherwise your OS will replace TWRP on the next boot.

Step 16: Decrypt Your Device Storage
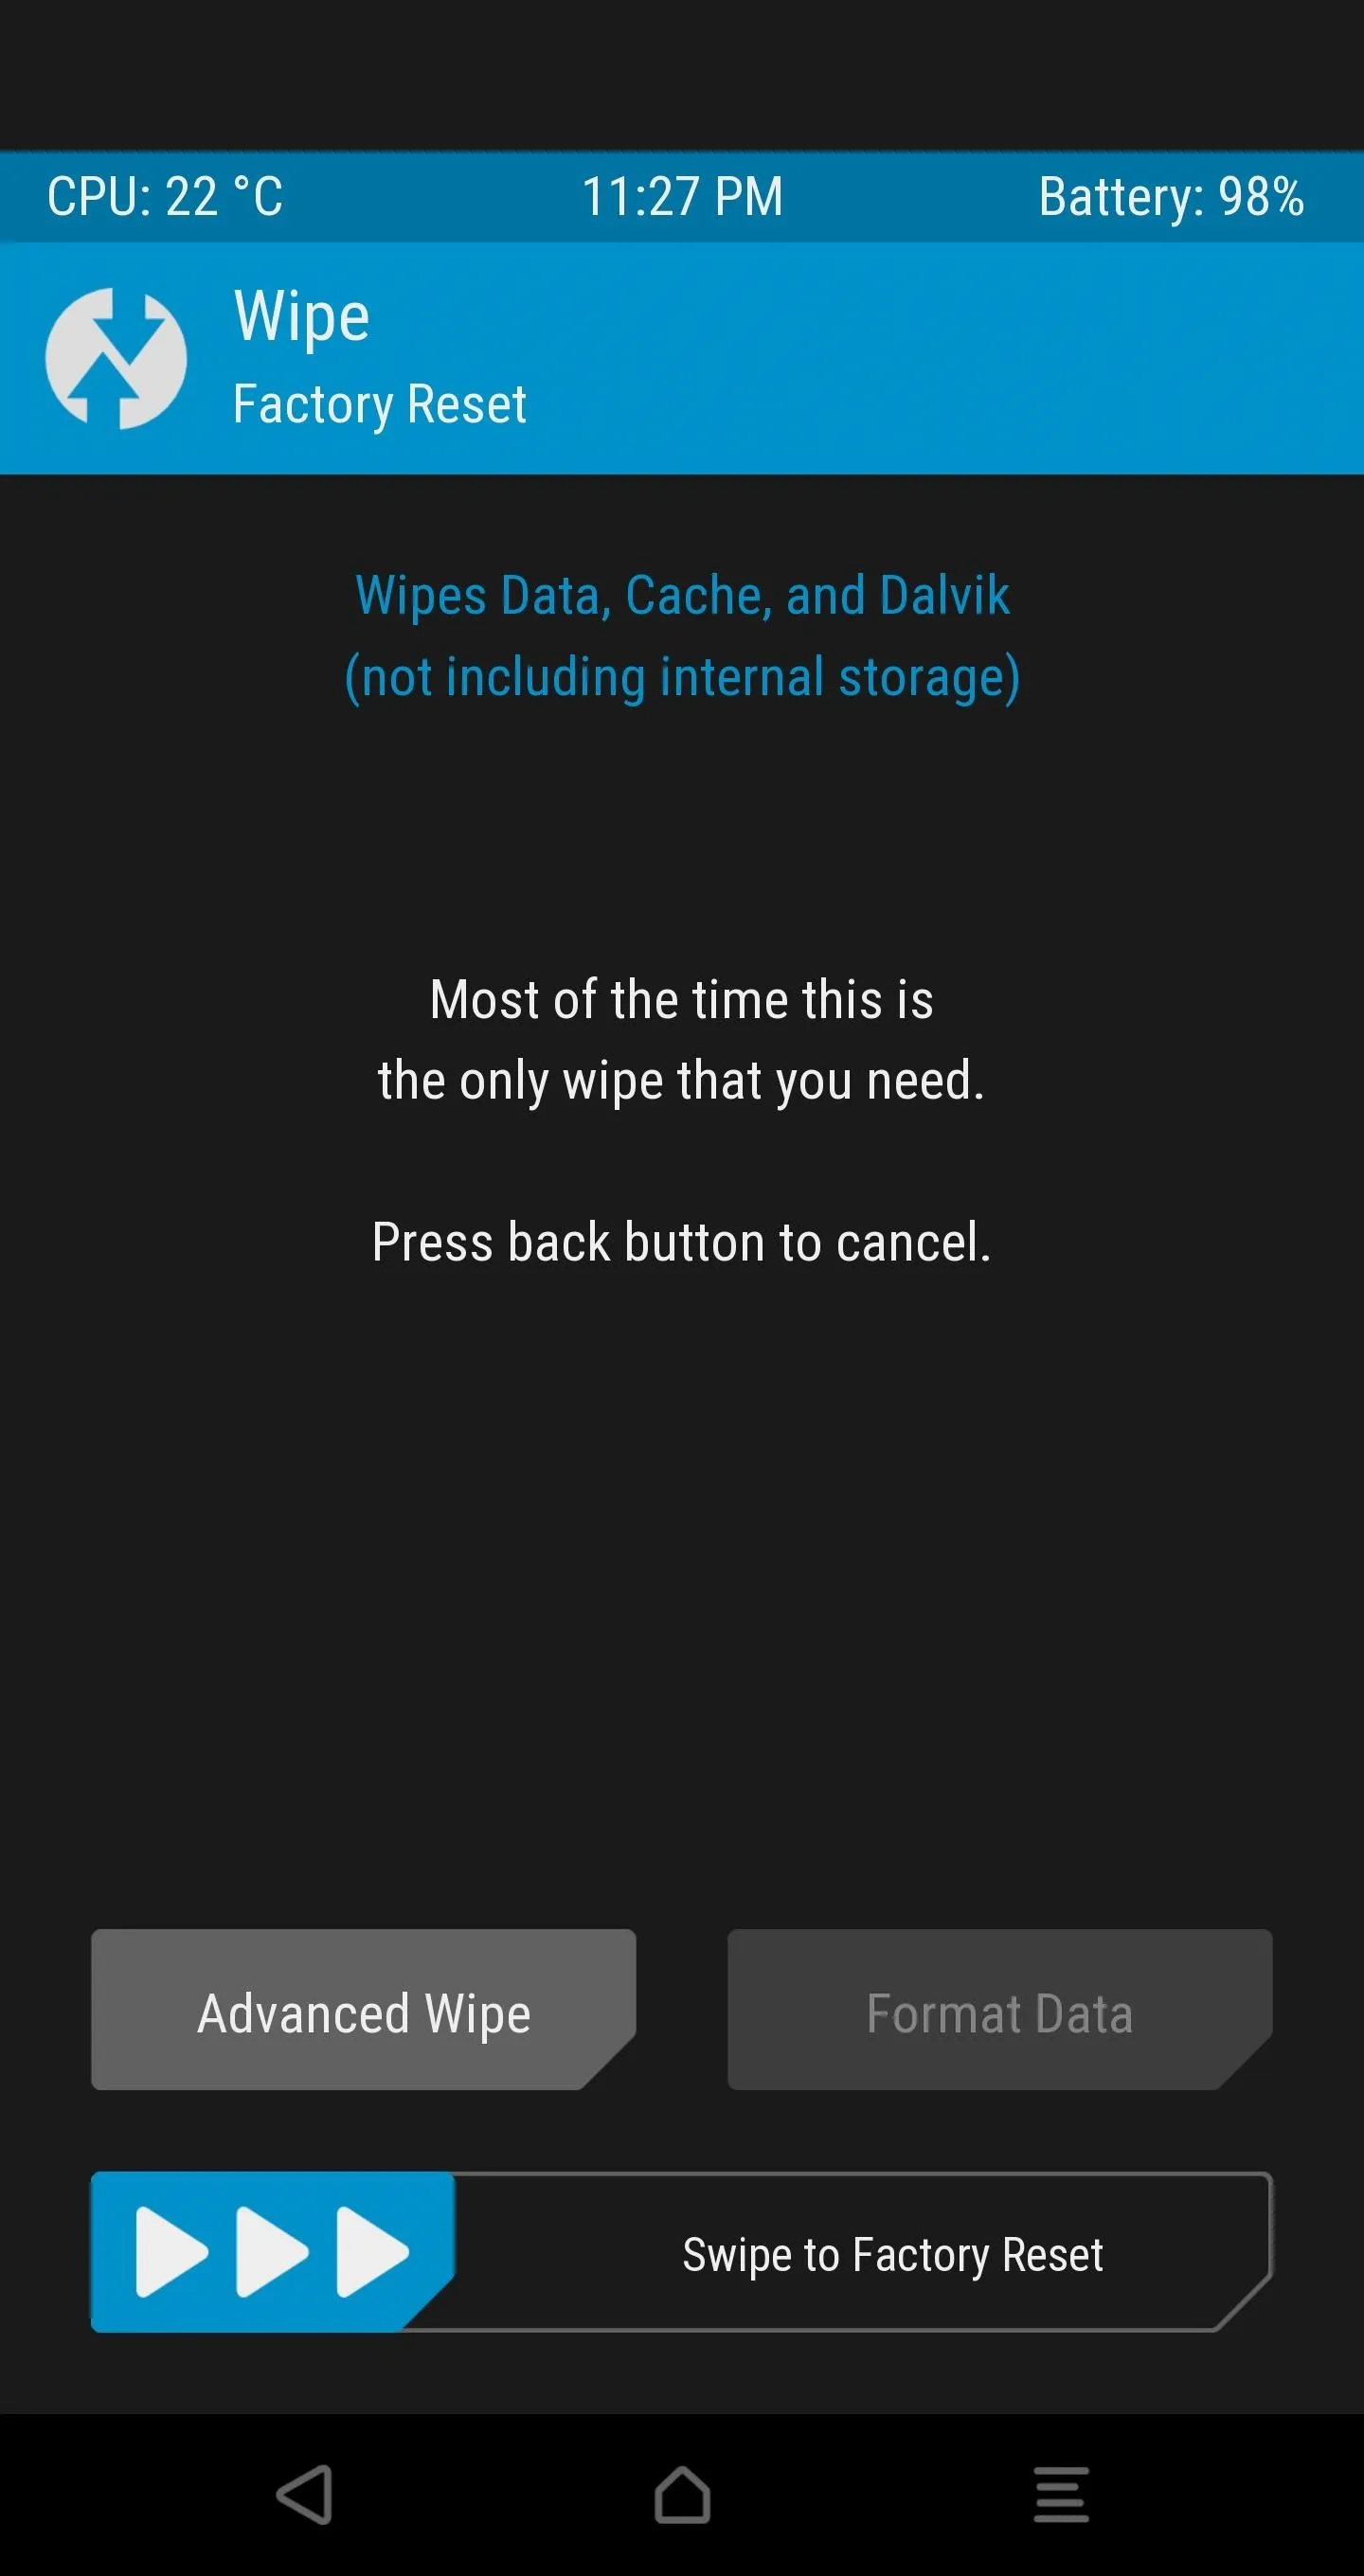
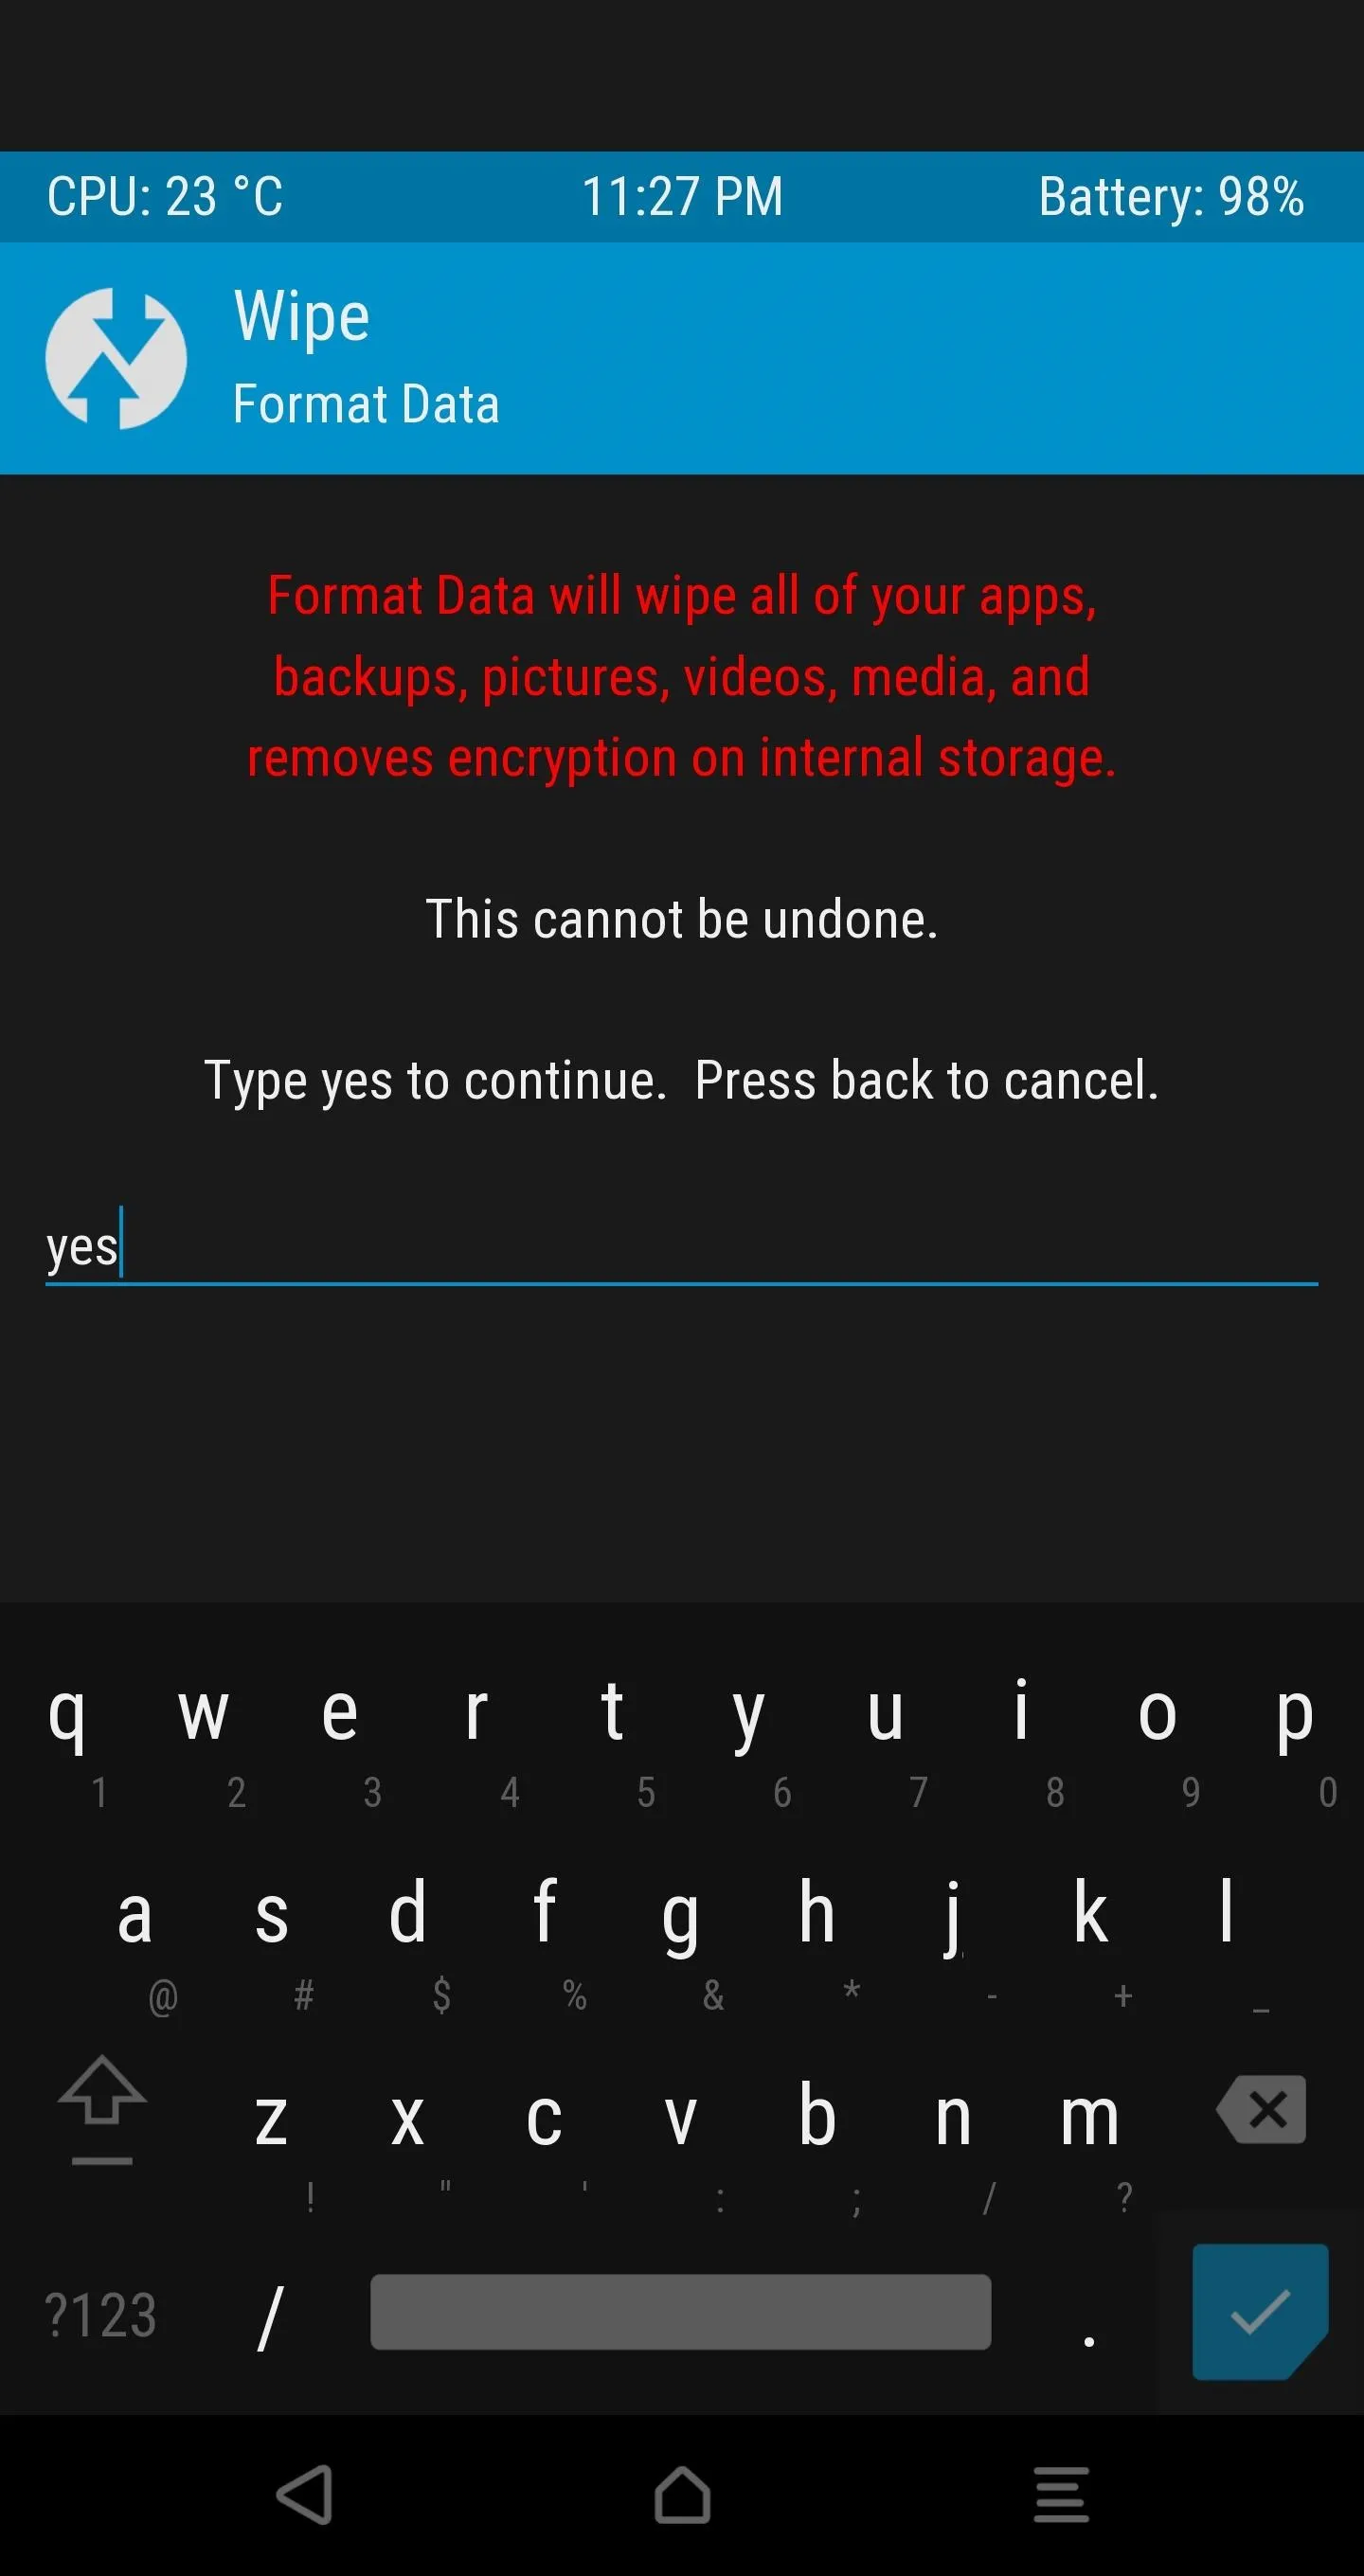
Next, use the "Format Data" option under the Wipe tab in order to disable device encryption. Type in yes and tap the check mark.


Step 17: Reboot TWRP with Decrypted Storage
Go back to the main screen of TWRP and open the Reboot tab to select the "Reboot Recovery" option.
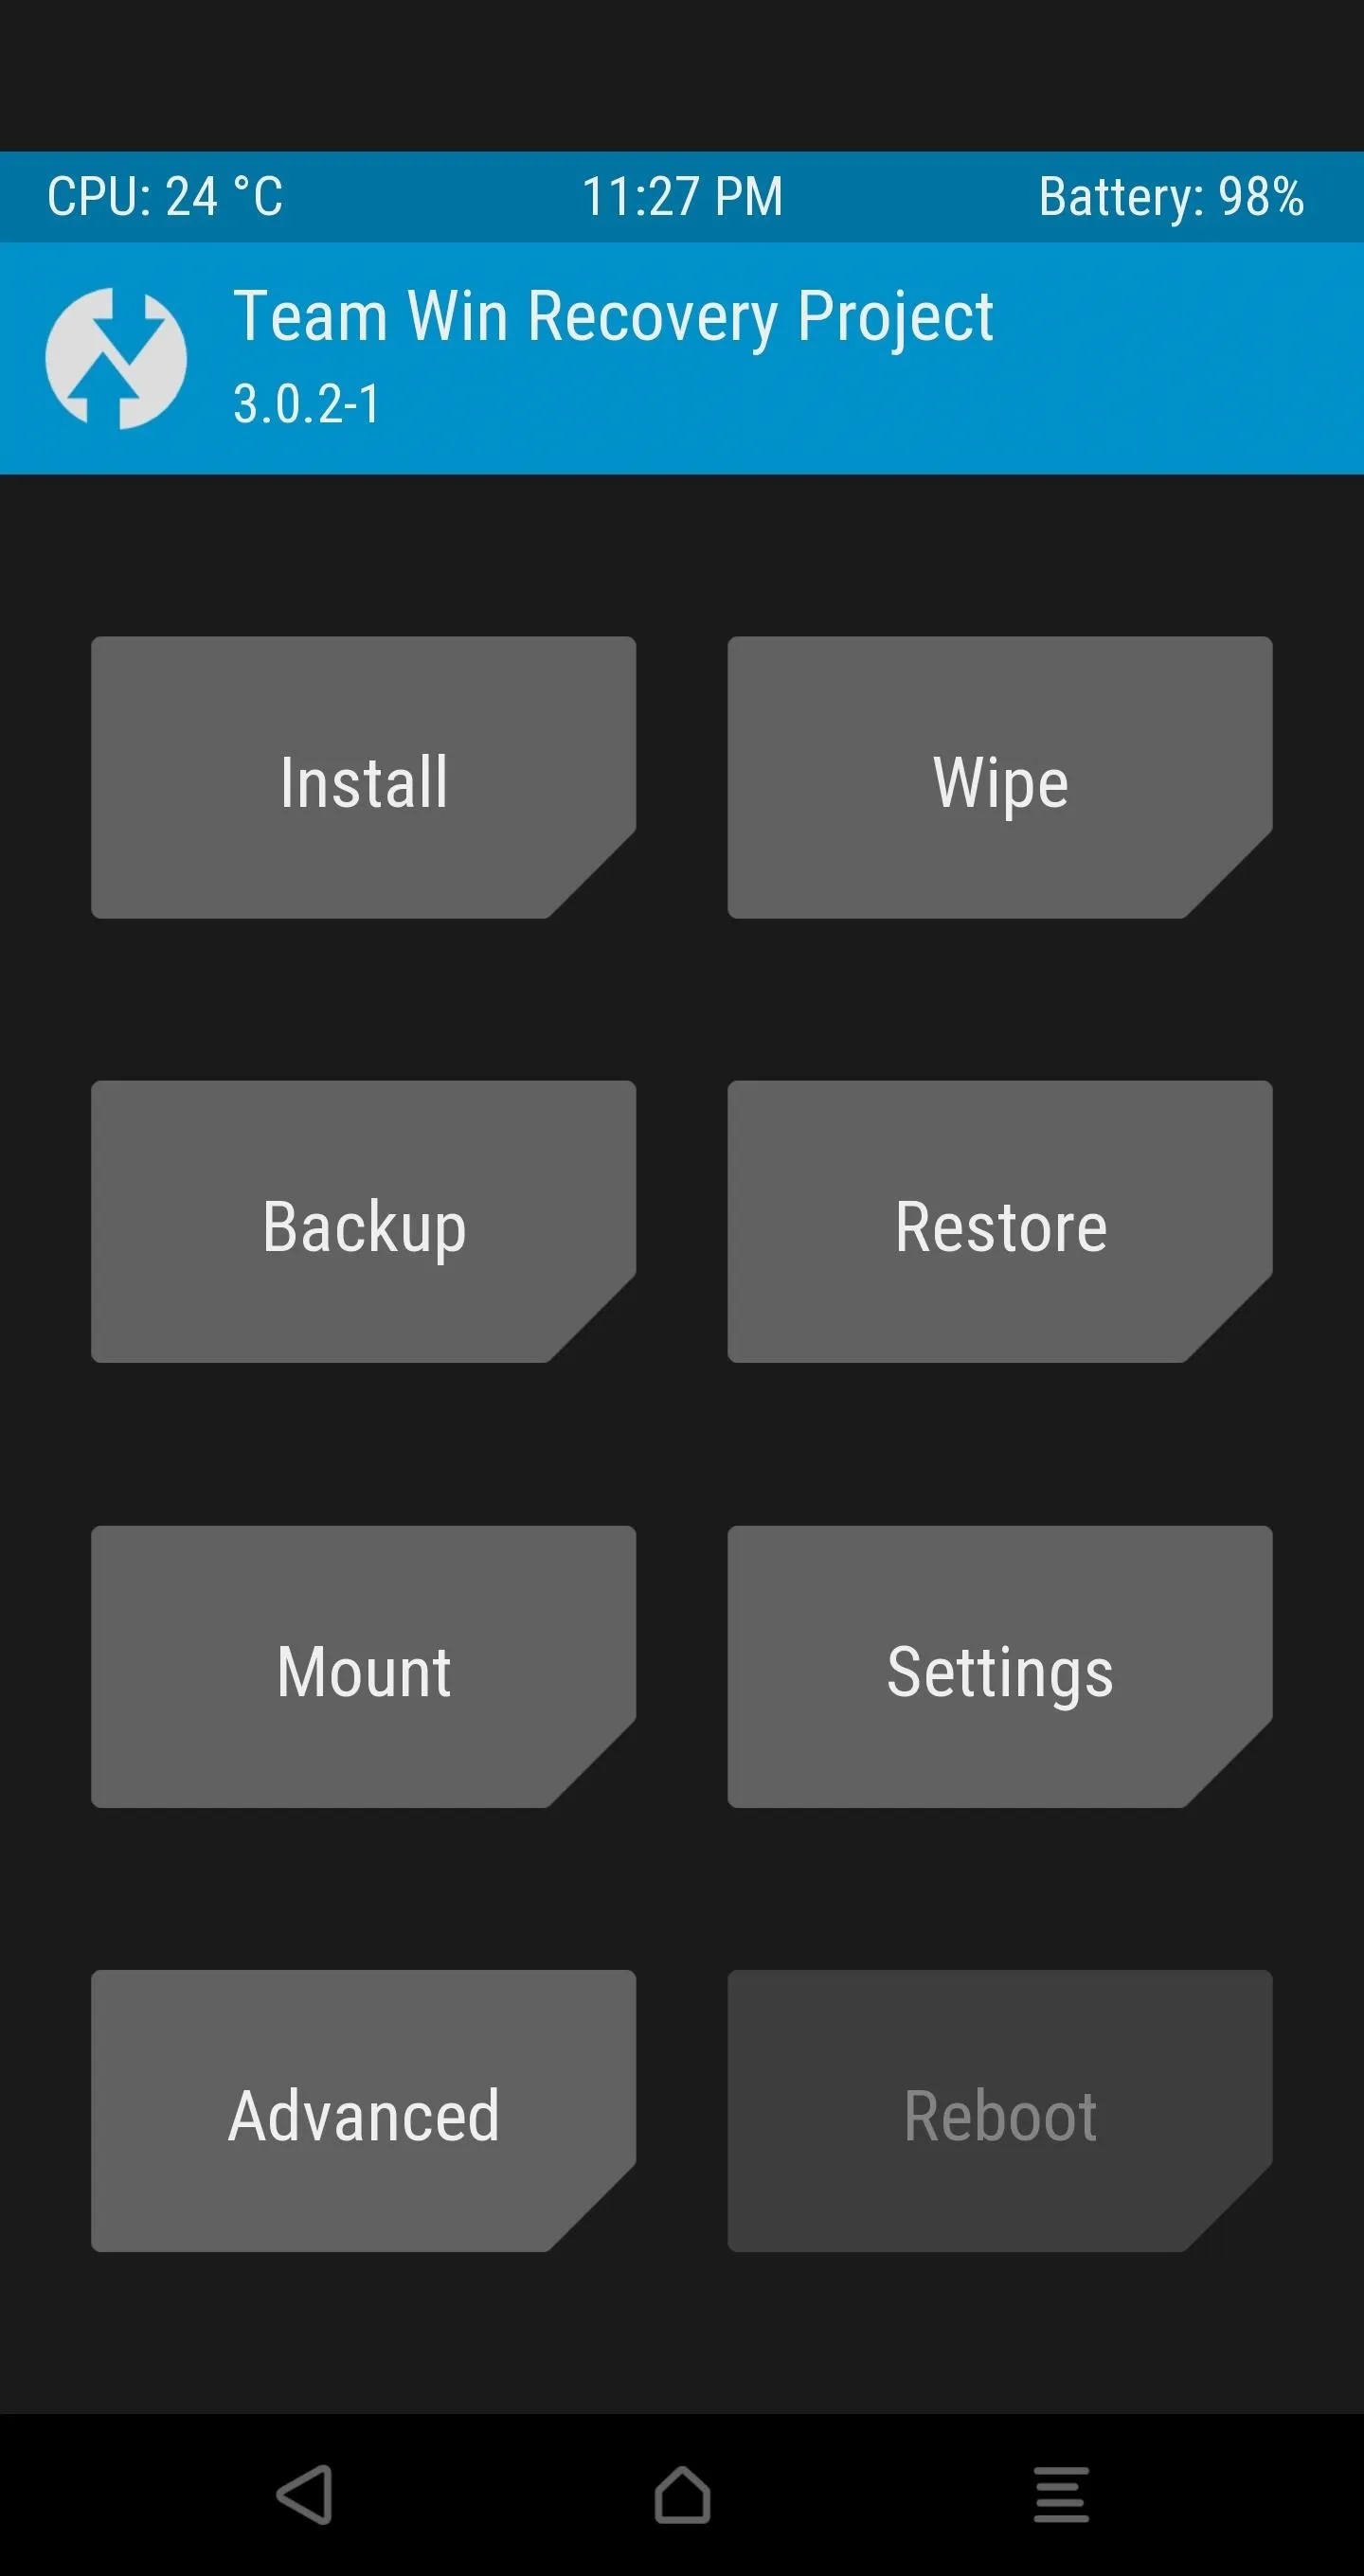
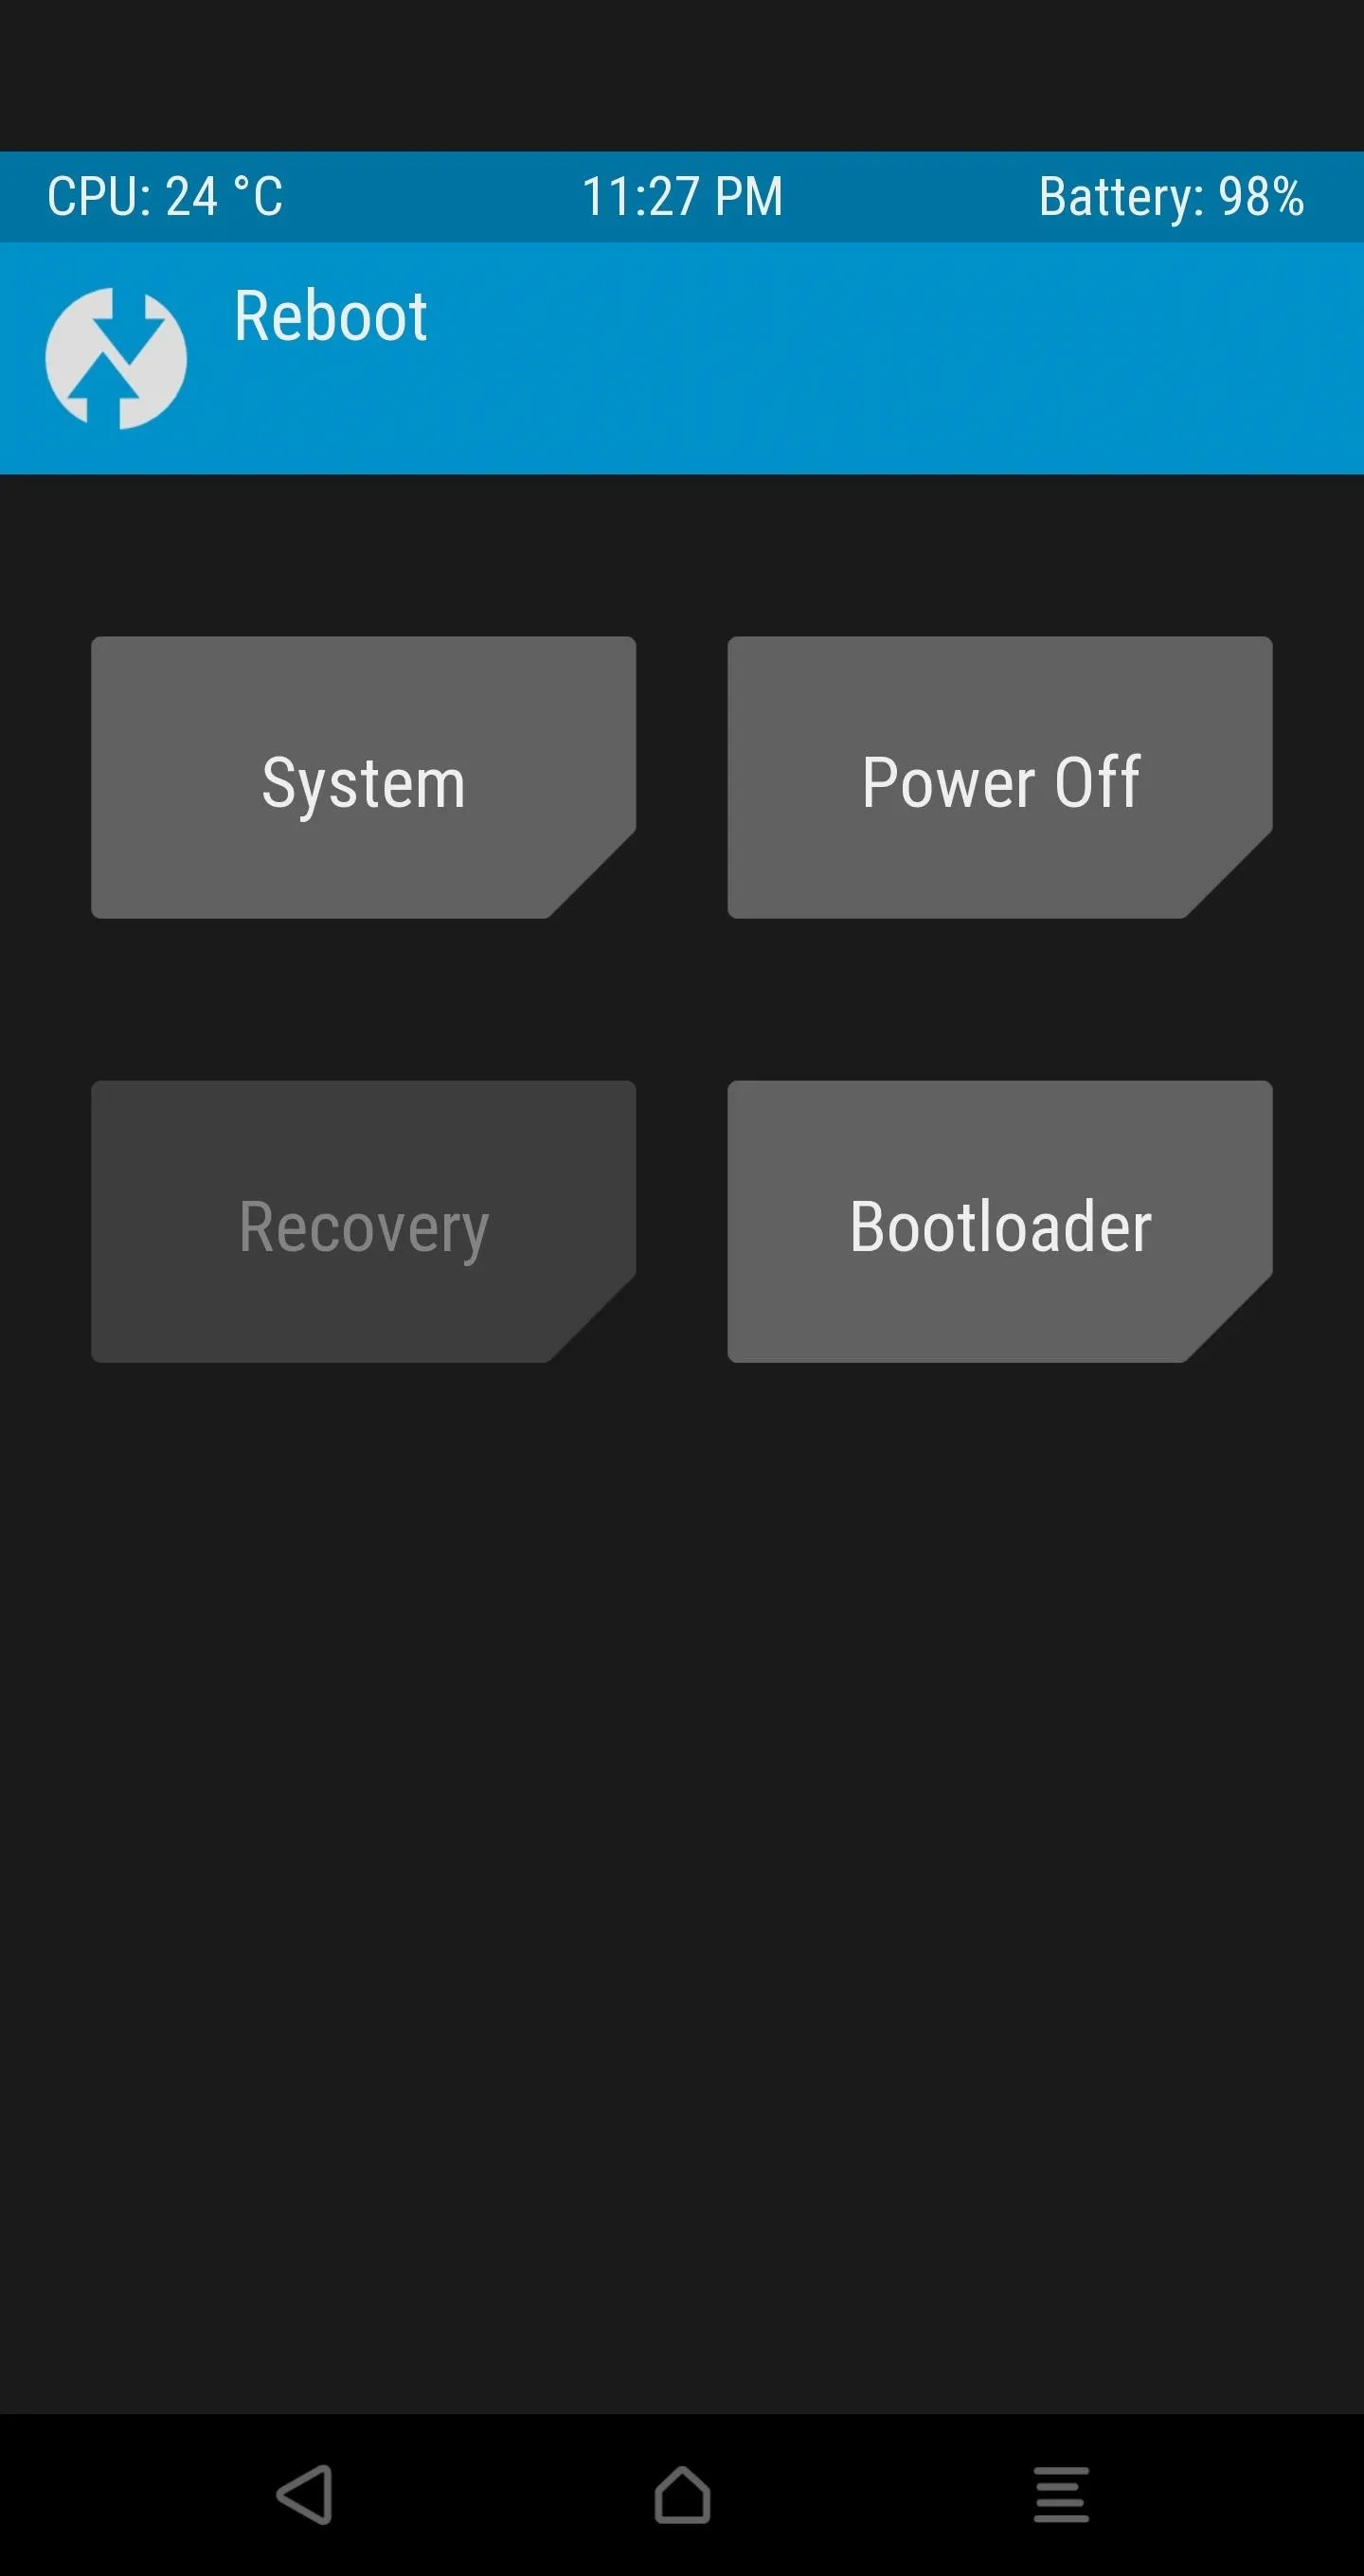


This will reboot you straight back into TWRP with your decrypted phone and allow you to flash the previously-downloaded SuperSU ZIP after you move it to the device or your SD card while in TWRP.
Step 18: Flash SuperSU for Permanent Root
It's time to flash SuperSU in TWRP so that we can keep root active without having to repeat the Dirty COW installation process every time we turn on the phone.
In TWRP, open the Advanced tab, select "ADB Sideload", and then Swipe to Start Sideload.
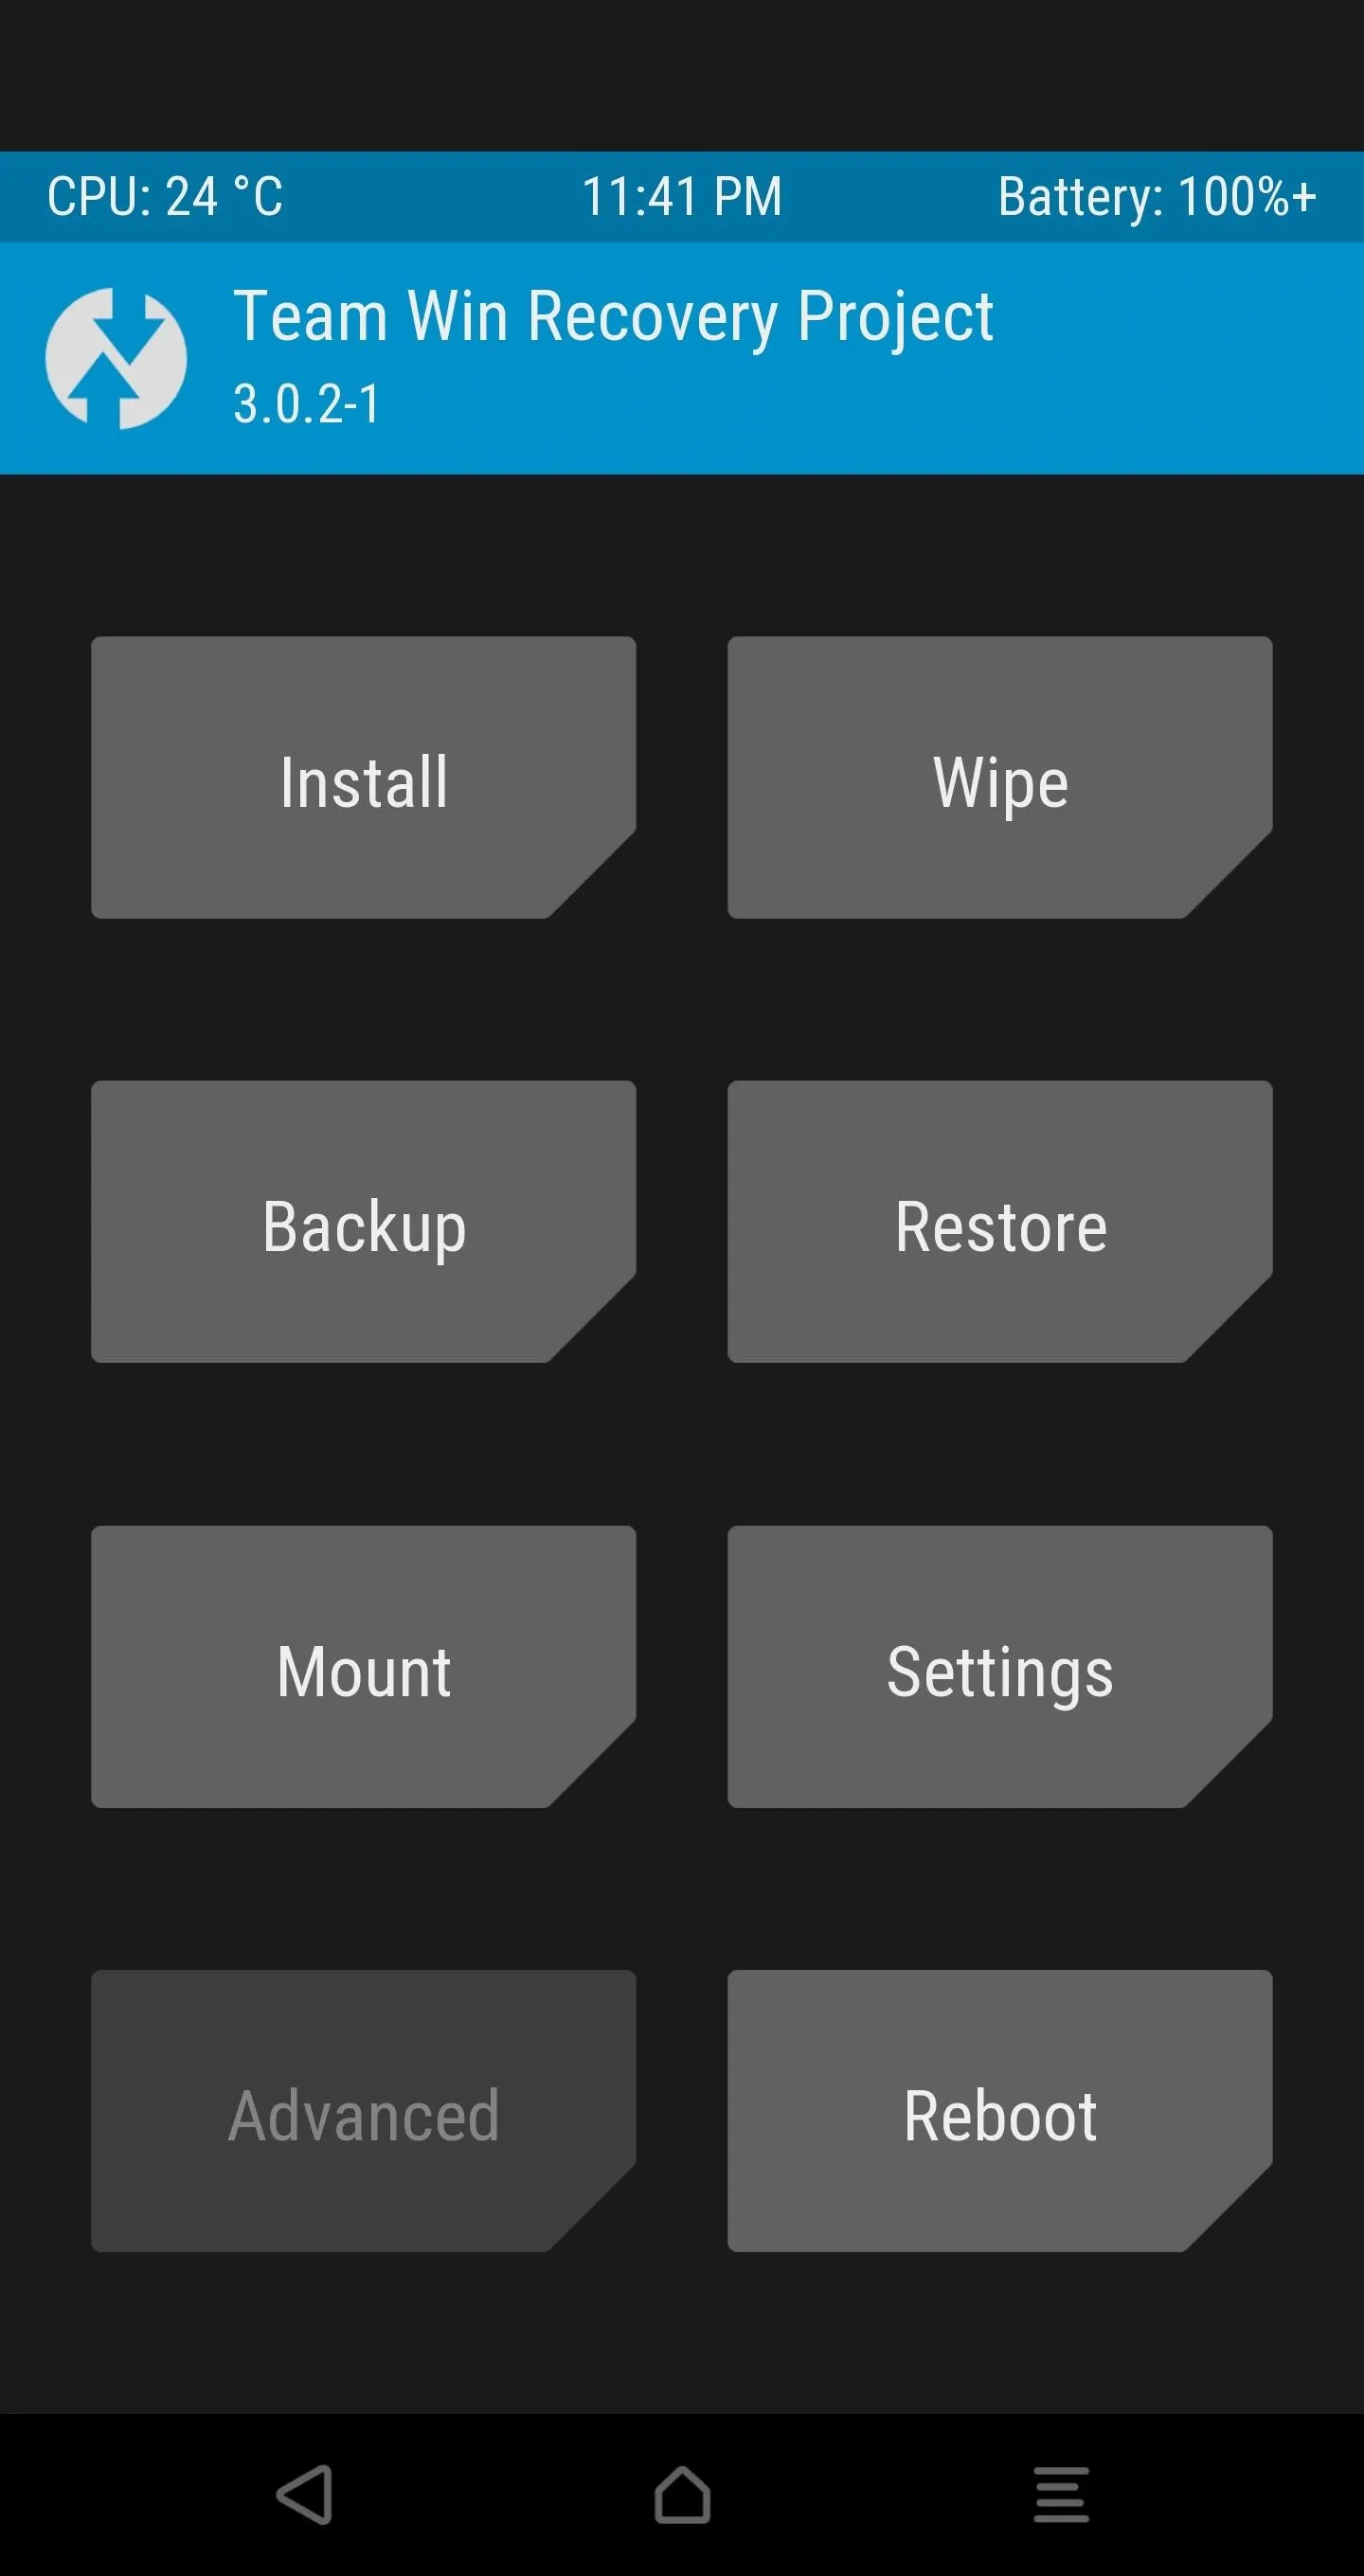
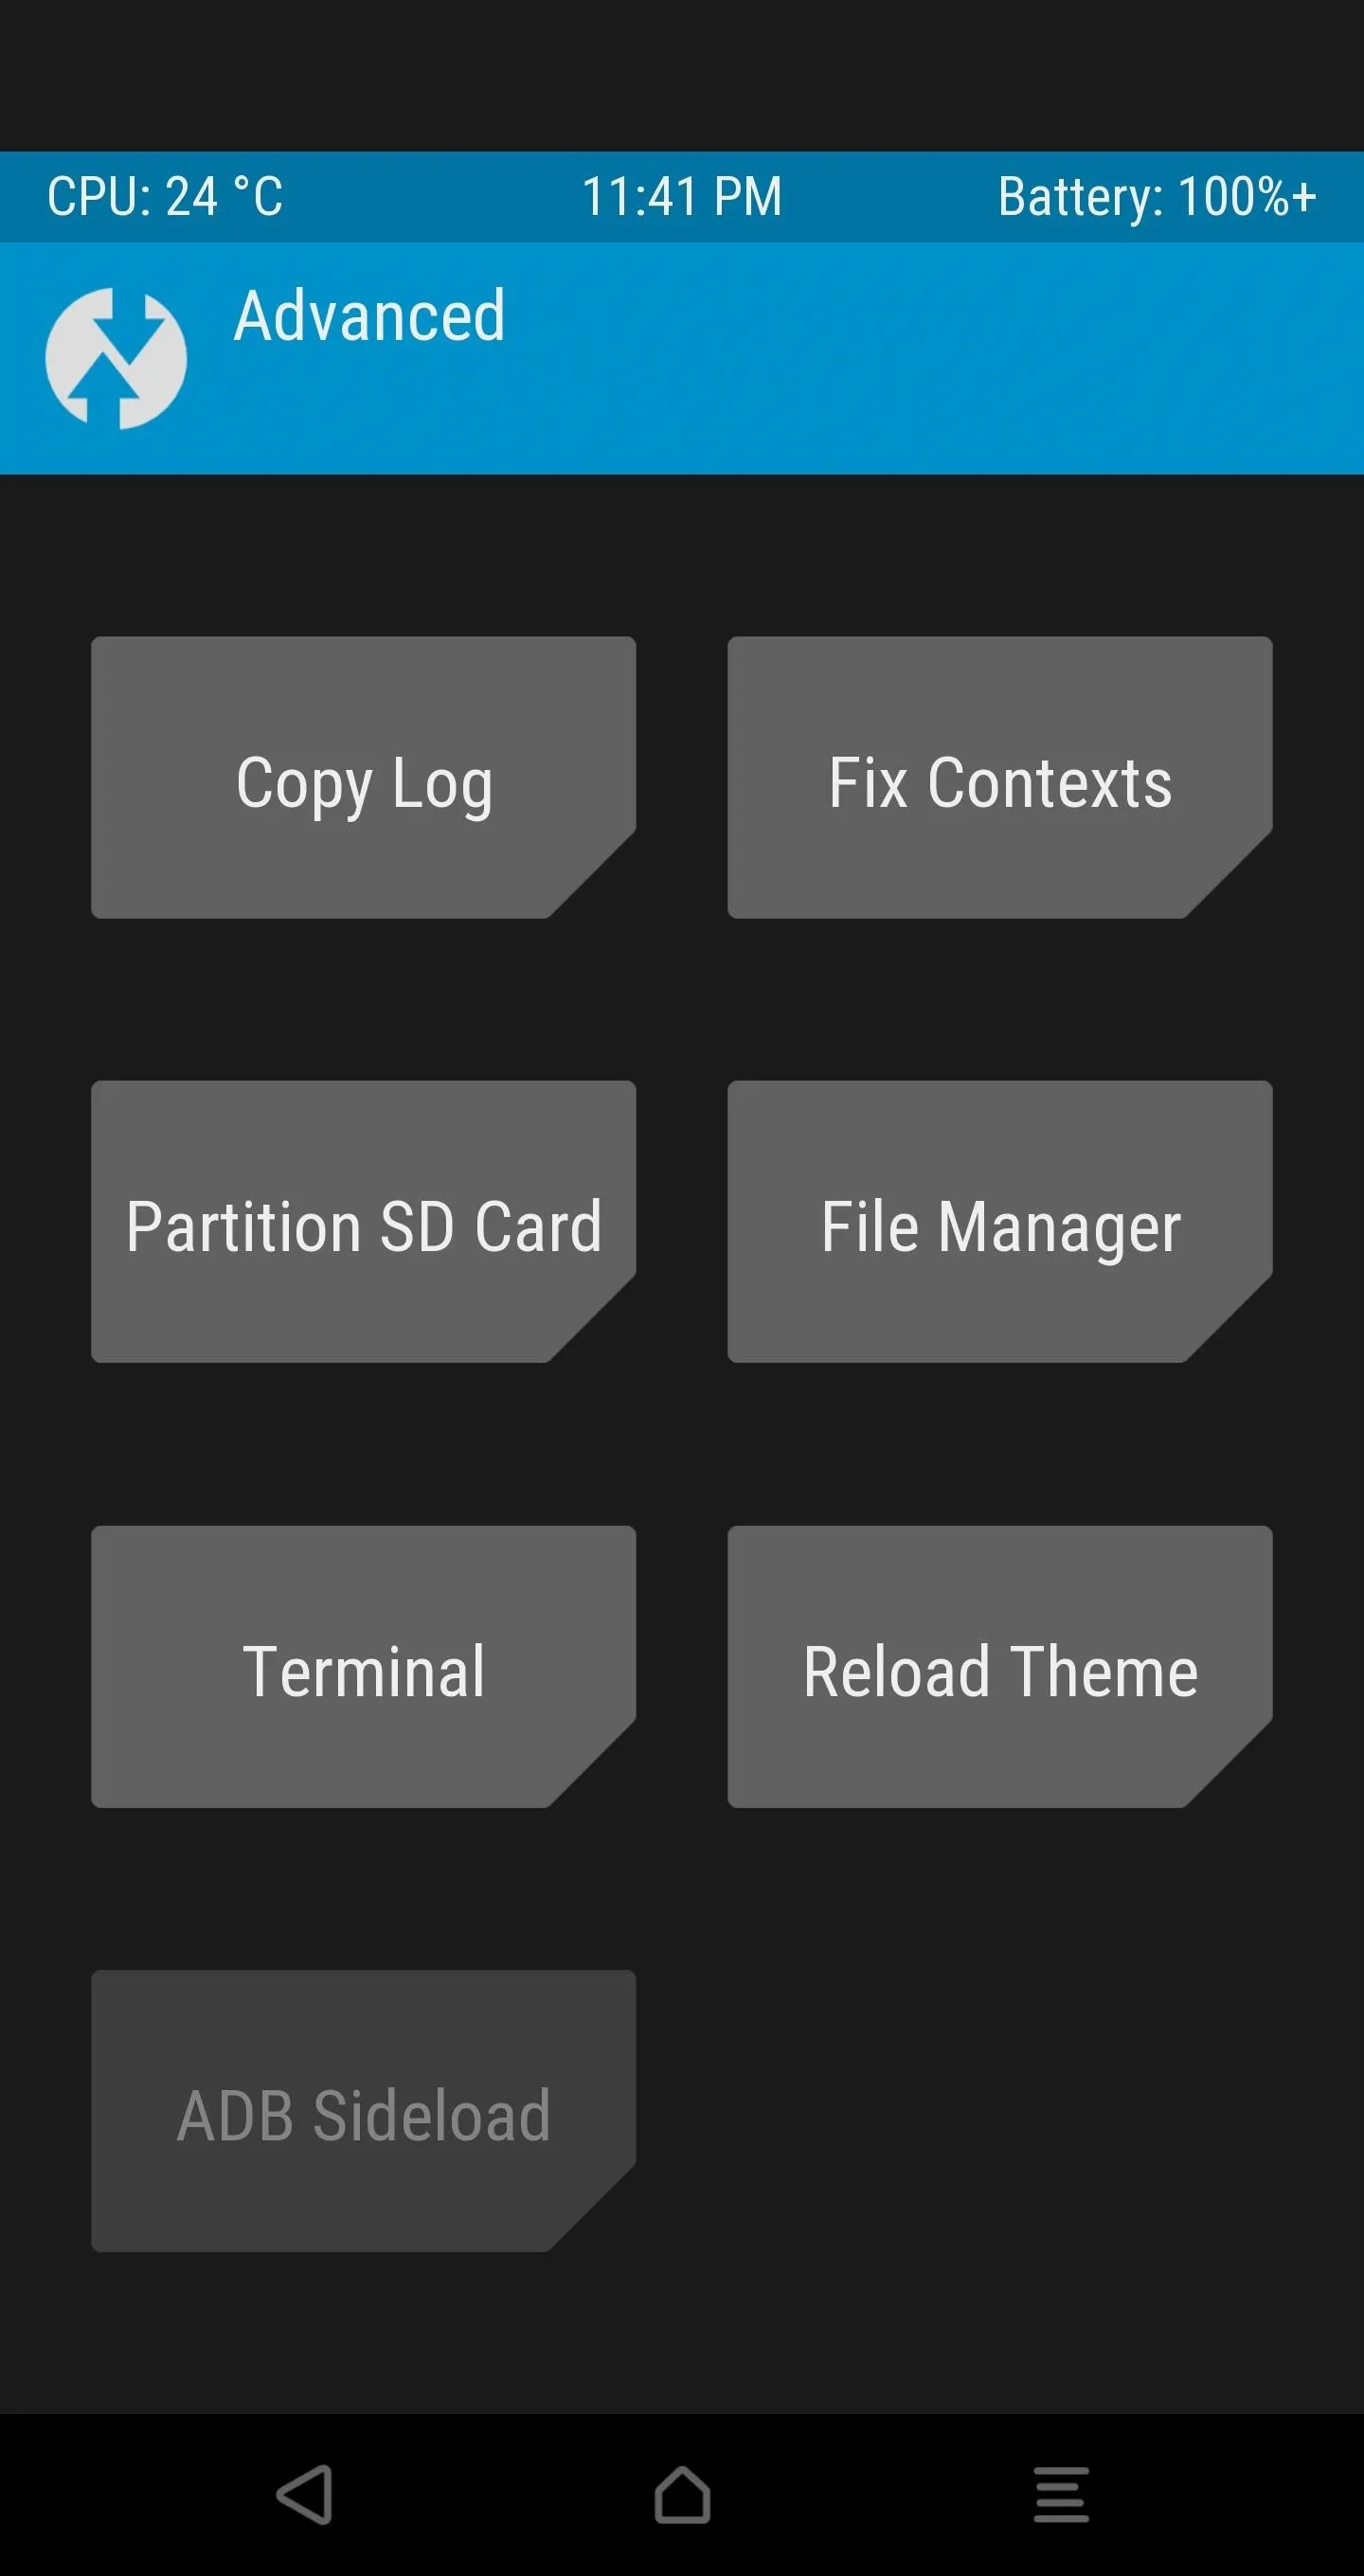
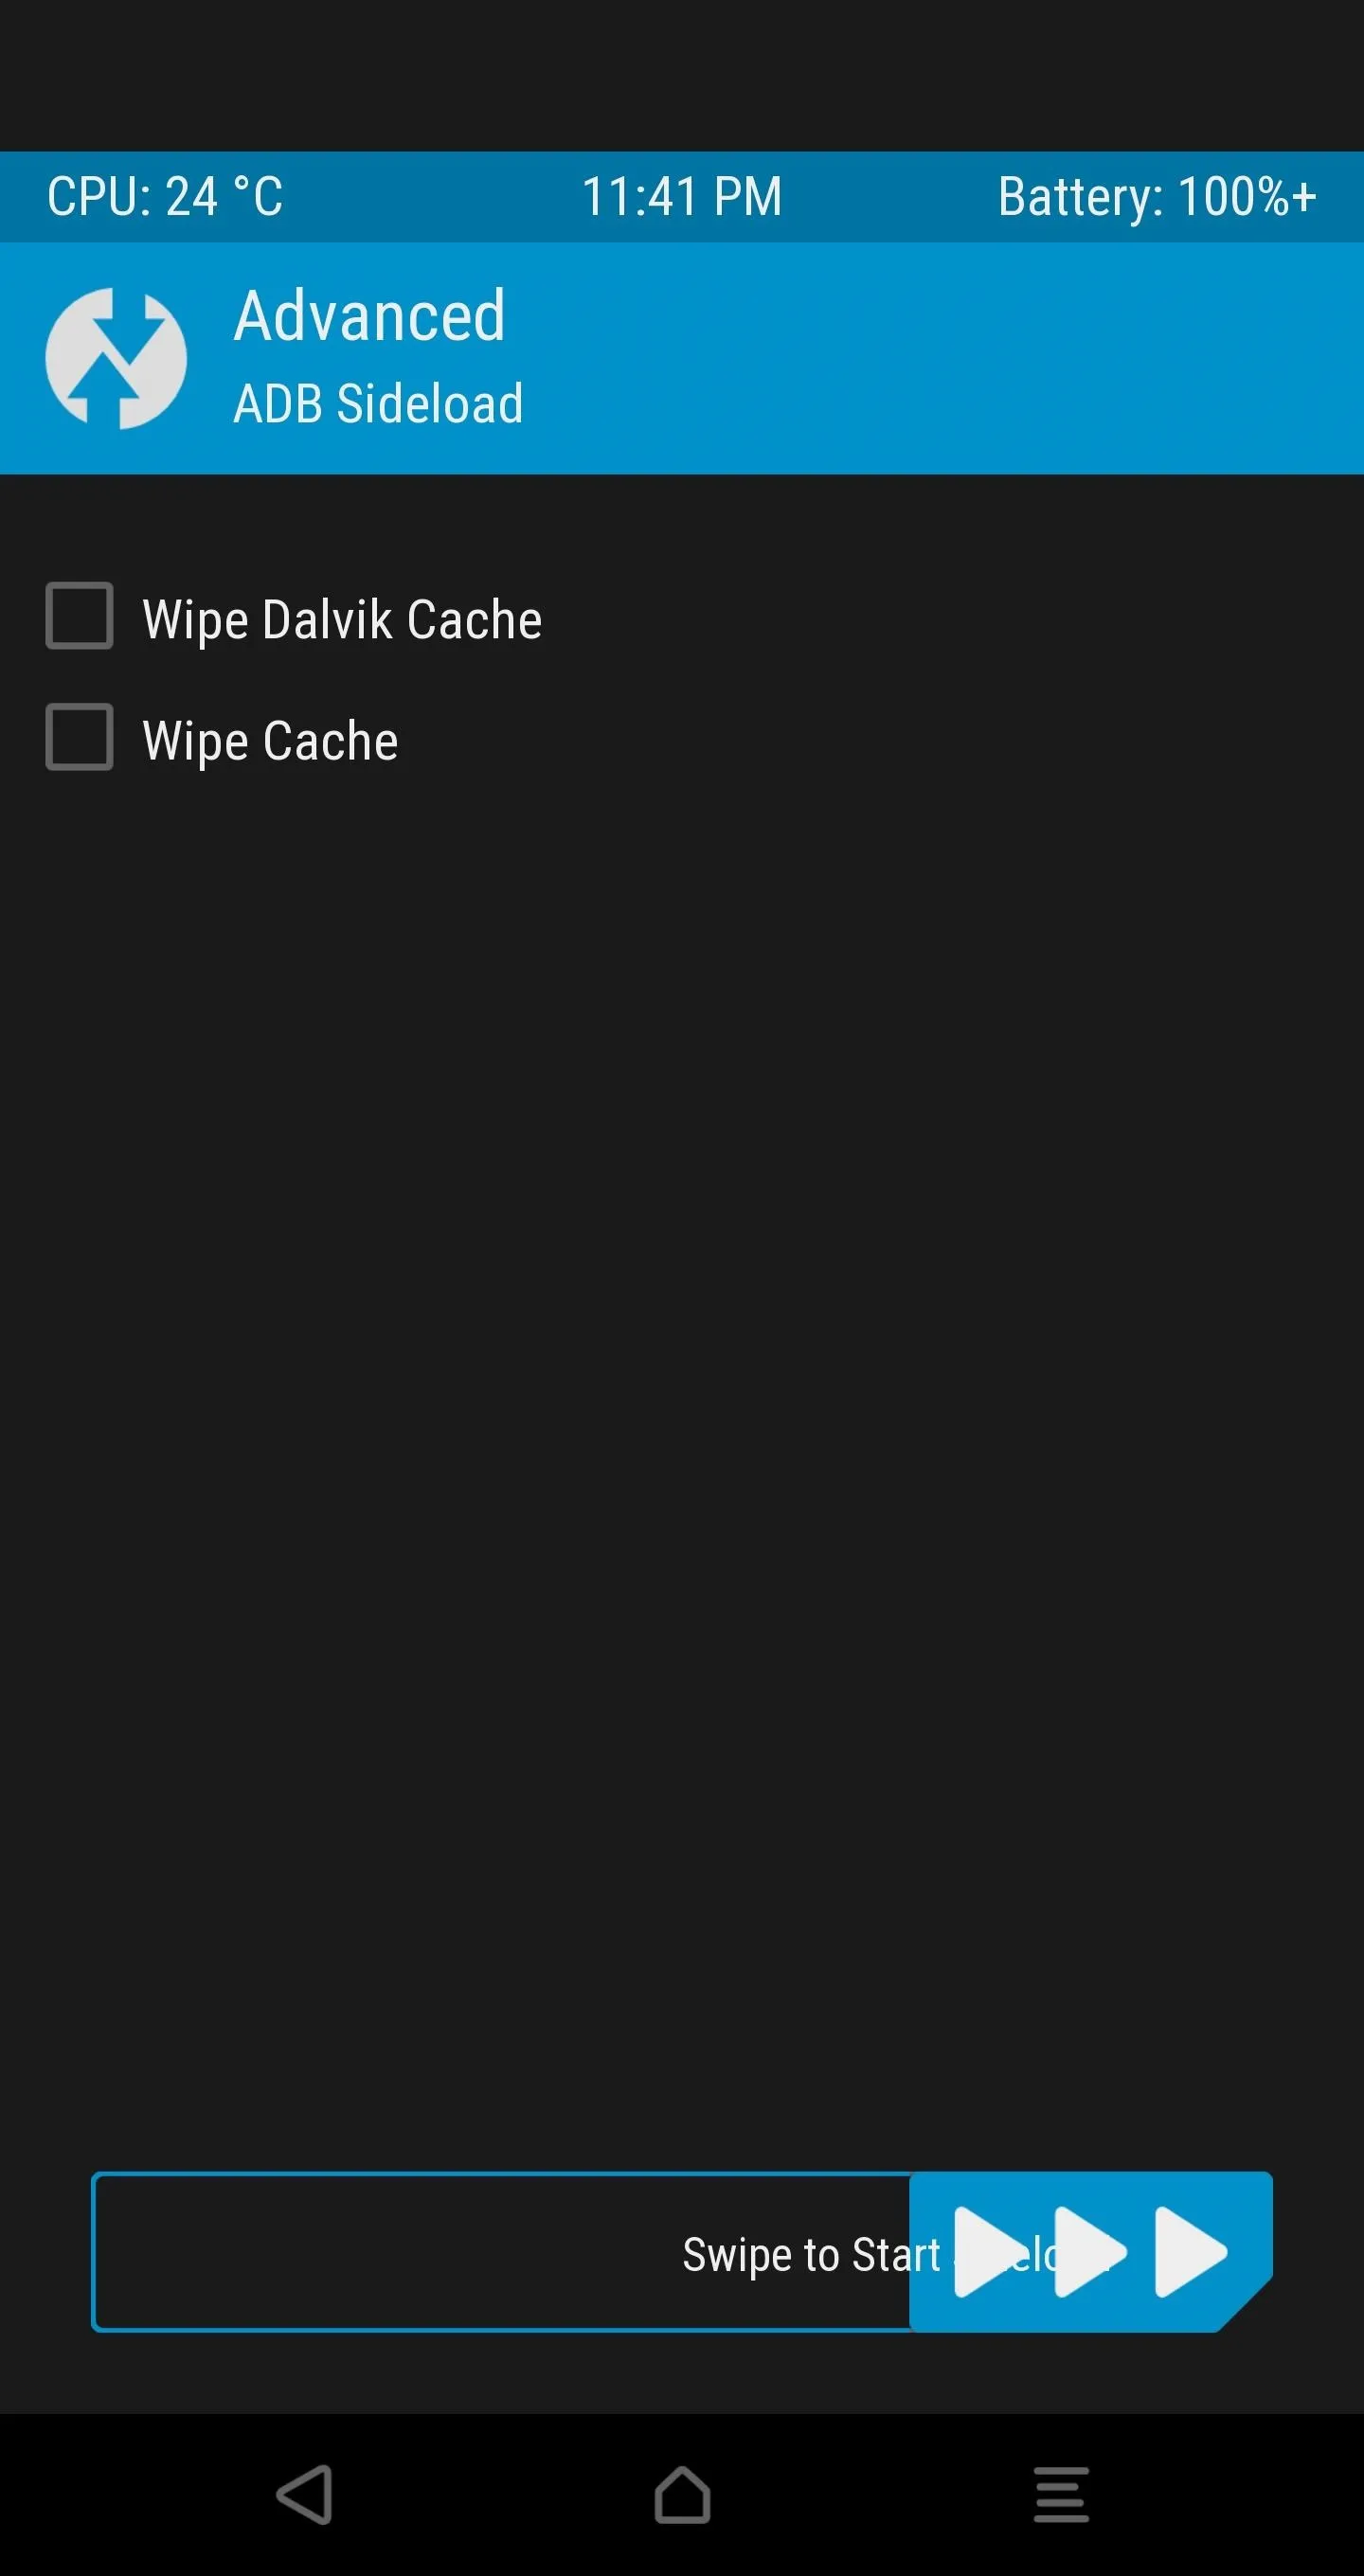


Next, find the SuperSU-vXXX.zip file that you pasted into the platform-tools folder back in Step 11, then rename this file to simply SuperSU.zip.
After that, go back to command prompt, command line, or terminal, and type in the following:
- adb sideload SuperSU.zip
Then hit enter to begin the SuperSU installation.

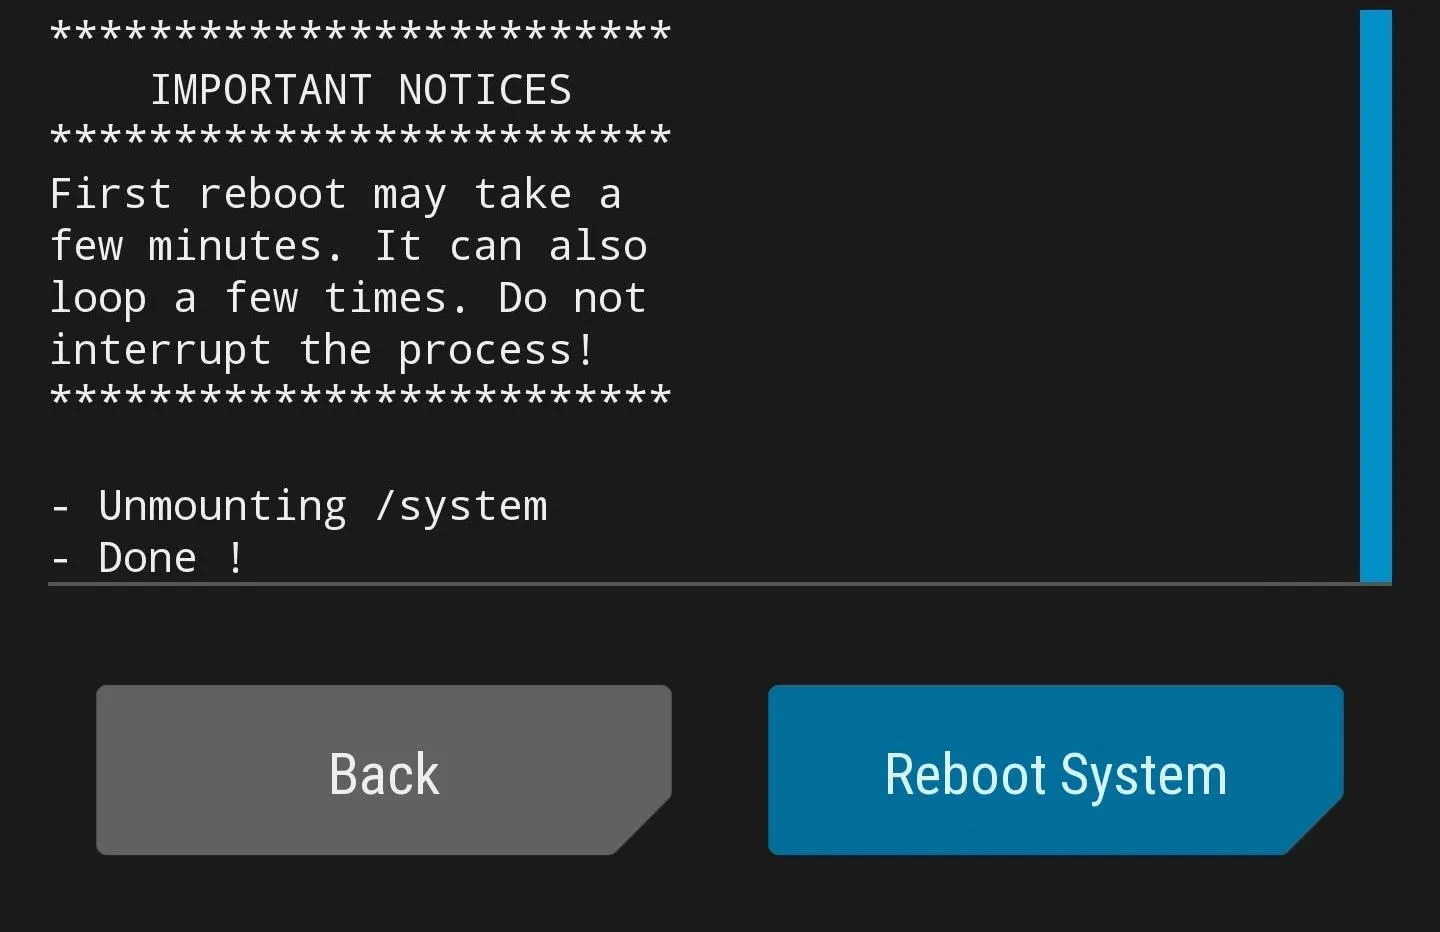
You're all done, hit the "Reboot System" option in TWRP (your phone will reboot a few times due to SuperSU settling down) for a brand new device experience with root!
Step 19: Verify Root Access
You'll need to set up your phone again, so take care of that, then you'll just need to verify that your phone is properly rooted. To do that, start by installing an app called Root Checker by developer joeykrim.

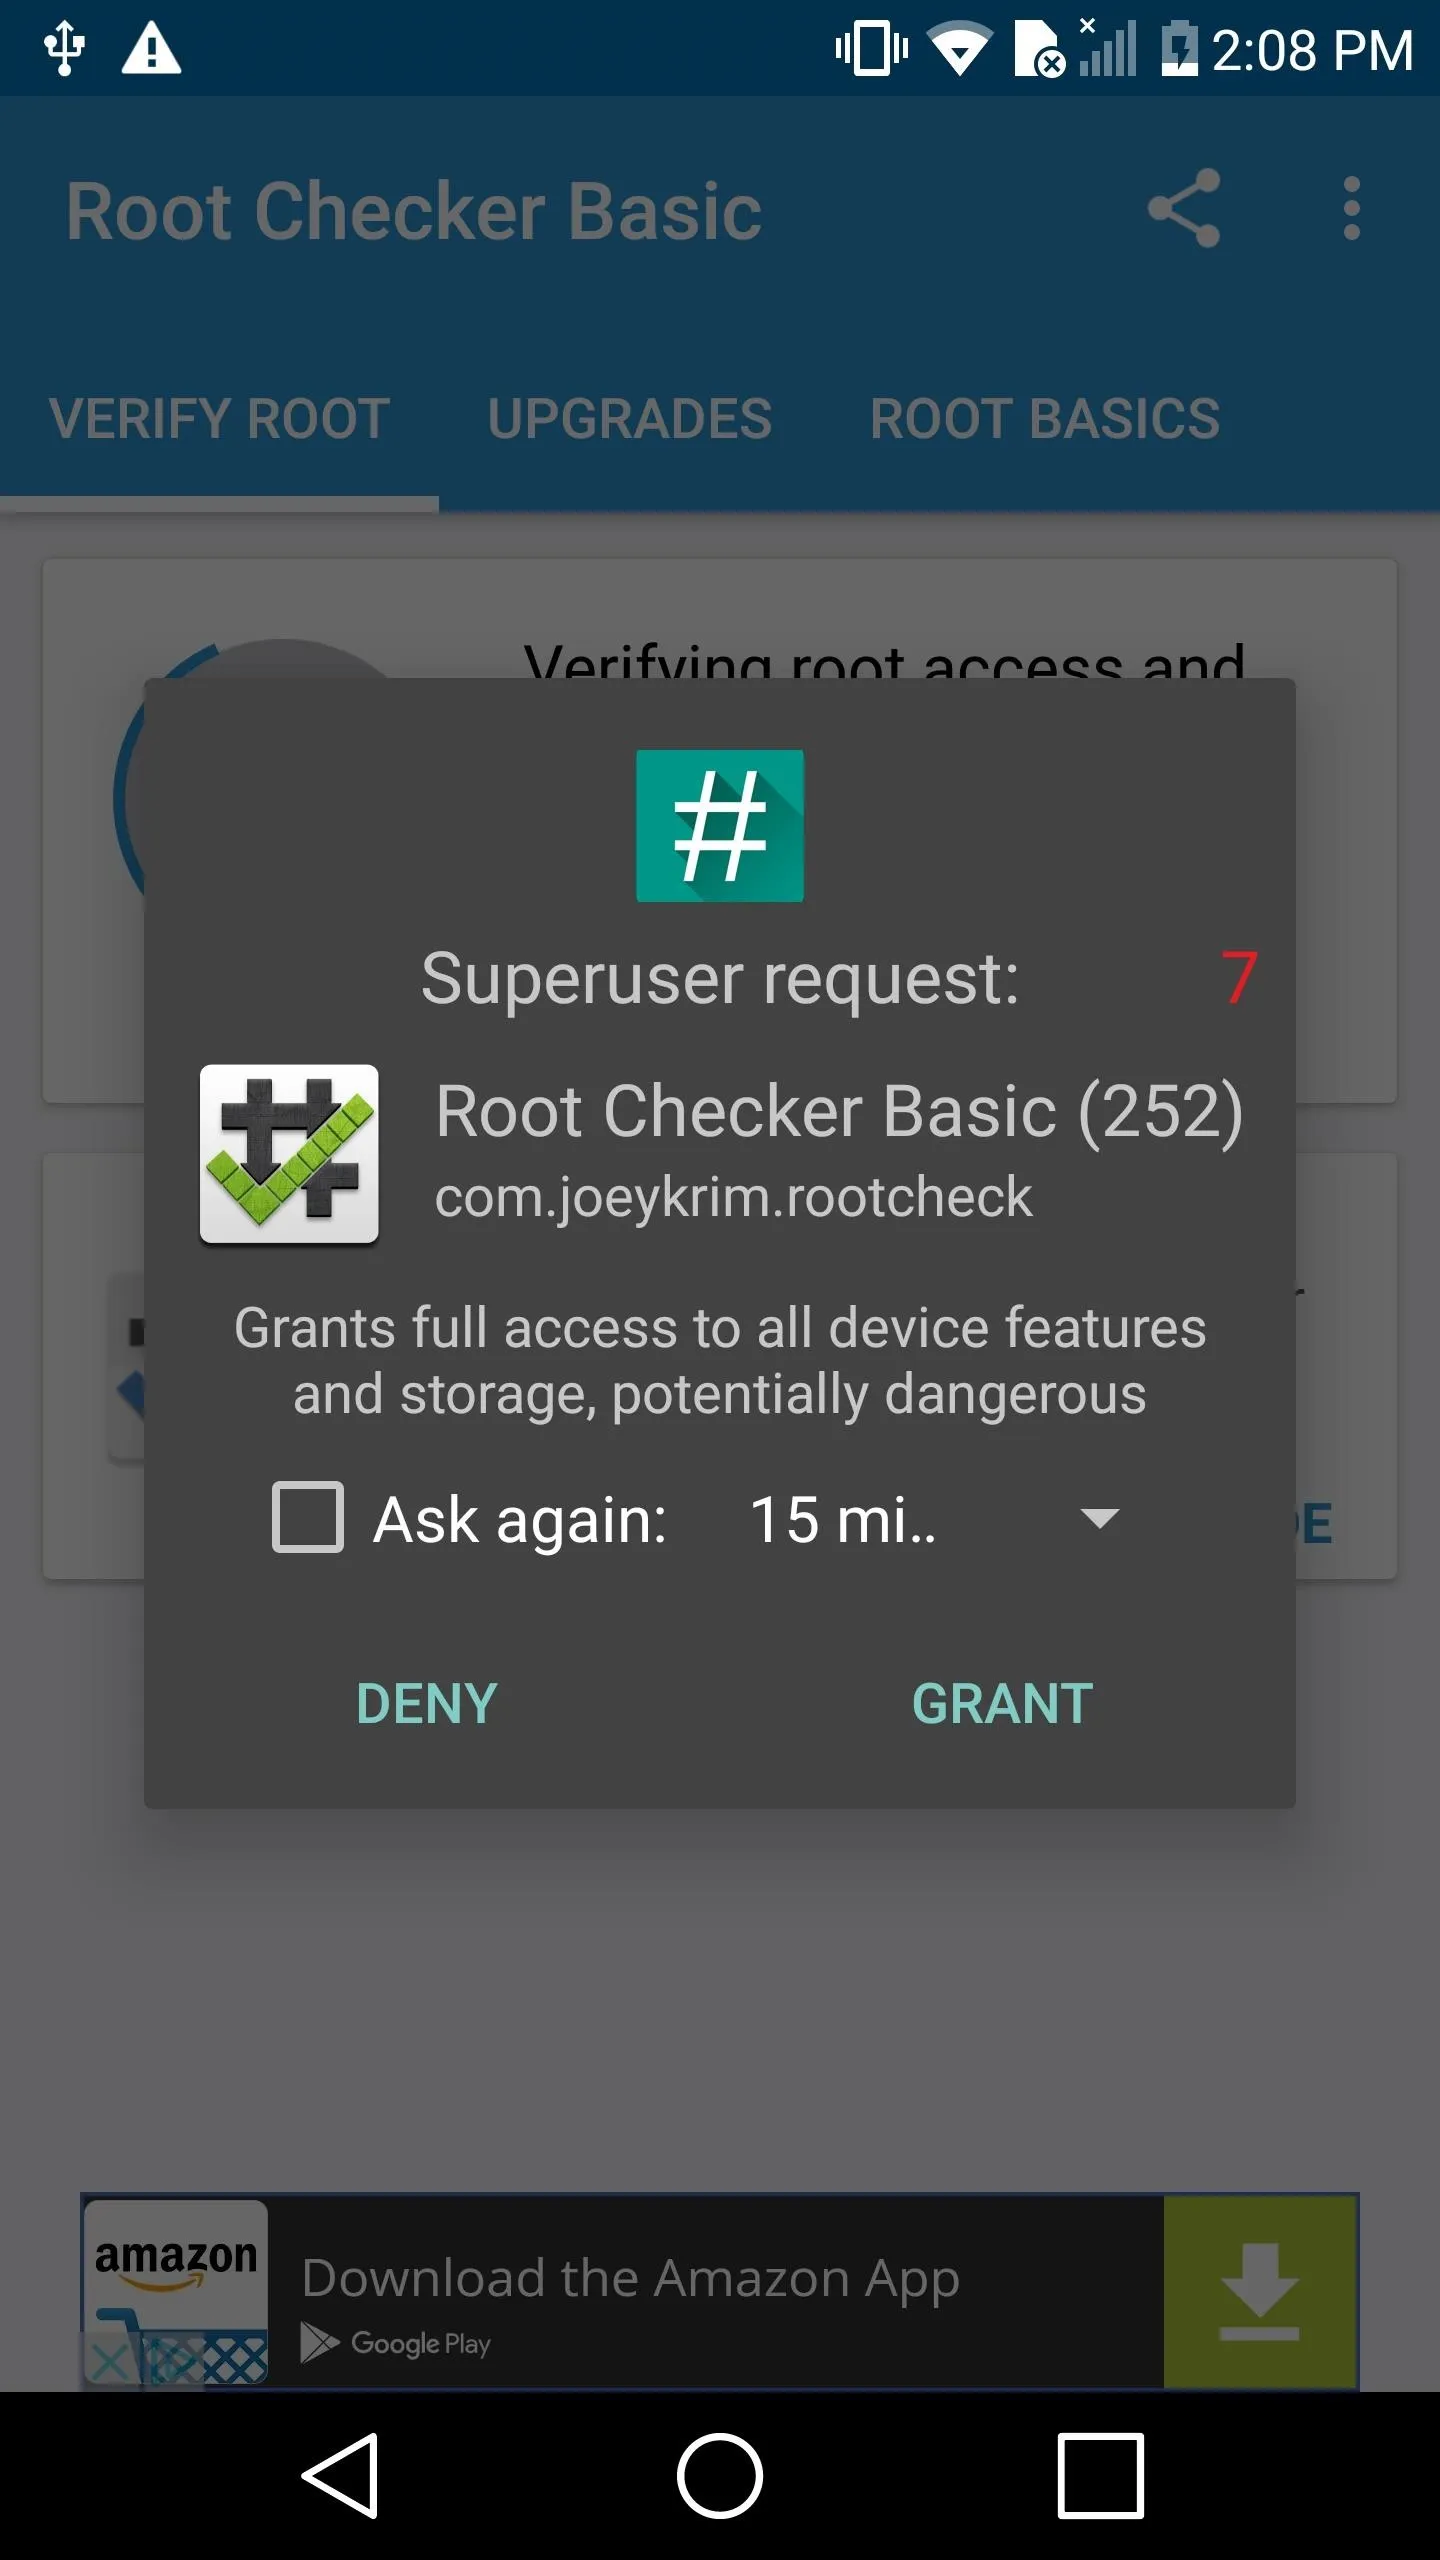
When you first launch the app, a Superuser request will pop up. Tap "Grant" here, and Root Checker will verify that you are now rooted.
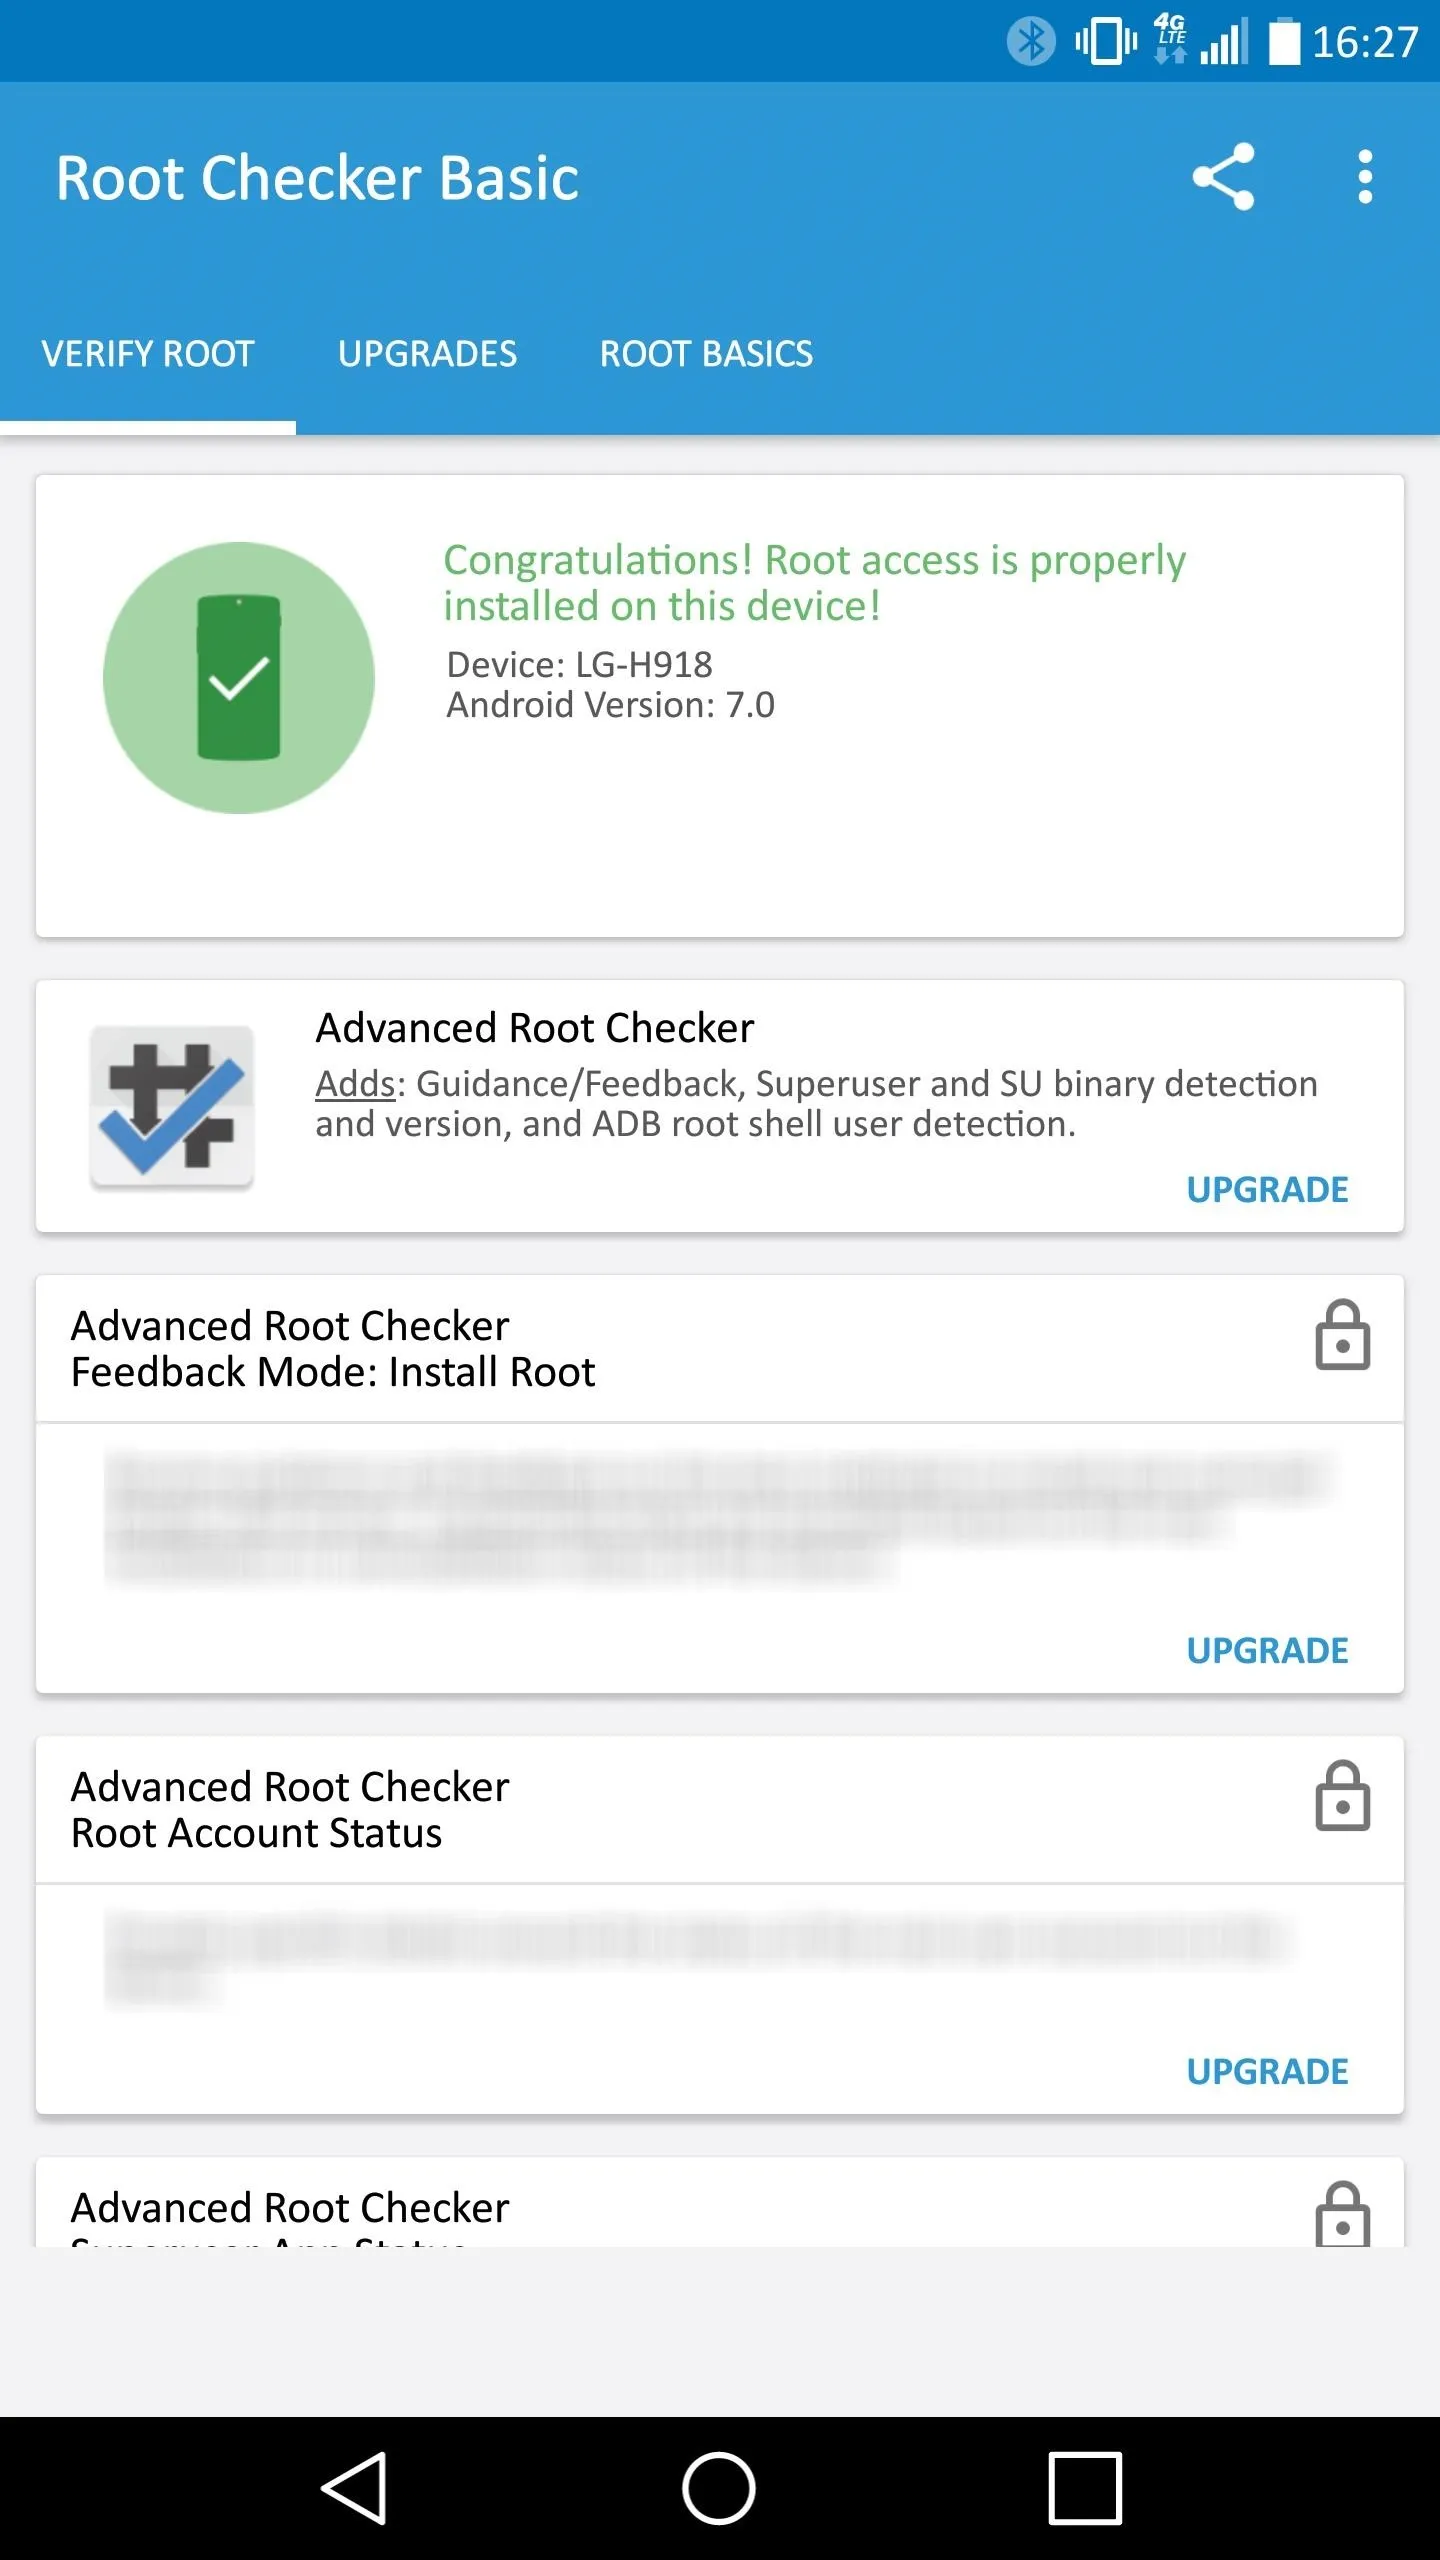


Once you see that green check, that's all there is to it. You're all set to enjoy your rooted LG V20!
- Follow Gadget Hacks on Facebook, Twitter, Google+, and YouTube
- Follow Android Hacks on Facebook, Twitter, and Pinterest
- Follow WonderHowTo on Facebook, Twitter, Pinterest, and Google+
Cover image by LG; screenshots by Kevin M./Gadget Hacks


Comments
No Comments Exist
Be the first, drop a comment!