One thing that makes Signal Private Messenger better on Android over iOS is that you can better secure the app with a password or passphrase. Best of all, you don't need to install an app locker to get this working — you can do it right from inside Signal.
Your messages always remain encrypted when it's from Signal-to-Signal, since that's what Signal is designed for, but that doesn't stop someone with access to your smartphone from just opening up the app and checking out your conversations. That's why it's good to create a password or passphrase for Signal itself, in addition to any lock screen security you have.
Not only will a password or passphrase keep prying eyes out of the app but, if you have Signal set up as your primary SMS messenger, it will ensure that any SMS or MMS text you receive will also be encrypted upon receipt. Destination information will not be encrypted, of course, but the bodies in the texts themselves will be encrypted. Just make sure that your original SMS application is deactivated or those messages may be stored there as well.
Step 1: Create Your Password or Passphrase
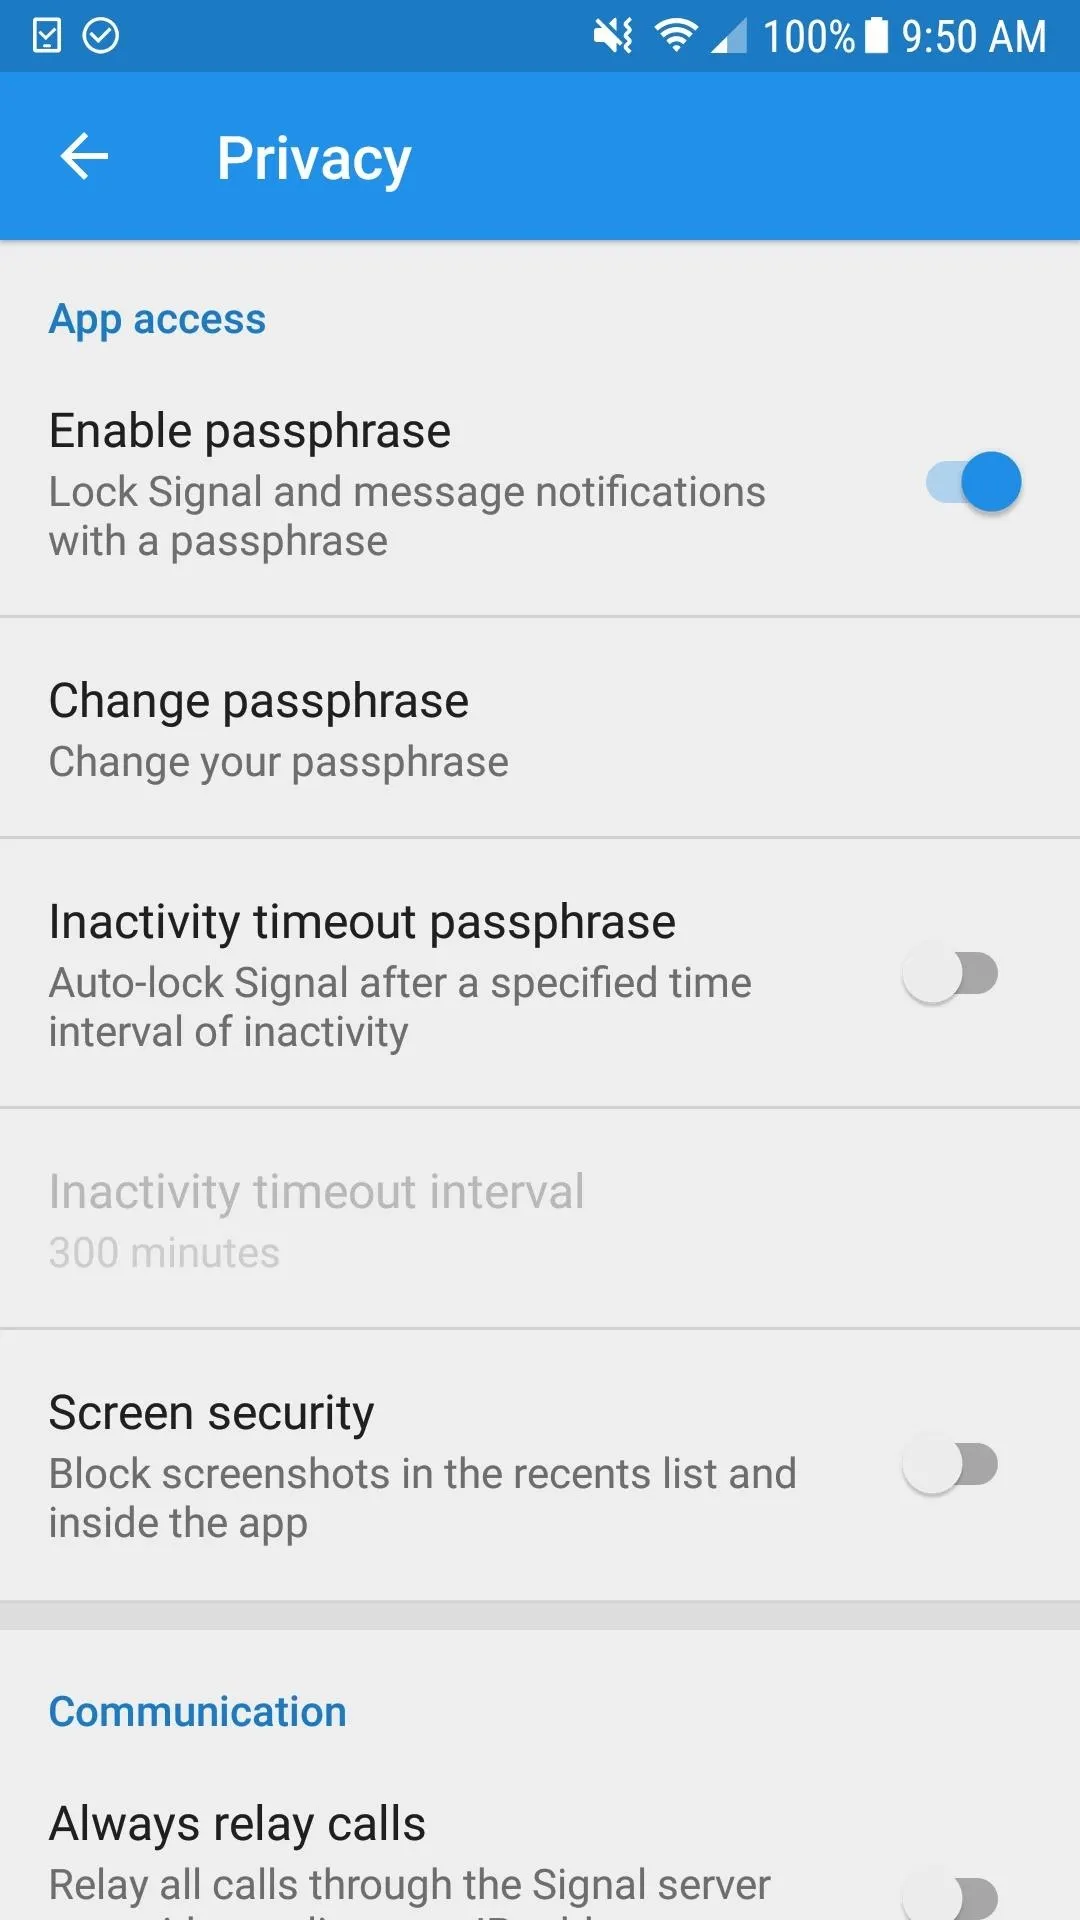
On the Signal homepage, tap on the ellipsis (three dots) in the top right, then choose "Settings." Next, open up "Privacy" and toggle on "Enable passphrase." This will not only lock Signal messages but notification previews as well.
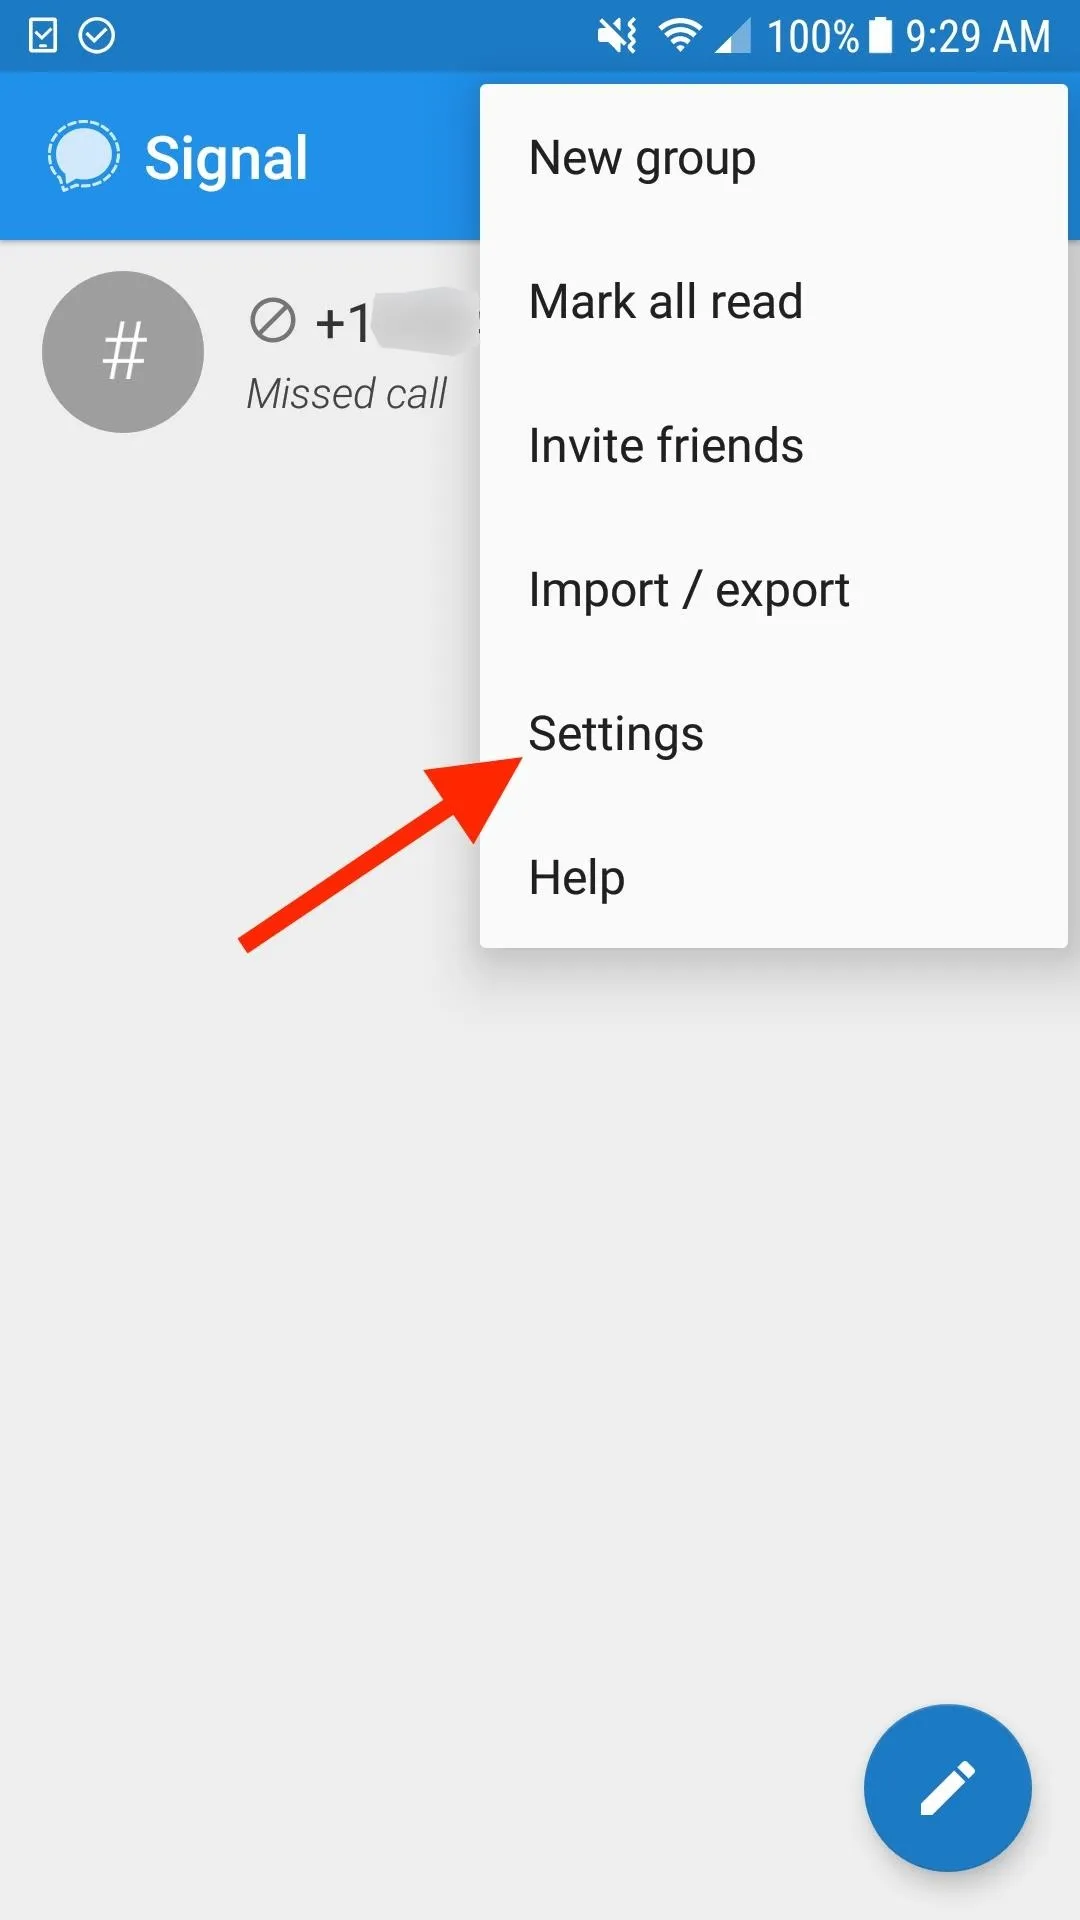
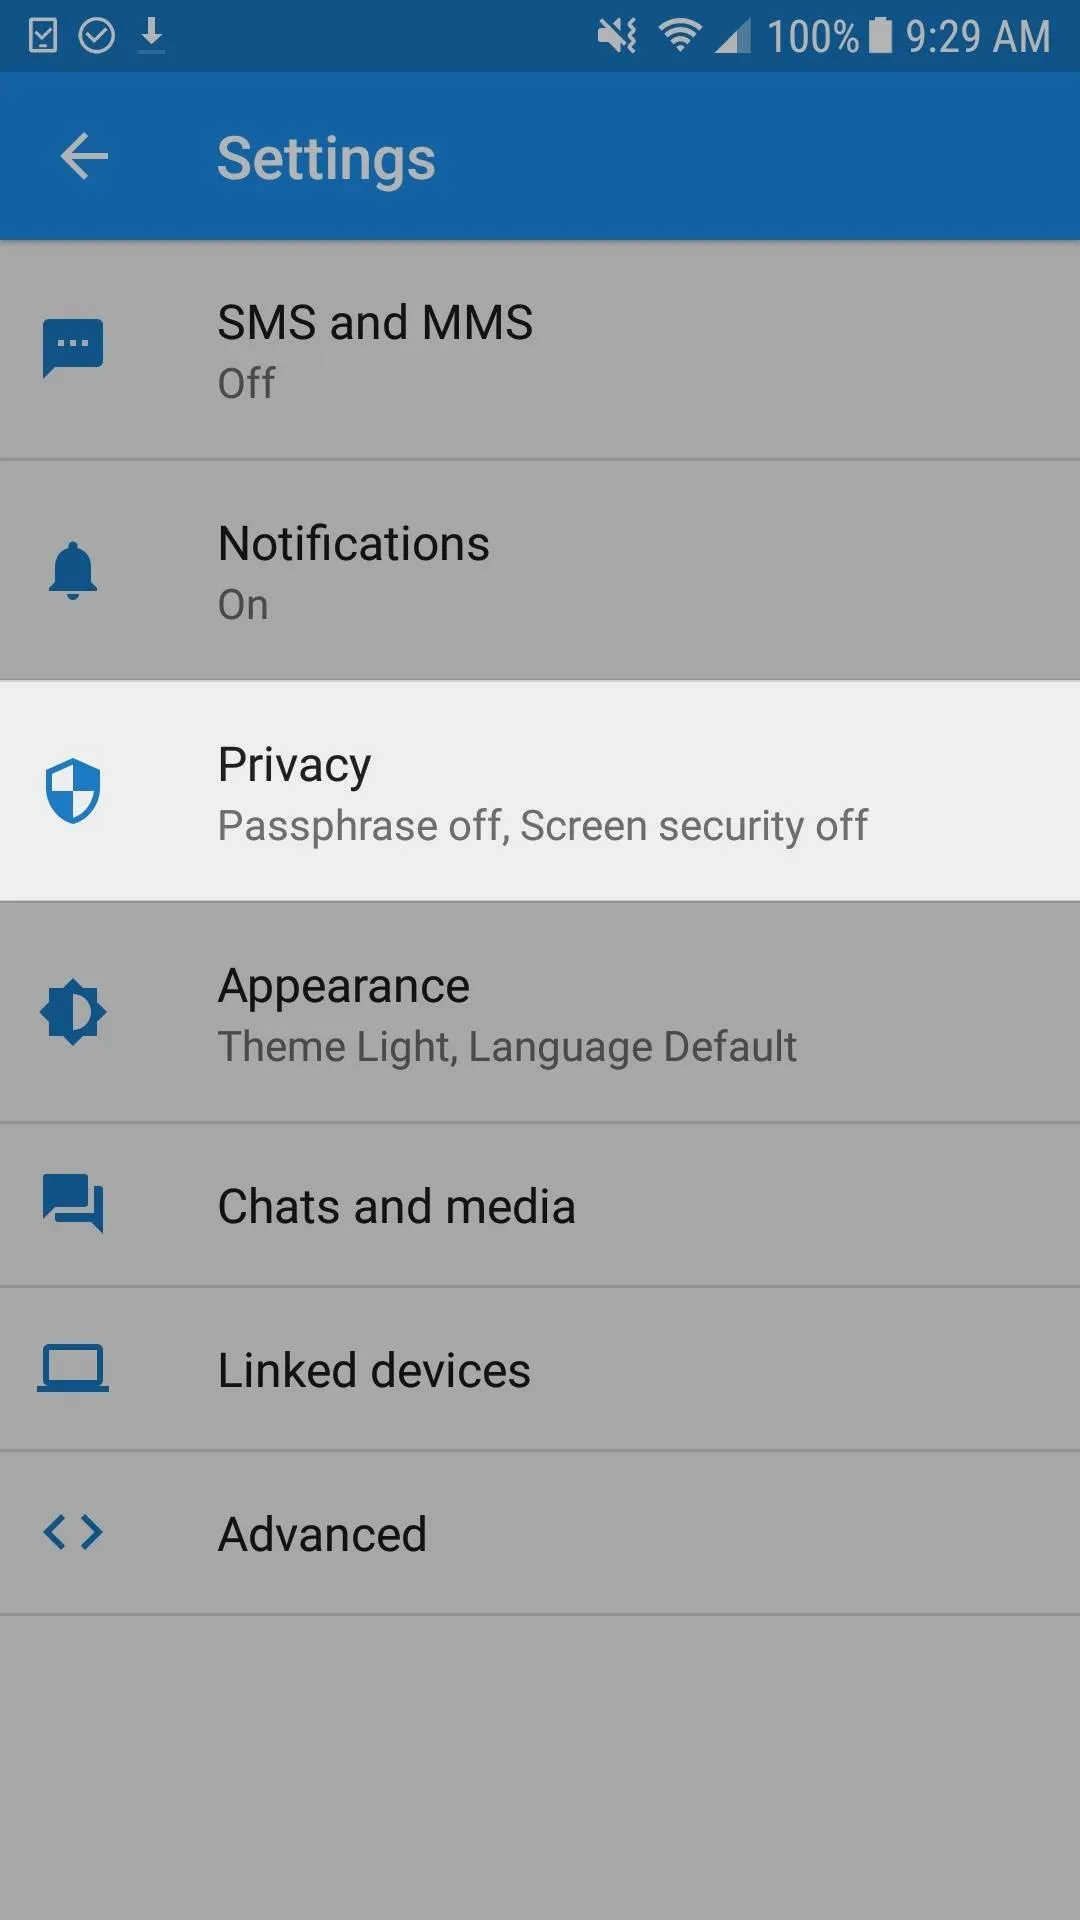
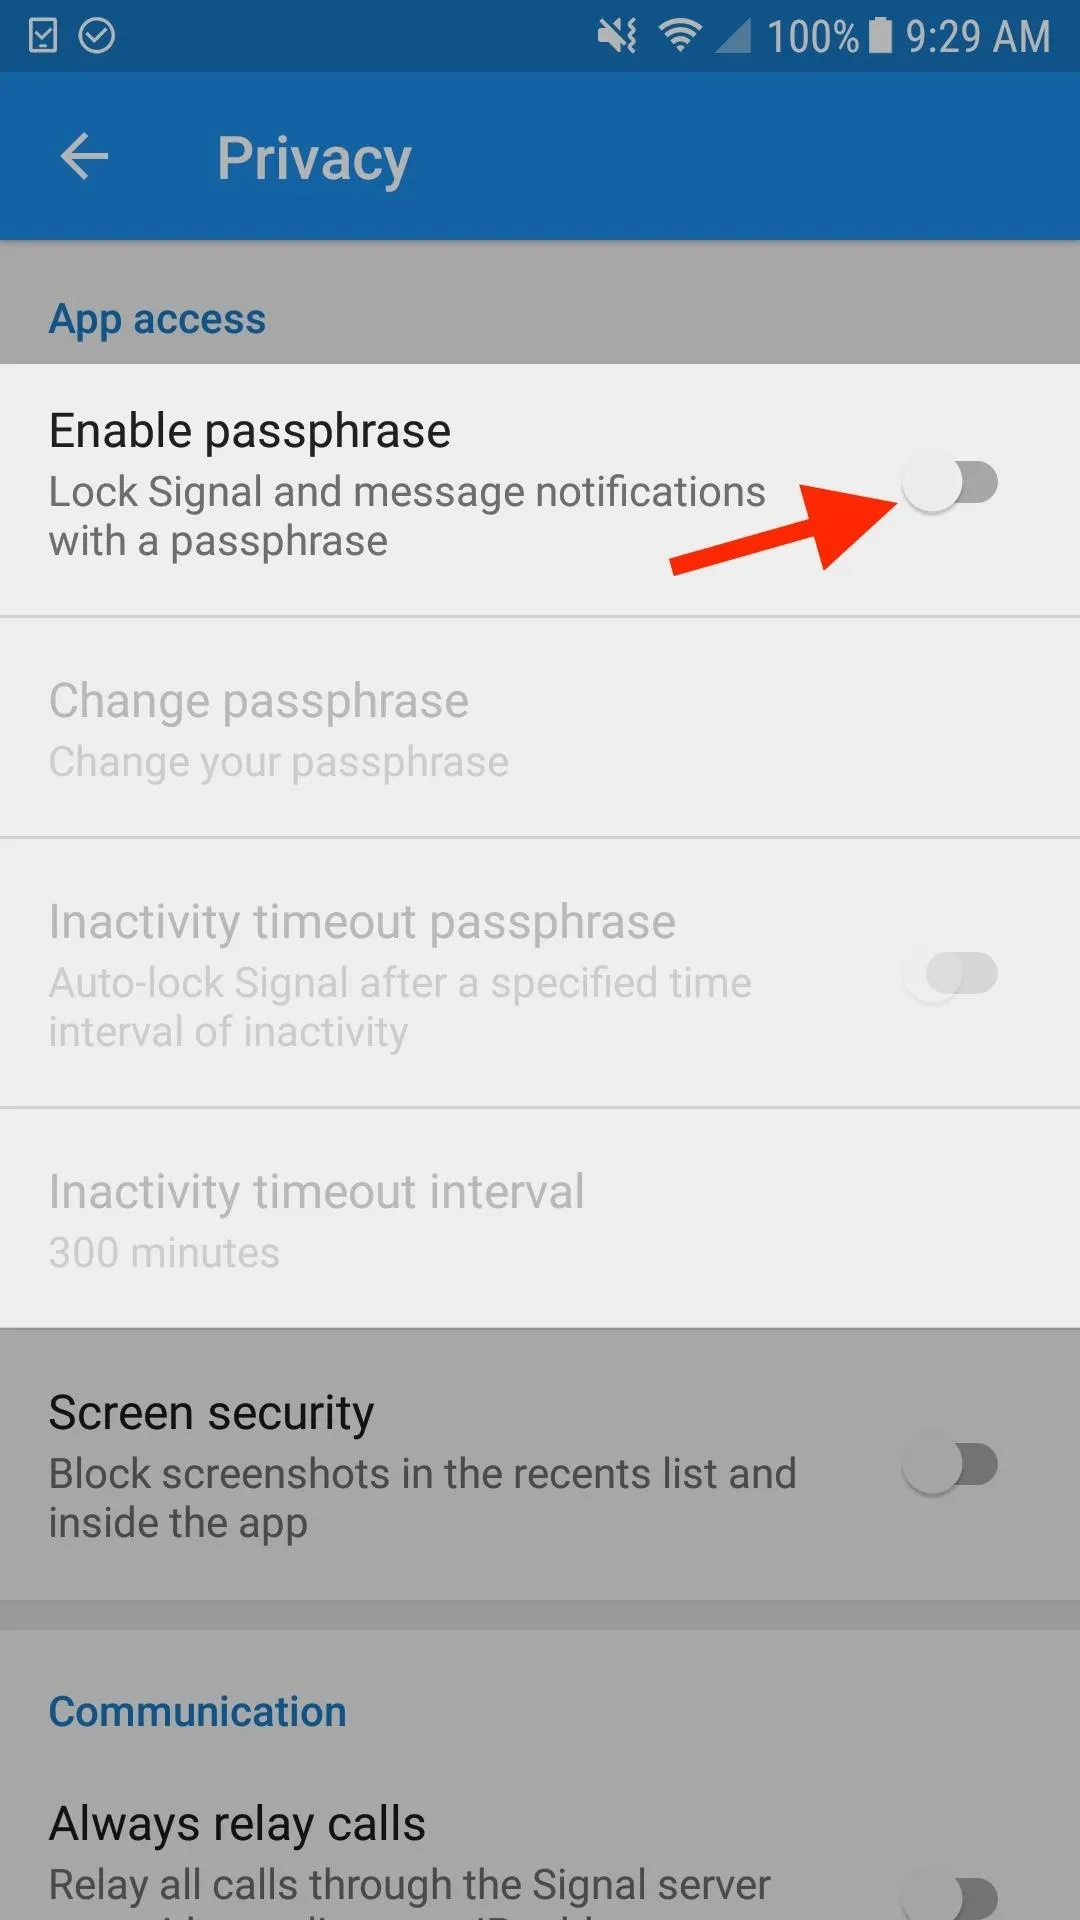


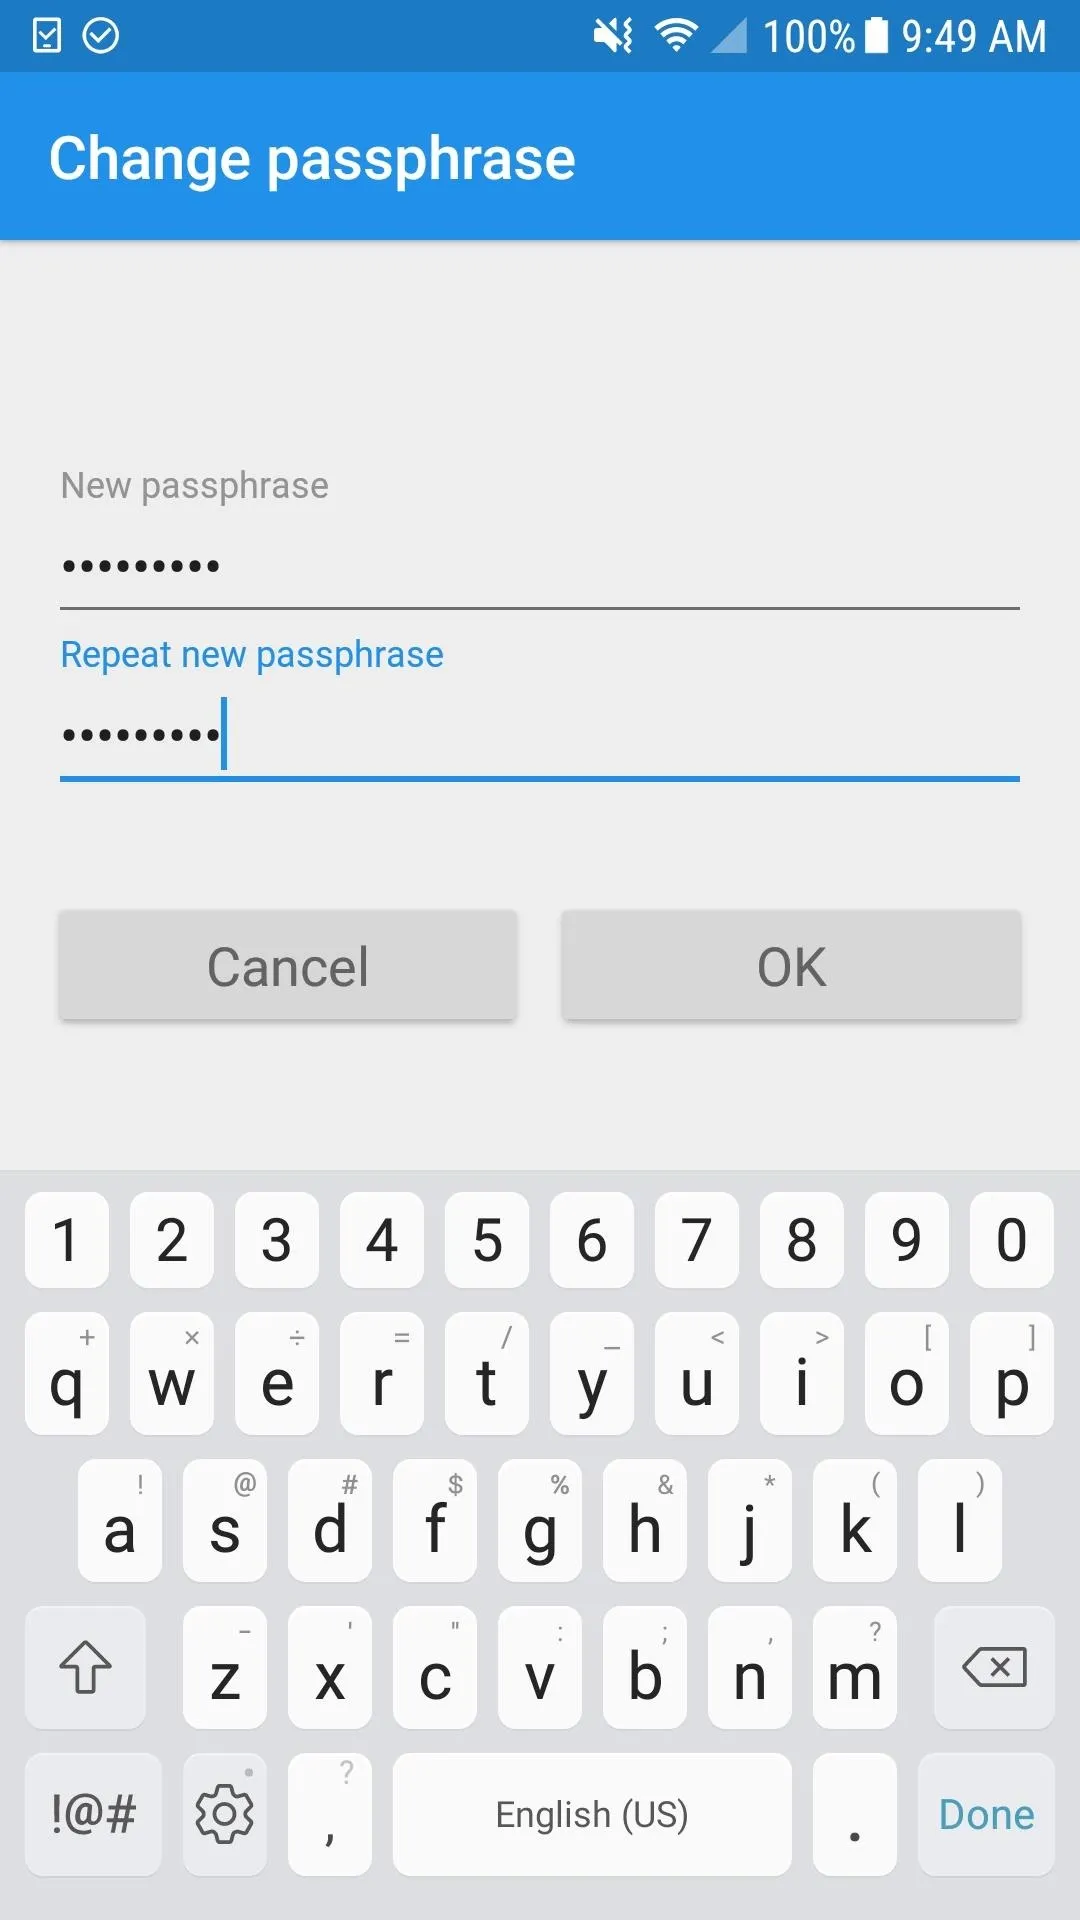
On the Change passphrase screen, input your passphrase twice, then tap "OK" to continue. Your passphrase can be anything you want it to be. It could be a password with all letters, an alphanumeric password, a numeric PIN, etc.
But you're best going with a strong passphrase that uses a combination of uppercase and lowercase letters, numbers, and symbols that's long and impossible to crack. Otherwise, what's the point, right? If you need help, you can use Diceware to help you make a good passphrase.


Step 2: Set a Timeout for Better Security
By default, your passphrase is cached in memory for as long as Signal is running. This means that as long as Signal is running in the background, that you'll be able to open the app back up without having to input your passphrase at all. Just clearing Signal from your Recents view list is not enough to force the login screen.
Of course, this may not be such a great idea for those of you looking for extra security — especially if you haven't disabled notifications for Signal. As long as it's still running, the messages in notifications will still be seen when they pop up. Signal has to actually be locked for notifications to also show up as locked.
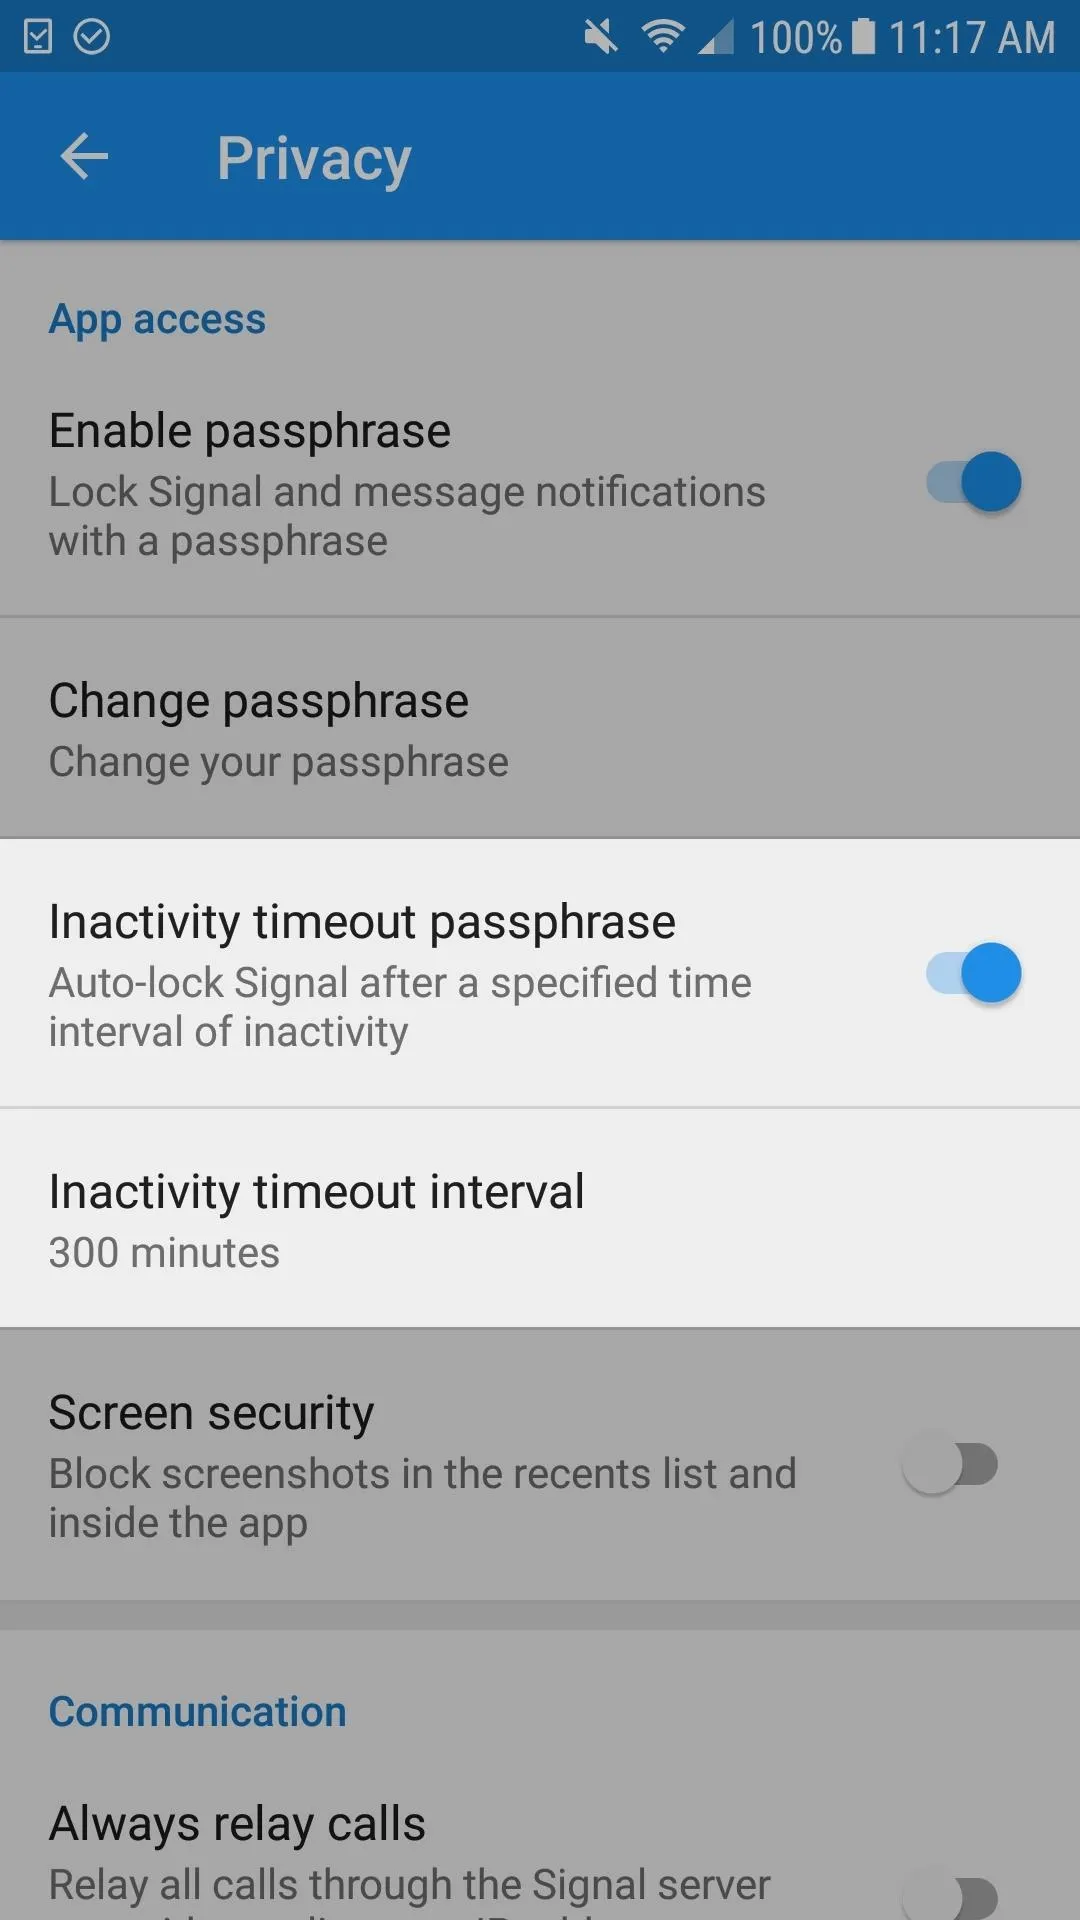
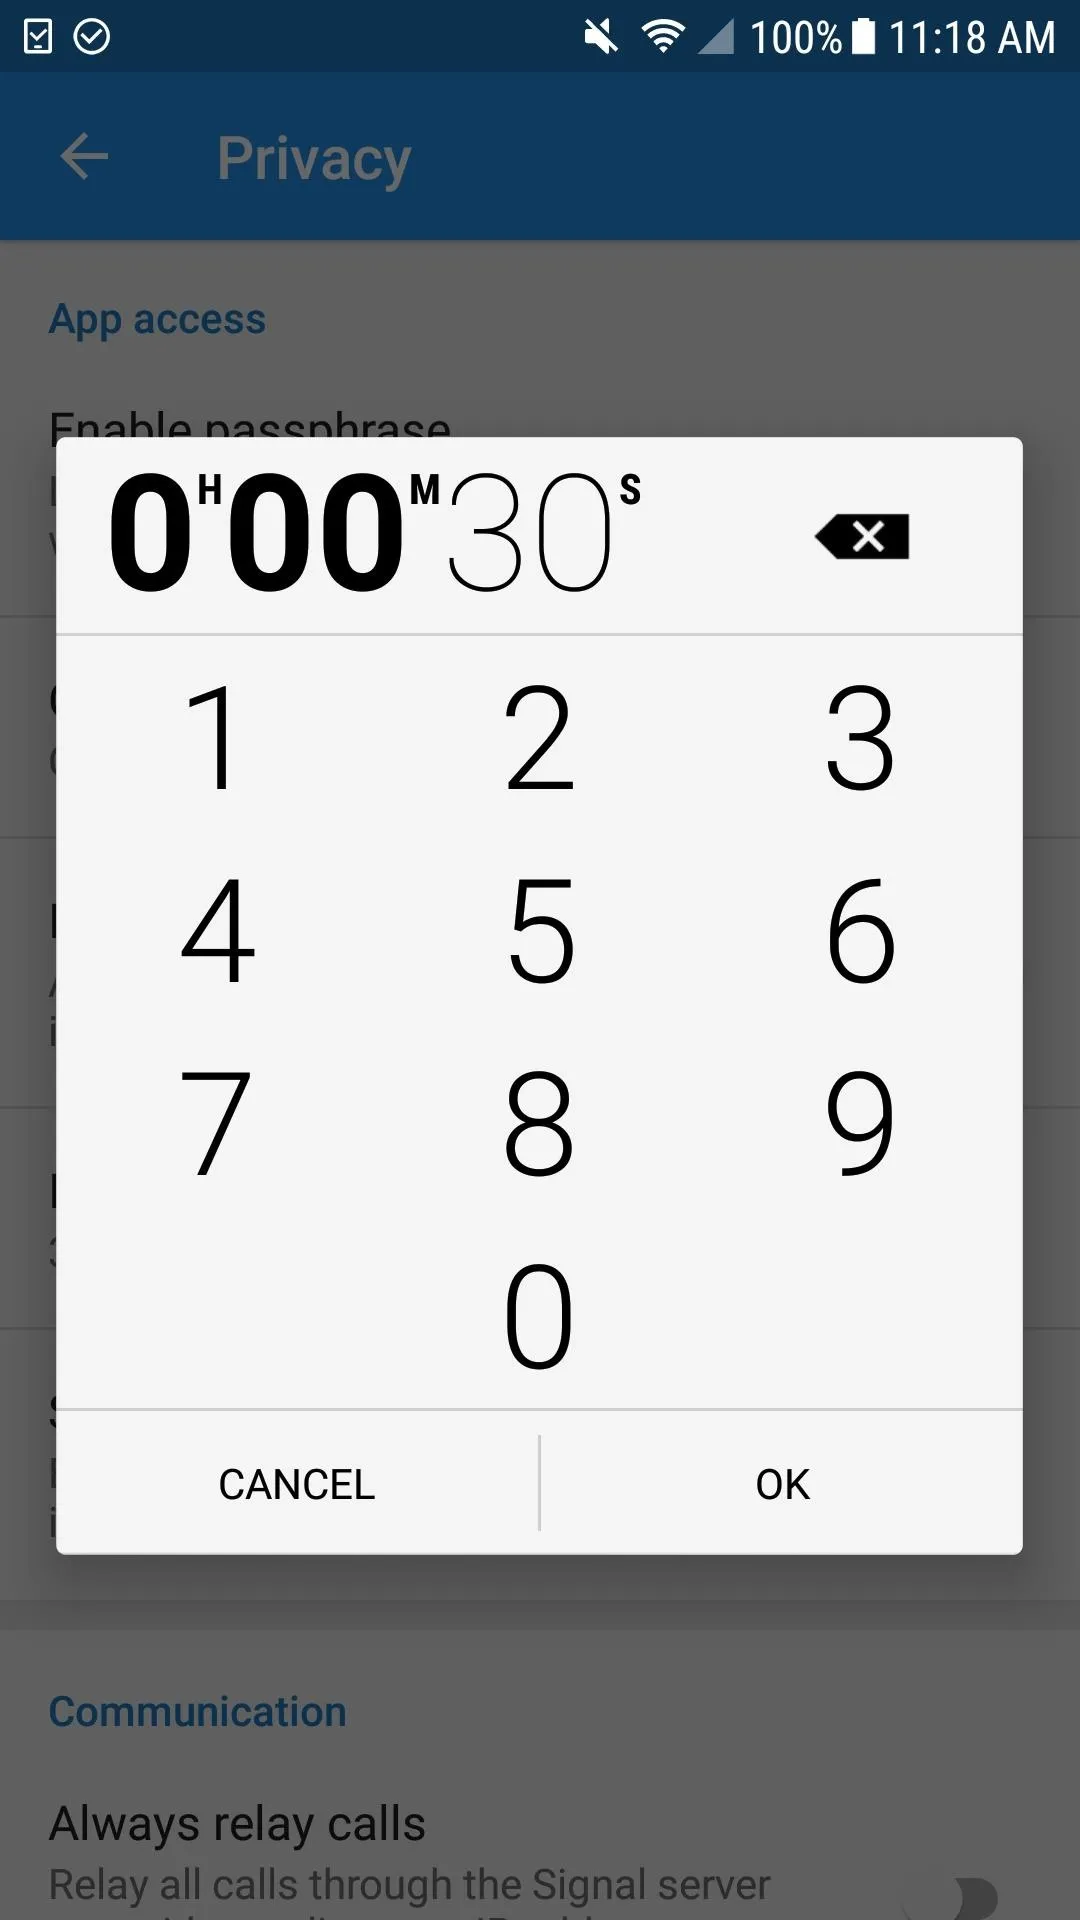
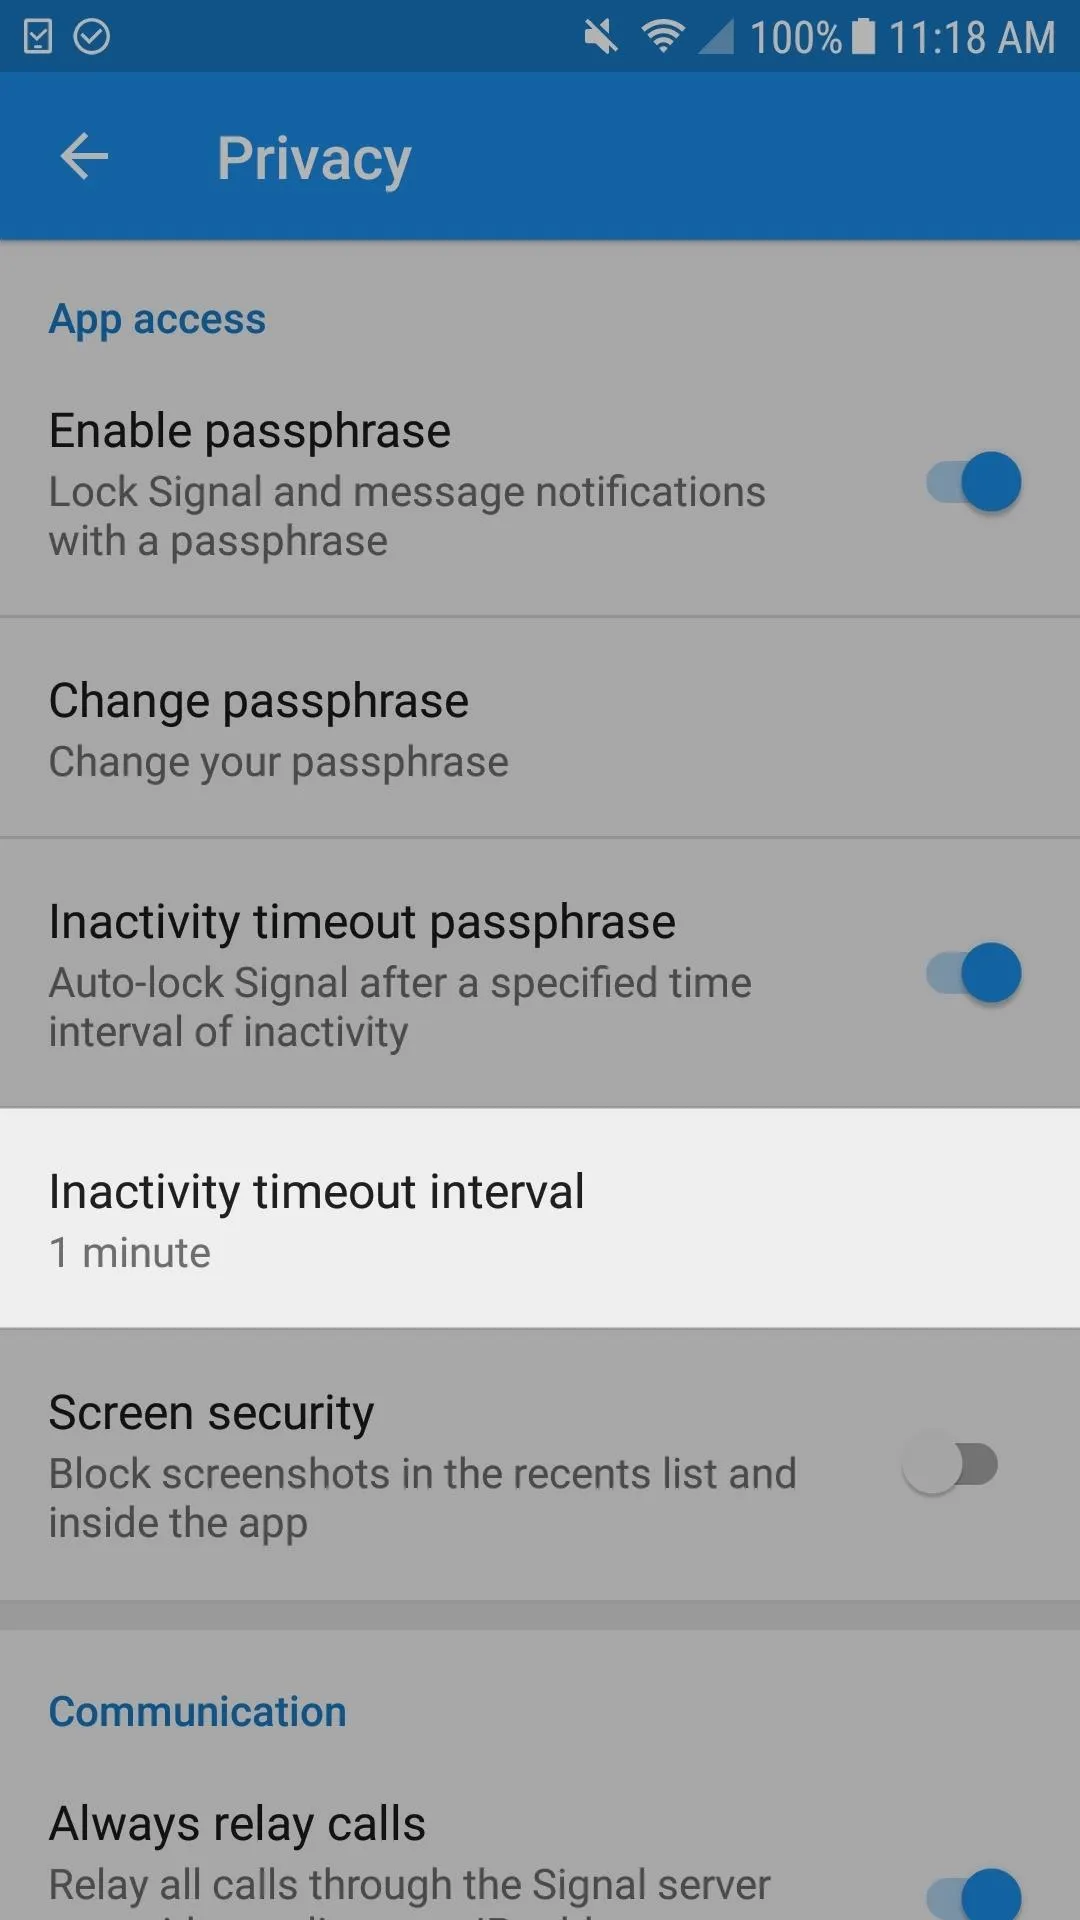
To alleviate these issues, you'll need to set a timeout interval, so head back to the "Privacy" settings in Signal, then toggle on "Inactivity timeout passphrase." Next, tap on the "Inactivity timeout interval" — this is where you'll choose the amount of time you'd like Signal to auto-lock after no activity. One minute is the minimum amount of time you can select, so I suggest going with that for maximum security.


Step 3: Unlock Signal & View Conversations
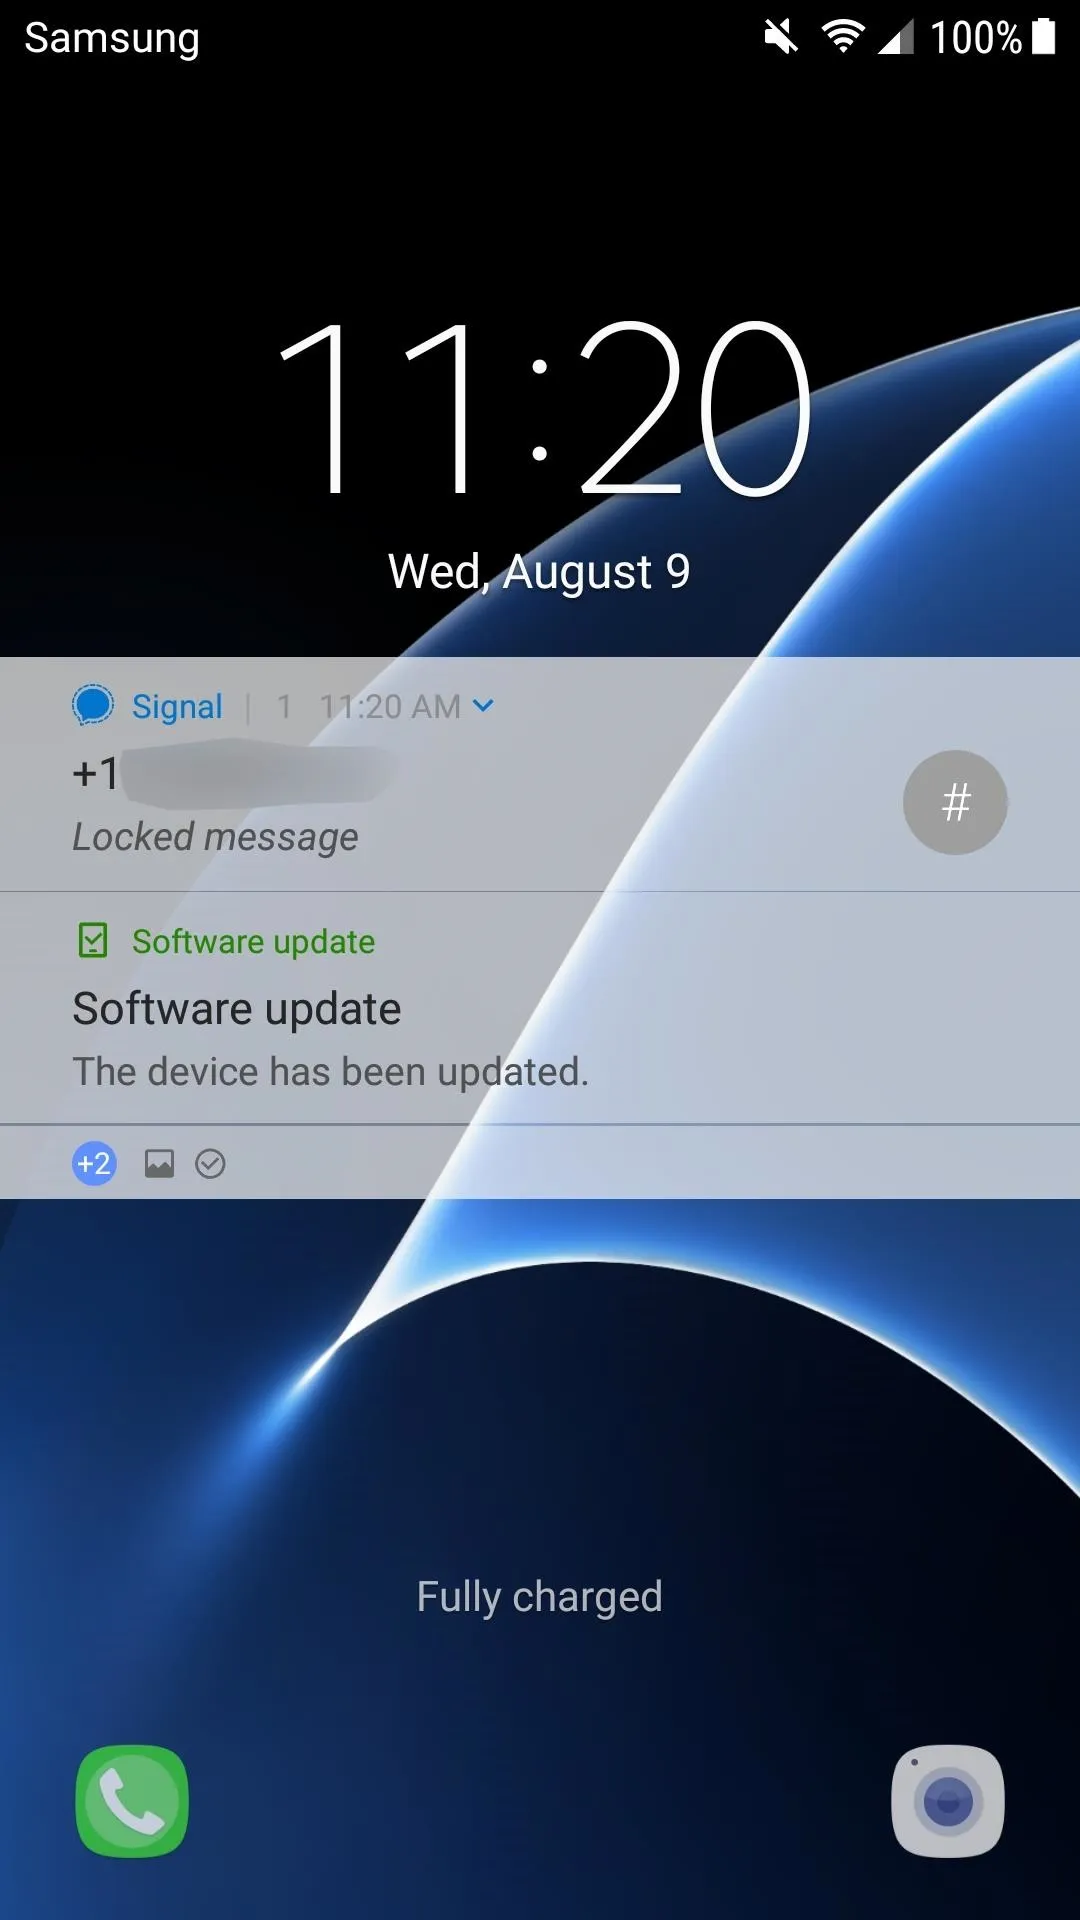
With Signal Private Messenger now set to auto-lock after a small period of time, you should be feeling better. When you get a new message, the notification preview will be disabled; It will still show the contact information, but not the message itself.
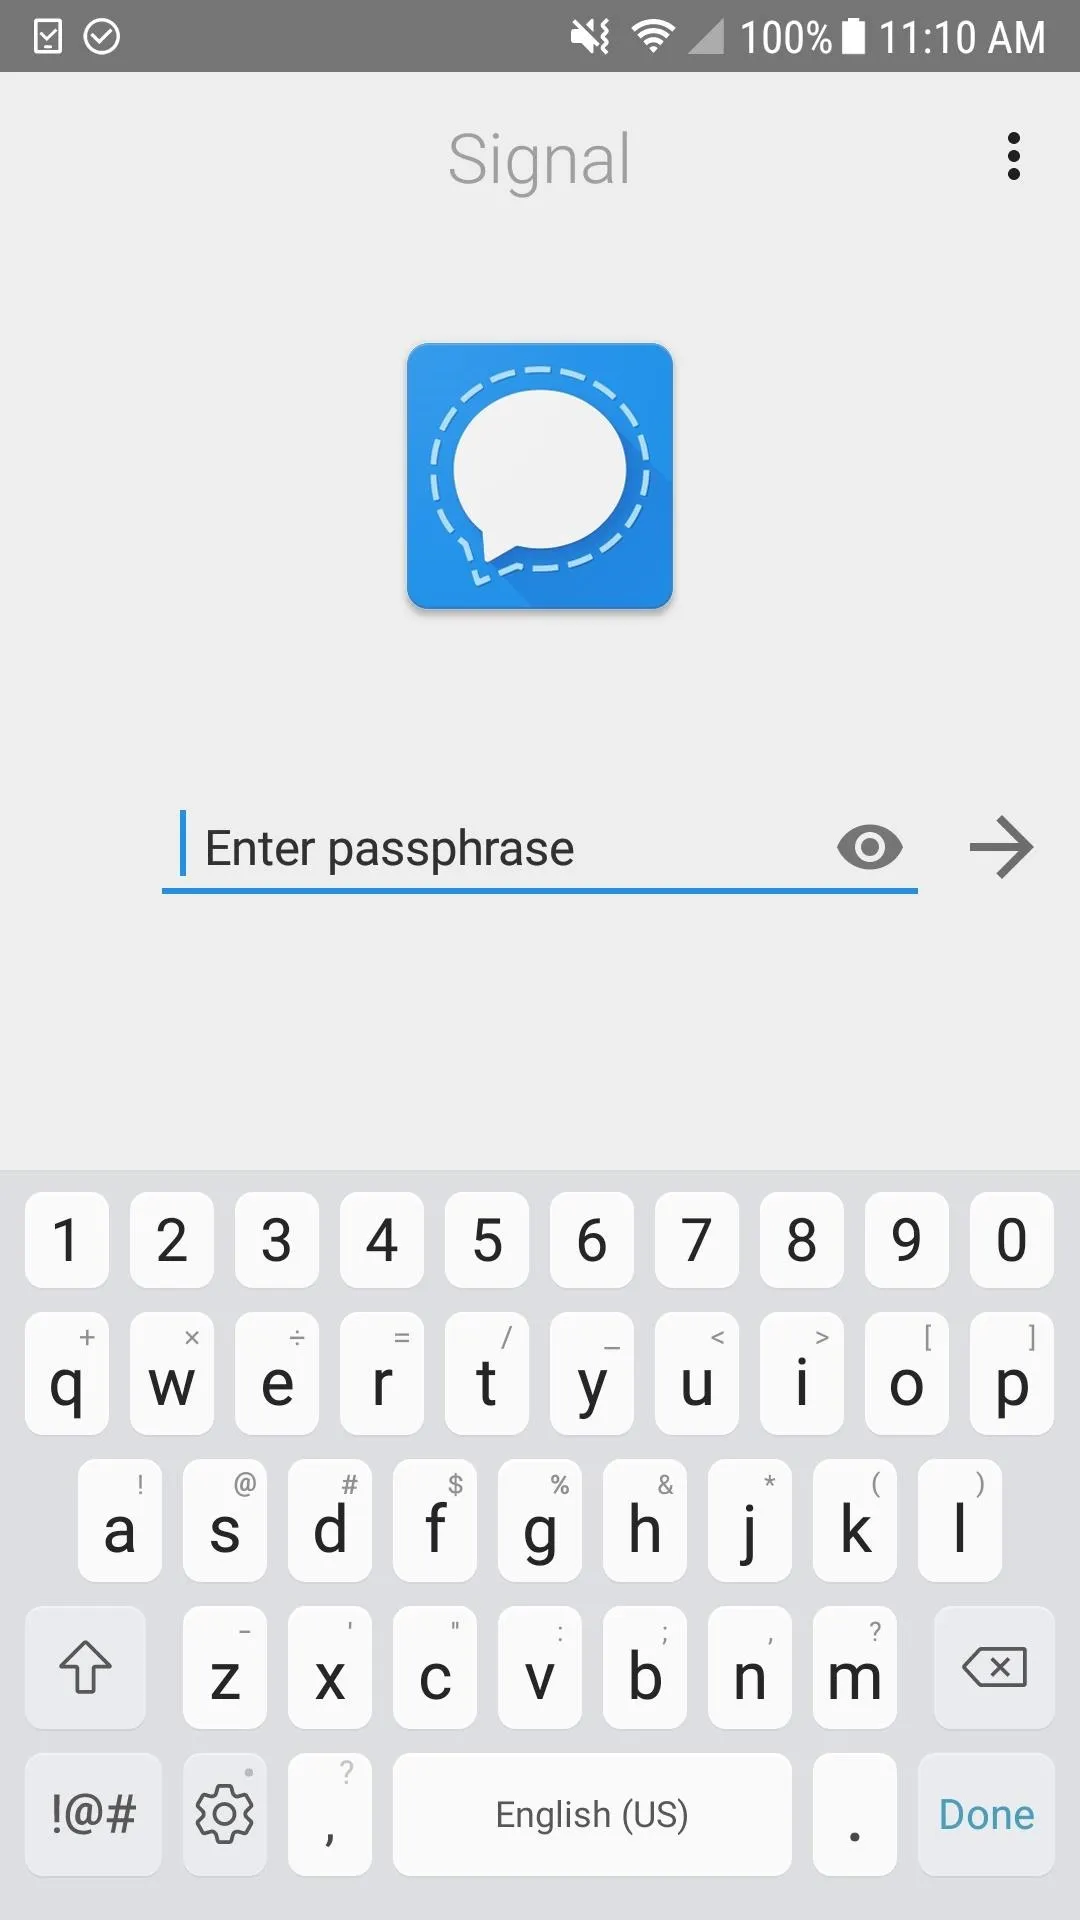
And when it comes time to view your messages again, just open up Signal and input your passphrase. By default, the characters you enter will be hidden from view, but you can tap on the eyeball to see them if you need to.


Just a few quick warnings before you head off: First, whatever passphrase you chose cannot be recovered if lost. So make sure you know you can remember it, or add it to your secure password manager, at least. And second, if you toggle "Enable passphrase" off for whatever reason, when you re-enable it you'll have to set your passphrase again. It could be the same thing as before, it just won't remember you want to use that again; It will remember your timeout interval, though.
- Follow Gadget Hacks on Facebook, Twitter, Google+, YouTube, and Instagram
- Follow WonderHowTo on Facebook, Twitter, Pinterest, and Google+
Cover photo and screenshots by Justin Meyers/Gadget Hacks


Comments
No Comments Exist
Be the first, drop a comment!